Audizine - An Automotive Enthusiast Community

Page 3 of 3 FirstFirst 123
Results 81 to 105 of 105
  1. #81
    Senior Member Three Rings MongoMcG's Avatar
    Join Date
    Apr 15 2022
    AZ Member #
    691122
    My Garage
    B8 A4, C2 Corvette, Austin-Healey 3000 BJ8, SN95 Mustang, 36 Ford hot rod truck, A4 B9 S-line, A3 8V
    Location
    Michigan

    Phase II - The Resurrection

    Guest-only advertisement. Register or Log In now!
    Phase II - The Resurrection

    We are back. It's been a more than a year of indecision about building up this car. I parked it, disheartened, after hearing what I thought were valves smacking pistons from a spun bearing. It wasn't.
    Whatever. Silly me and all that. The boroscope revealed good news - no evidence of valve/piston impact. But it also showed what a bad oil burner it was as well as some slight cylinder scoring that might be from chunks of carbon build-up falling from the exaust valves. Yep. Blame the engine flush.


    These were screened from the drained oil.


    We are going to finish this build to end up with a decent but heavy autocross/track-day driver that can also handle a few short hops for Chili-Cheese Fritos and a some round trips to the cabin 'up-north'. The car will have quite a head start to a big turbo upgrade, too, needing only fueling upgrades, should one feel the need. One should, but not right now.

    First things first - I needed to get back my my notebook, which is this thread on Audizine. I use it for my own benefit, but if you dig it or find something useul then I appreciate your time here.

    Now, gotta pull the motor and tear it down for the machinist. I'll add links here to any write-ups of these items I add, so this post will be an index for Phase II - The Resurrection.

    New Forged Internals: (may change)
    • IE Forged Connecting Rods - 144x22
    • Mahle Pistons - 22mm wrist pin
    • Mahle Rod Bearings
    • ARP Main Studs
    • 034 Rear Main Seal

    Machinist will prep the block and build the short block. We'll see if the cylinders need boring and if the crank needs polishing/new bearings. Hope for the best, prepare for the worst.

    Valvetrain Upgrades: (edited to reflect product changes)
    • Ferrea intake and exhaust valves - not oversized, and I'll trust the machininst on angles and back cut.
    • IE Valve Guide Bushings
    • IE Valve Seals
    • IE Performance Valve Springs and Titanium Retainers
    • New Audi Genuine rocker arms
    • ARP Head Studs

    Machinist will clean the head, prep valve seats, press in new valve guide bushings & hone to tolerance, assemble the head (minus rocker arms) and finish the short block. This should push us comfortably to 7,500 rpm's or more.

    Clutch and Shifter Upgrades
    - Ringer Racing Clutch Kit
    • Clutch: Stage 5 Cerametallic
    • Flywheel: Clutch Masters SMFW, Billet Steel with Billet Steel Insert
    • ARP Flywheel bolts
    • SS Clutch Line

    - JXB Performance Might-as-well-be-gated Shifter Kit
    • Shifter Mounting Plate
    • Shifter Reinforcement Kit
    • Short Shift Clamp

    Drivetrain Mount Upgrades:
    • 034 Motorsports Track/Street Density Engine Mounts
    • 034 Street Density Transmission Mount
    • CTS Transmission Mount Insert (previously installed)
    • JXB Performance Driveshaft Center Support Carrier
    • 034 Rear Differential Mount (previously installed)
    • 034 Rear Differential Carrier Mount Insert Kit (previously installed)

    Suspension Upgrades:
    I'm keeping the original Audi Factory Sport Package front sway bar (26.5mm, 8K0411309L), factory sport springs (8K0411105DS), factory struts (8T0413031AE) and shocks (8T0513035M). note: OE Strut=Sachs 313 364 and OE Shock=Sacks 313 366. The Sport Package spring provides a 20mm lower stance than standard springs, and they still impress me. The Sacks sport struts and shocks will do until I figure out what the rest of these upgrades do to the handling.
    • 034 Rear Sway Bar
    • 034 Dynamic+ Adjustable Rear Sway Bar End Link Kit
    • 034 Rear Subframe Mount Insert Kit
    • 034 Dynamic+ Adjustable Front Sway Bar End Link Kit
    • 034 Density Strut Mounts
    • 034 HD Tie Rod Kit
    • 034 Density Line Control Arm Kit

    I stuck with one brand hoping their engineers try to get the stuff to play nicely together, and I'm not smart enough or wealthy enough to r&d a hodge podge of parts. I'd like to stay away from adjusting the suspension because it will make me crazy, so I limited adjustabilty to just the sway bar end links, and those are limited to mild or stiff. My mind can cipher that much.

    So here we go, once more unto the breach, dear friends, once more.
    Last edited by MongoMcG; 04-12-2024 at 10:24 AM.
    “The Force is strong with this one.”
    My K04X build thread

  2. #82
    Veteran Member Four Rings 19birel's Avatar
    Join Date
    May 10 2015
    AZ Member #
    332119
    My Garage
    '13 A4 Prem+, '00 VW Golf, '21 VW GTI
    Location
    Pittsburgh PA

    Love this build! Can't wait to see this next phase take shape

    A couple notes with regards to the suspension setup. I like your philosophy of not adding adjustability for the sake of it, I have taken that approach as well on my street/track car. However, there's a couple things I would seriously consider as they could really prove beneficial on track.

    -Adjustable rear toe arms: These cars run a couple degrees of toe-in from factory, running closer or at 0 dials out some understeer by allowing the rear of the car to rotate more

    -Adjustable front upper control arms: This will allow you to add some negative camber which will help with tyre wear and increase grip mid-corner.

    Tell your alignment shop what camber & toe specs you want and you're set!
    "Emmaline" Monsoon Grey/Titanium Grey 2013 A4 Prem+ 6MT w/Sport Pkg BUILD THREAD
    S-Line converted | A7 356mm BBK | OEM 19x9" A8 wheels | Spec Stage 3+ Clutch | ECS LWFW | IE 3" downpipe | CTS catback | IEStage2+JB4 Stack Tuned | Meth Injection and more...
    Previous Audi: "Adeline" 1999.5 B5 A4 1.8TQMS

  3. #83
    Senior Member Three Rings MongoMcG's Avatar
    Join Date
    Apr 15 2022
    AZ Member #
    691122
    My Garage
    B8 A4, C2 Corvette, Austin-Healey 3000 BJ8, SN95 Mustang, 36 Ford hot rod truck, A4 B9 S-line, A3 8V
    Location
    Michigan

    Thanks for reading. Yeah, adjustable uppers would seem to be in order, but I look at them the same way I look at television these days - I don't really care what is on, I just want to see what else is on. My wife hides the remote. Reducing adjustability also removes the excuse that my lap times were lousy because "the car just wasn't set up right today."

    However, the adjustable rear toe links did catch my eye last week. When I decide on shocks and struts we will add the rear toe links. By then I'll might find enough reasons to be hankerin' for the adjustable upper arms, too. I'll just need my wife to hide the keys when I'm itchin' to see "what else" they can do.
    “The Force is strong with this one.”
    My K04X build thread

  4. #84
    Senior Member Three Rings MongoMcG's Avatar
    Join Date
    Apr 15 2022
    AZ Member #
    691122
    My Garage
    B8 A4, C2 Corvette, Austin-Healey 3000 BJ8, SN95 Mustang, 36 Ford hot rod truck, A4 B9 S-line, A3 8V
    Location
    Michigan

    Boroscope before engine tear down:
    “The Force is strong with this one.”
    My K04X build thread

  5. #85
    Veteran Member Three Rings SNice's Avatar
    Join Date
    Aug 06 2019
    AZ Member #
    512227
    Location
    Philadelphia

    Happy to hear you are back at it!!!! I was getting worried!

    Love the upgraded parts list -
    I used a lot of the same when I went through this with mine! So far so good! (Fingers crossed; knock on wood).

    Looking forward to your progress!!!


    Sent from my iPhone using Audizine Forum
    2014 A4 B8.5 - AUDI _ EFR 6758 / WPT Stg. 3 Flex-Fuel TUNE / WM Injection / Custom HFC / JHM D-Pipe / AWE FMIC & EXHAUST / APR INTAKE / KW V3
    2002 SV650 - SUZUKI
    1989 nt650 HAWK GT - HONDA
    1972/4 r5/rd350 Hybrid (WIP) - YAMAHA
    1971 r5 350 (basket case) - YAMAHA

  6. #86
    Senior Member Three Rings MongoMcG's Avatar
    Join Date
    Apr 15 2022
    AZ Member #
    691122
    My Garage
    B8 A4, C2 Corvette, Austin-Healey 3000 BJ8, SN95 Mustang, 36 Ford hot rod truck, A4 B9 S-line, A3 8V
    Location
    Michigan

    STOP!

    I suddenly became obsessed with stopping this car. It's not even on wheels and is just beginning an uphill climb to resurrection, and all I can think about is stopping. Yeah, brakes...big brakes. I had to convince myself that Big Brake Kits are not in the budget, so I started a little digging into BBKs. I was right - out of the budget. But then I ran into Nano999's Macan caliper swap thread which gave me a twinkie of hope. Front calipers from a 2015 to 2018 (maybe later) Porsche Macan, Base, 2.0L (must be for the Base model, apparently), are Brembo 4 pots, they are already black, and they are still available new and significantly cheaper than Q5 calipers, which is another popular big brake upgrade option for the B8. Swap in a pair of larger 345mm x 30mm front rotors and good-to-go, right?

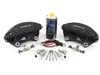
    Not so fast. Nano999 states the up-front Macan caliper upgrade really only came to life when paired with S4 calipers swapped into the rears. Well, that ain't cheap. I was about halfway through the replies and just about had myself talked out of it. Then I saw these pictures from classicrl45 pop up in the thread:


    Yes, please.

    I think the style points just opened up the budget a little, and I blame classicrl45. Swapping the rear brakes also to Macan calipers and larger 330x22mm rear rotors just makes this a complete and smartly balanced upgrade. I surprisingly do not mind, at all, the Porsche logo on the calipers because it appears at all four corners. And the hint of the red brake pad peeking out from the rear caliper? Oof.

    I thought to myself, "Self, you can figure this out; it can't be hard; and you can make it affordable." One of those three thoughts was correct (maybe). Which led to the post you are reading now. This is not a step-by-step post - it's more of a shopping list.

    I have compiled a parts list, complete with all the bolts, screws, lubes, pads, clips, ss lines, dust shields and more, which are needed (some optional) to upgrade all four corners of the car with 2015-18 Base Macan Brembo brake components.

    General notes:
    • Any 345x30 (front) and 330x22 (rear) S4 rotors will do, including two piece units.
    • Availability for all parts was quite good at the time of this writing, except for the right rear carrier.
    • There is new stock available for the rear calipers (95B615423G & 95B615424, without carriers) that should fit.
    • You must have the Macan carriers for the calipers to work on the B8 A4.
    The only new carriers I found are silver, left side only, and they cost more than the caliper. This makes a used right rear carrier a real treasure hunt. Same for a used right rear caliper because folks are buying them for the carrier. Luckily, there are junkyards and a couple of decent used marketplaces - Wolf, Ebay, etc.

    I got these on Ebay (they are pulls from the same vehicle - a 2018 Porsche Macan Base 2.0L with 38,000 miles.)


    The rest of the parts are a combination of B8 A4, S4, Macan and aftermarket parts (indicated). Any "Kit" in the list will also be itemized. It appears this is a bolt-on upgrade, and I think my list is comprehensive, but I won't be able to verify until I install the brakes in a couple of months. All bolts are TTY and should be replaced. I will also list as 'optional' those parts that are less than essential to putting these laces on your shoes. About $3,000 total for the upgrade. Variables: there are cheaper as well as more expensive rotors, reducing cost by $250, or increasing cost by as much as $1,500, or more. There are also cheaper, non-performance brake pads - save $150. Skipping the dust shields, air ducts, stainless steel brake lines and the bleeder tool would save about $400.

    My knowledge of this upgrade is limited to what I learned from the group in Nano999's brake upgrade thread and what is laid out here. I'm putting this list here mostly for my own safekeeping. I don't have any answers, so please don't ask here. Nano999's thread and others which are dedicated to this topic are the place to ask the group for more info.

    Calipers, Brake Lines, Bolts, Misc. Hardware

    FRONT

    - Front Big Brake Kit - Stage 2 - No Pads/Rotors - ECS ES#3677993 (S4)
    • Front Brake Caliper Left - Porsche Genuine 95B615123F (Macan)
    • Front Brake Caliper Right - Porsche Genuine 95B615124F (Macan)
    • x4 Caliper Bolt - Audi Genuine N91147601 - Secures the caliper/carrier to the spindle. M14x1.5x48 (B8)
    • Front Exact-Fit Stainless Steel Brake Lines - ECS ES#3450988 (B8) (optional)
    • TYP 200 Brake Fluid - 1 Liter - TYPE200 (use any approved fluid, but this one is in the kit) (B8)
    - x2 Stainless Steel Brake Rotor Set Screw - ECS ES#257461 - Need these 2 plus the two in the rear pad and rotor installation kit (below) for a total of four (B8)

    REAR

    - OEM 2015-2018 Porsche Macan Left Rear Caliper ABS - Porsche Genuine 95B615405 (used) (Macan)
    - OEM 2015-2018 Porsche Macan Right Rear Caliper ABS - Porche Genuine 95B615406 (used) (Macan)
    - x4 Pad Retaining Spring - Porsche Genuine 3D0615231 (or Audi, same number)
    - Rear Exact-Fit Stainless Steel Brake Lines - ECS ES#3450989 (optional) (B8)


    - Rear Pad And Rotor Installation Kit - ECS ES#2594250 (B8)
    • x2 Self Locking Bolt - Audi Genuine N91041702 - Secures the rear caliper carrier to the spindle - upper position M12x1.5x38 (B8)
    • x2 Self Locking Bolt - Audi Genuine N91126801 - Secures the rear caliper carrier to the spindle - lower position - M12x1.5x62 60mm measured from under the washer (B8)
    • x2 Rear Guide Pin Boot Kit - Audi Genuine 8K0698470A, or TRW 8K0698470A (B8, or aftermarket)
    • x2 Syl-Glide Silicone Brake Lubricant Compound - 4 Gram Packet - American Greaase Stick BK-1 (aftermarket)
    • x2 Stainless Steel Brake Rotor Set Screw - ECS ES#257461 - Holds brake rotor to hub when wheel is removed (M6x16) (4 total, see in FRONT section above) (aftermarket)

    FRONT and REAR (optional)

    - x4 Brake Line Retaining Spring - Audi Genuine 4D0611715B - secures brake lines to brake line securing brackets (B8)
    - Anti Seize Compound, 100g, Copper - LiquiMoly 2012 (aftermarket)


    PADS and ROTORS
    Note: The pads listed are for daily driving. I will use a different pad for track days (Ferodos or EBC Blue for the Macan calipers).

    FRONT

    - Front Brake Pad Wear Sensor - Febi Bilstein 8K0615121 Note: Actually I do not know if the pads are set up to accept a wear sensor. If not, I'll use this sensor to make a pad wear sensor bypass. (B8)
    - Front V5 Dimpled & Slotted Brake Rotors - Set (345x30) - ECS ES#4668212 (S4)
    - Redstuff Performance Front Brake Pad Set - EBC DP32070C (Macan)

    REAR

    Rear V5 Drilled & Slotted Brake Rotors - Set (330x22) - ECS ES#4668331 (S4)
    Redstuff Performance Rear Brake Pad Set - EBC DP32082C (Macan)


    Dust Shields, Air Ducts and Miscelaneous (all optional)
    Note: The front dust shields are being swapped for the Porsche dust shields so the air ducts (also Porsche) can function properly to cool the front brakes. The Porsche air ducts clip to the tie rod. Alternatively, there is an air duct kit available for the B8 that clamps onto the control arm (ES#4353029) that are 5X the price of the Porsche version.

    FRONT

    - Cover Plate (Dust shield, left) - Porsche Genuine 95B615311G (Macan)
    - Cover Plate (Dust shield, right) - Porsche Genuine 95B615312G (Macan)
    - x6 Torx Head Bolt - Audi Genuine WHT005227 - Secures the dust shield to the spindle M6x12 (3 per side) (B8)
    - Front Brake Duct (left) - Genuine Porsche 95B615447C (Macan)
    - Front Brake Duct (right) - Genuine Porsche 95B615448C (Macan)
    - x2 Front Brake Duct Clamp - Genuine Porsche 95B699011C (Macan)

    REAR

    - Dust Shield, left - Porsche Genuine 8K0615611A (1/3 the price of Audi Genuine) (Macan or B8)
    - Dust Shield, right - Porsche Genuine 8K0615612A (1/3 the price of Audi Genuine) (Macan or B8)
    - x8 Torx Head Bolt - Audi Genuine WHT005227 - Secures the dust shield to the spindle M6x12 (4 per side) (B8)

    MISCELANEOUS

    - 3-Liter Premium European Brake Bleeder - Schwaben 007237SCH01AKTKT (aftermarket)
    • 3-Liter Premium European Brake Bleeder - Schwaben 007237SCH01A (aftermarket)
    • Billet Aluminum Cap For Schwaben Euro Bleeder - Schwaben 018337SCH01A (aftermarket)
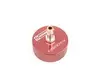
    - Caliper Paint - Black - POR15 POR42606KT (aftermarket)

    That's everything. One of the used calipers is in need of paint touch up. I hope the POR15 black caliper paint kinda' sorta' matches closely. Okay, the brake obsession is over - back to the engine.

    P.S. As far as fitment with various wheel diameters, I didn't worry about it with my original 19" Titanium Sport rotorss (et45). I'm curious about the 18" winter wheels, and whether I'll be able to run 17 (or 18) inch wheels for autocross. That'll need more experimentation and research when the time comes.
    Last edited by MongoMcG; 04-16-2024 at 08:40 PM.
    “The Force is strong with this one.”
    My K04X build thread

  7. #87
    Veteran Member Four Rings 19birel's Avatar
    Join Date
    May 10 2015
    AZ Member #
    332119
    My Garage
    '13 A4 Prem+, '00 VW Golf, '21 VW GTI
    Location
    Pittsburgh PA

    Depending on the offset of the wheels you choose, you might need spacers, but you will be able to fit 17s around those brakes. My winter setup is a set of 17" MSWs and I have a larger 356mm bbk from a C7 A7 up front and whilst it's tight, it fits

    Hearing "it really comes to life with the S4 brakes in the rear" makes the gears in my head turn though. I have a set of C7.5 A7 Comp calipers sitting on a shelf, but it felt sacrilegious to separate the rears (same as S4) and strip the factory Competition red off to match them to my yellow fronts so I let them sit...maybe I ought to just bite the bullet, or sell the set and pickup some cheap, raw C7 rear calipers to paint and install haha
    "Emmaline" Monsoon Grey/Titanium Grey 2013 A4 Prem+ 6MT w/Sport Pkg BUILD THREAD
    S-Line converted | A7 356mm BBK | OEM 19x9" A8 wheels | Spec Stage 3+ Clutch | ECS LWFW | IE 3" downpipe | CTS catback | IEStage2+JB4 Stack Tuned | Meth Injection and more...
    Previous Audi: "Adeline" 1999.5 B5 A4 1.8TQMS

  8. #88
    Senior Member Three Rings MongoMcG's Avatar
    Join Date
    Apr 15 2022
    AZ Member #
    691122
    My Garage
    B8 A4, C2 Corvette, Austin-Healey 3000 BJ8, SN95 Mustang, 36 Ford hot rod truck, A4 B9 S-line, A3 8V
    Location
    Michigan

    Quote Originally Posted by 19birel View Post
    Depending on the offset of the wheels you choose, you might need spacers, but you will be able to fit 17s around those brakes. My winter setup is a set of 17" MSWs and I have a larger 356mm bbk from a C7 A7 up front and whilst it's tight, it fits
    Oh yeah - 17's with nice autocross tires. Dagnabbit! I just spent that budget on brakes. There's always next year, until there isn't.
    “The Force is strong with this one.”
    My K04X build thread

  9. #89
    Senior Member Three Rings MongoMcG's Avatar
    Join Date
    Apr 15 2022
    AZ Member #
    691122
    My Garage
    B8 A4, C2 Corvette, Austin-Healey 3000 BJ8, SN95 Mustang, 36 Ford hot rod truck, A4 B9 S-line, A3 8V
    Location
    Michigan

    Progress report: Trying to keep everything in order, from studying parts diagrams to installation, is a challenge. The parts list is too long and getting longer. The new spreadsheet, designed to simplify things, is so tedious that it makes blood shoot from my eyes. But my bolt count from phase one was 578 bolts ordered, and only 300 bolts used. That got my cheapskate Scotch blood boiling and indicated a change was needed.

    It's smart to have a plan in place, and how detailed that plan needs to be varies by individual. My brain works a little funny as it's taxed with a bit of anxiety and obsessive compulsive disorder, which is odd because I'm disorganized (but I'm perfectly disorganized, I suppose). I'm not complaining - everybody is wired a little differently, and that makes us unique and valuable in our own way; but what the OCD means for my project is that everything needs to be lined up and practically ready to go before the first bolt is turned. My initial process is not unique: mentally simulate the project many times while researching and shopping parts - iterate-factor-repeat. That points me to every bolt that needs to be removed, its torque spec, and whether it is torque-to-yield (TTY), reusable, or needs replacement just for cosmetic reasons. Each iteration may reveal important data points that need to be catalogued. So, the biggest tool I own when it comes to car restoration is not the lift or the rotisserie, it is spreadsheet software, because it helps keep the project within parameters, and it tracks parts and hardware from research through installation. These data points are easy to keep straight in a single-layer repair-and-replace scenario. But a restoration, which is what this project is, combined with an engine and suspension build, is far more complicated and can easily spiral out of control in terms of parts, costs and time. "Winging it" and seeing where it goes does not work for me. But that's me. My process is not better or correct for anyone except me, and I need a spreadsheet.

    But this is where the OCD issue is compounded - if a spreadsheet is needed, then a ridiculous spreadsheet is better, including product pictures, diagrams, links to vendors, products, sales orders, and shipping information. The spreadsheet has become a project of its own - morphing into a sort of algorithmically sortable digital simulation of a car restoration process. It is far, far more work than is reasonable, and a lot of it is still tedious, manual input; but the knowledge I gain while building the spreadsheet translates directly to building the car, and for my brain that's kinda' priceless. Beyond that, the biggest benefit is the time saved finding catalogued information again. For example, when a large shipment of nuts and bolts shows up they can be sorted and bagged into their little sub-projects, including attaching a printed label that itemizes contents and purpose. I know - crazy, right? Some might be able to pick up one of 500 bolts that UPS dropped off three months ago and say what it's for, but not here.

    If you're someone who can wing it on projects larger than a repair and replacement, I envy your fortitude upon entering the breach. I'm diving back into my digital simulation for a few more days.
    “The Force is strong with this one.”
    My K04X build thread

  10. #90
    Senior Member Three Rings MongoMcG's Avatar
    Join Date
    Apr 15 2022
    AZ Member #
    691122
    My Garage
    B8 A4, C2 Corvette, Austin-Healey 3000 BJ8, SN95 Mustang, 36 Ford hot rod truck, A4 B9 S-line, A3 8V
    Location
    Michigan

    So this happened today...

    So this happened today. Having the radiator removed and the AC strapped off to the driver side makes getting this out of the car a piece of cake. I won't do suspension work until this motor goes back in and the car is back to street weight. I will do the clutch, engine mounts, gearbox mount, rear subframe inserts and maybe the brakes while the head and block are being done at the machine shop. I'm also replacing the notchy steering shaft - that'll be a very welcome improvement.


    Next up, serious conversation with machinists and removing the driver side front axle so we can get the fried clutch out of there.


    Last edited by MongoMcG; 05-06-2024 at 05:19 PM.
    “The Force is strong with this one.”
    My K04X build thread

  11. #91
    Veteran Member Four Rings 19birel's Avatar
    Join Date
    May 10 2015
    AZ Member #
    332119
    My Garage
    '13 A4 Prem+, '00 VW Golf, '21 VW GTI
    Location
    Pittsburgh PA

    What clutch are you going with?
    "Emmaline" Monsoon Grey/Titanium Grey 2013 A4 Prem+ 6MT w/Sport Pkg BUILD THREAD
    S-Line converted | A7 356mm BBK | OEM 19x9" A8 wheels | Spec Stage 3+ Clutch | ECS LWFW | IE 3" downpipe | CTS catback | IEStage2+JB4 Stack Tuned | Meth Injection and more...
    Previous Audi: "Adeline" 1999.5 B5 A4 1.8TQMS

  12. #92
    Senior Member Three Rings MongoMcG's Avatar
    Join Date
    Apr 15 2022
    AZ Member #
    691122
    My Garage
    B8 A4, C2 Corvette, Austin-Healey 3000 BJ8, SN95 Mustang, 36 Ford hot rod truck, A4 B9 S-line, A3 8V
    Location
    Michigan

    I chose the Ringer Racing Stage 5 clutch to future-proof. Even if I never do the big turbo upgrade it'll just be a longer lasting clutch, and honestly, the price difference between stage 3 and stage 5 is negligible compared to the competition. I spoke with Mike (from Ringer) on the phone, and his expertise came though loud and clear. The S4 cats dig these clutches, and the Ringer kits are highly regarded on the S4 forums. I expect a slightly stiffer pedal, but even if it is significant I'm used to the big, stiff clutch in the C2 Corvette, so it'll be fine.

    I'm also going with the Clutch Masters single mass billet flywheel with billet insert, adding a stainless clutch line and completely upgrading the shifter with the JBX "Might As Well Be Gated" kit. Shifting is about to get a whole lot more exciting.
    “The Force is strong with this one.”
    My K04X build thread

  13. #93
    Veteran Member Four Rings 19birel's Avatar
    Join Date
    May 10 2015
    AZ Member #
    332119
    My Garage
    '13 A4 Prem+, '00 VW Golf, '21 VW GTI
    Location
    Pittsburgh PA

    Quote Originally Posted by MongoMcG View Post
    I chose the Ringer Racing Stage 5 clutch to future-proof. Even if I never do the big turbo upgrade it'll just be a longer lasting clutch, and honestly, the price difference between stage 3 and stage 5 is negligible compared to the competition. I spoke with Mike (from Ringer) on the phone, and his expertise came though loud and clear. The S4 cats dig these clutches, and the Ringer kits are highly regarded on the S4 forums. I expect a slightly stiffer pedal, but even if it is significant I'm used to the big, stiff clutch in the C2 Corvette, so it'll be fine.

    I'm also going with the Clutch Masters single mass billet flywheel with billet insert, adding a stainless clutch line and completely upgrading the shifter with the JBX "Might As Well Be Gated" kit. Shifting is about to get a whole lot more exciting.
    That'll be a nice setup! How much torque is it rated for? I went with a similar mentality when I did my clutch upgrade, always nice to have some headroom in that department!

    Curious to hear your impressions on the shifter upgrades, clutch line is probably next for me then I want to clean up the 130k miles worth of shifter slop my car has developed
    "Emmaline" Monsoon Grey/Titanium Grey 2013 A4 Prem+ 6MT w/Sport Pkg BUILD THREAD
    S-Line converted | A7 356mm BBK | OEM 19x9" A8 wheels | Spec Stage 3+ Clutch | ECS LWFW | IE 3" downpipe | CTS catback | IEStage2+JB4 Stack Tuned | Meth Injection and more...
    Previous Audi: "Adeline" 1999.5 B5 A4 1.8TQMS

  14. #94
    Senior Member Three Rings MongoMcG's Avatar
    Join Date
    Apr 15 2022
    AZ Member #
    691122
    My Garage
    B8 A4, C2 Corvette, Austin-Healey 3000 BJ8, SN95 Mustang, 36 Ford hot rod truck, A4 B9 S-line, A3 8V
    Location
    Michigan

    Quote Originally Posted by 19birel View Post
    How much torque is it rated for?...clutch line is probably next for me then I want to clean up the 130k miles worth of shifter slop my car has developed
    The JBX Performance "Might As Well Be Gated" shifter kit does exactly what you're looking for in terms of slop. It's not just a short throw shifter kit: it includes a billet shifter bracket that greatly reduces side to side and front to back play in the shifter, an upgraded billet shift-linkage arm to replace the plastic stick from the factory, and an optional short-throw shifter clamp (for 70 bucks it's the most cost effective option to reduce shifter throw, imo.) I'm keeping the stock shifter, but one could install a short throw shifter on top of this kit for even more reduction in shifter throw, as long as it installs to stock mounting points.

    Below are the specs for Stage 3 through 5 Ringer Racing clutch kits. Stage 3+ and Stage 5 have a slightly upgraded pressure plate which will increase pedal stiffness "slightly" (we'll see). And the other difference is the clutch friction surface goes to full cerametallic on both sides for stage 4 and 5. The price difference between Stage 3 and Stage 5 is only $90, (half that for Stage 3+ and Stage 4).

    The B8 2.0 kit comes with a new throwout bearing, (6) bolts to attach the pressure plate to the flywheel and (8) bolts to attach the clutch plate carrier to the crankshaft (over the rear main seal). Oddly, the kit does not include bolts to attach the flywheel to the clutch plate carrier (the bolts we access through the hole in the bottom of the gearbox). Also not included: the pilot bearing, a new clutch fork, nor a new guide sleeve for the throwout bearing. I have not looked to be certain, but I believe th Clutch Masters billet single mass flywheel has the needle bearing installed.


    All in, the JBX kit was $500 and the Ringer Racing clutch kit was $2,500. Add a couple hundred more for bolts, pilot bearing and clutch fork (and possible a new guide sleeve for the throwout bearing).

    Info from ringer-racing.com

    Description:
    This is a Private Label kit built by Clutch Masters exclusively for Ringer Racing

    Torque Rating at the Flywheel:
    • Stage 3 – 510 ft lbs
    • Stage 3+ – 550 ft lbs
    • Stage 4 – 630 ft lbs
    • Stage 5 – 680 ft lbs

    Applications:
    • Audi A4 2.0T (2009-2016)
    • Audi A5 2.0T (2010-2016)

    Kit includes:
    • Ringer Racing Clutch Kit
    • Clutch Masters Flywheel
    • Throw-out Bearing
    • Alignment tool

    Stage 3 through Stage 5 include:
    • Heavy-Duty reinforced pressure plate
    • Hi-Leverage pressure ring design
    • Sprung hub/cushioned Steel backed disc

    Stage 3
    • Heavy-duty street & racing system
    • Ductile Iron Casting
    • Steel backed Organic/Cerametalic Material

    Stage 3+
    • Modified pressure plate for 8% more clamping load
    • Steel backed Organic/Cerametalic Material
    • Slightly stiffer pedal

    Stage 4
    • Heavy-duty street & racing system
    • Full Face Cerametalic Material on both sides

    Stage 5
    • Modified pressure plate for 8% more clamping load
    • Full Face Cerametalic Material on both sides
    • Slightly stiffer pedal

    Optional Stainless clutch line for stock slave

    Flywheel Options:
    • Steel Flywheel = 28 lbs
    • Billet Steel Flywheel with Billet Insert = 25.5 lbs

    Note: Bolt torque specs
    • Flywheel bolts = 55 ft lbs
    • Pressure plate bolts = 25 ft lbs
    • Dab of loctite on all bolts


    *Option to add a Diamond Claw Surface Lock to the flywheel
    Surface locks have successfully eliminated fretting (surface welding) in every application customers have placed them in. With an installed thickness of .010″-.012″ a Diamond Claw Surface Lock will not significantly alter assembly spacing. You’ll give yourself a much better chance of the flywheel not coming loose in the first place, and if for some reason it does, youÂ’ll have an extra layer of very hard steel that can prevent the flywheel from damaging itself. Surface lock goes between the 2 sections of the flywheel on B8 cars.
    Last edited by MongoMcG; 05-07-2024 at 01:48 PM.
    “The Force is strong with this one.”
    My K04X build thread

  15. #95
    Veteran Member Four Rings 19birel's Avatar
    Join Date
    May 10 2015
    AZ Member #
    332119
    My Garage
    '13 A4 Prem+, '00 VW Golf, '21 VW GTI
    Location
    Pittsburgh PA

    680 ft/lbs...blimey! And I thought my 500 ft/lbs Spec Stage 3+ was extreme haha. One thing I recall when I was in the process of clutch replacement was that if you're running a single disc clutch, it's recommended to bypass the clutch switch (for when you start the car) to avoid spinning the thrust bearing. I didn't pursue this myself as I didn't think my clutch was aggressive enough to warrant, but might be something worth looking into for your application.

    The JXB kit looks nice although a little pricey- I currently have the JHMotorsports solid short throw shifter, my next step is likely the ECS shift selector monoball to eliminate the side to side slop, and then the JXB shifter plate (second gear lockout on aggressive downshifts is driving me nuts) in order to stay budget friendly. If I'm not satisfied after that I'll revisit the rest of the JXB catalog; they have really expanded their offerings since I last looked into them.
    "Emmaline" Monsoon Grey/Titanium Grey 2013 A4 Prem+ 6MT w/Sport Pkg BUILD THREAD
    S-Line converted | A7 356mm BBK | OEM 19x9" A8 wheels | Spec Stage 3+ Clutch | ECS LWFW | IE 3" downpipe | CTS catback | IEStage2+JB4 Stack Tuned | Meth Injection and more...
    Previous Audi: "Adeline" 1999.5 B5 A4 1.8TQMS

  16. #96
    Senior Member Three Rings MongoMcG's Avatar
    Join Date
    Apr 15 2022
    AZ Member #
    691122
    My Garage
    B8 A4, C2 Corvette, Austin-Healey 3000 BJ8, SN95 Mustang, 36 Ford hot rod truck, A4 B9 S-line, A3 8V
    Location
    Michigan

    Well, like any good Detroit Red Wings winning streak, it had to end at some point. After 14 years with this car my streak of unstripped bolts has finally come to an end. A too-rusted torx bolt gave way on the oil pan. The thing that bakes my bagels about it is that it was probably pilot error: I didn't realize I grabbed a T27 bit (not a T30) until the damage was done. I'm throwing that little bass turd T27 bit in a different drawer in the toolbox.

    @19birel - the ECS monoball is a good choice. I believe it is the same (or very similar) to the ball socket on the JBX shift linkage arm at half the price (even less when on-sale). It's pre-assembled and the installation looks like a piece of cake. The JBX kit, besides adding the stiffer arm, also removes play (and the plastic bushing) at the other end of the linkage arm with a machined ball socket there, too. Is that worth double the price? I think one would need to drive both to decide which suits them if given the chance, because how a man's stick-shift feels is a very personal matter, after all.

    The stiffer mine is, the happier I am.
    Last edited by MongoMcG; 05-09-2024 at 08:23 AM.
    “The Force is strong with this one.”
    My K04X build thread

  17. #97
    Senior Member Three Rings MongoMcG's Avatar
    Join Date
    Apr 15 2022
    AZ Member #
    691122
    My Garage
    B8 A4, C2 Corvette, Austin-Healey 3000 BJ8, SN95 Mustang, 36 Ford hot rod truck, A4 B9 S-line, A3 8V
    Location
    Michigan

    Removing the turbo oil supply line from the block

    I ran into a couple of issues tearing down the motor for the machinist. A stripped bolt on the oil pan, as mentioned above, was the first stripped bolt on this car in 14 years. Pretty good streak. The other issues were the turbo oil supply line and the crankshaft position sensor were both corroded in place. Rather than prying them out and possibly breaking or distorting the flange that holds them in place, I used a wedge technique to remove them, and that helped keep damage limited to some scarring on the oil line and the platic body on the crank position sensor did break (next post, below).

    This info is from an earlier post in the regular forum (head nod to Snice and Iceman for the help):

    The turbo oil supply line is out. Besides the scarring from getting aggressive with the channel locks (last pic) I was able to keep everything else pretty gentle. Use the channel locks to manhandle a twist on the fitting to get better penetration of the PB Blaster.


    Then tap a putty knife between the boss/flange and the block to open it up a bit:


    Then you can tap in a screwdriver on both sides and alternate a few taps on each side to wedge out the fitting.


    I suppose you could try a rubber pad to prevent this scarring, but I had to really crank on the channel locks to get the fitting to move.I'll probably file away these scars and re-use this line for now.


    I'm not saying it can't be done from below while the motor is still in the car, but the attack angles are slightly different for driving wedges in there.
    Last edited by MongoMcG; 05-11-2024 at 07:59 AM.
    “The Force is strong with this one.”
    My K04X build thread

  18. #98
    Senior Member Three Rings MongoMcG's Avatar
    Join Date
    Apr 15 2022
    AZ Member #
    691122
    My Garage
    B8 A4, C2 Corvette, Austin-Healey 3000 BJ8, SN95 Mustang, 36 Ford hot rod truck, A4 B9 S-line, A3 8V
    Location
    Michigan

    The crankshaft position sensor broke after wedging it out with srewdrivers came up short by about 3-4mm. I could'a shimmed and wedged some more, but got greedy and grabbed the sensor by hand to wiggle it out. The plastic body sheared or snapped off at the shoulder, which is not unheard of, I guess. Why did Audi not make this sensor a threaded device like others?

    Speaking of threads, I spent some time chasing threads on the block, upper oil pan, and the head that I could see while they are all still together. That's a boring job, but it's nice to have fresh holes to work with. Stop it.

    Speaking of boring, I grabbed a couple of picks and went to work removing rust scale, dirt, and loose paint from the block. We'll see what the machined surfaced look like if/after it goes in the hot tank.

    Extracting a stripped oil pan bolt was a near disaster today after the head sheared off. I prayed for a steady hand and got it done without incident.

    A dozen Michigan winters tried to keep the crankshaft position sensor captive. It got free, but at a heavy, heavy price.


    A Tiger game on the radio helps pass the time, usually, but listening to them get lit up in the eighth today didn't help. E-5. Go back to DH, Vierling. You can't handle that corner. Yeah, I screamed that at the radio, too. Didn't help then, either.

    All in all, a very good day in the garage, capped off with a spectacular show of the Northern Lights tonight.
    Last edited by MongoMcG; 05-27-2024 at 10:30 PM.
    “The Force is strong with this one.”
    My K04X build thread

  19. #99
    Senior Member Three Rings MongoMcG's Avatar
    Join Date
    Apr 15 2022
    AZ Member #
    691122
    My Garage
    B8 A4, C2 Corvette, Austin-Healey 3000 BJ8, SN95 Mustang, 36 Ford hot rod truck, A4 B9 S-line, A3 8V
    Location
    Michigan

    The upper and lower oil pan are off, and zero sludge. The gray in the pan is the ceratech oil treatment. The head was supposed to come off today as well, but I don't have the M10 polydrive bit. I ordered it today, but it will not be here until Friday. I guess I'll work on the clutch until then.

    The driver side front axle came out without incident today, and the boots look great. The impact wrench didn't move the axle bolt, but all 165 pounds of me bouncing on the end of a 24" breaker bar did the trick. I should have used my torque multiplier, but forgot it was on the shelf.

    Some cool shots from today...


    This little bugger had me woried. It looked like a needle bearing in the pic, but it was not round, not metallic, and it broke in two easily.


    (oops, this one is rotated 180 degrees)
    Last edited by MongoMcG; 05-12-2024 at 07:53 AM.
    “The Force is strong with this one.”
    My K04X build thread

  20. #100
    Veteran Member Four Rings TWiST's Avatar
    Join Date
    Jun 08 2007
    AZ Member #
    18647
    Location
    ...

    Your thread is a great collection of information and reference. Thanks for sharing it with all of us!

  21. #101
    Senior Member Three Rings MongoMcG's Avatar
    Join Date
    Apr 15 2022
    AZ Member #
    691122
    My Garage
    B8 A4, C2 Corvette, Austin-Healey 3000 BJ8, SN95 Mustang, 36 Ford hot rod truck, A4 B9 S-line, A3 8V
    Location
    Michigan

    Thank you, Twist. We are trying to pay back a little of what we've gained here at Audizine and other forums. e.g. 19Birel's and Allowencer's threads are just two of many excellent resources.
    Edit: Add Snice's thread where he is doing plenty of fun stuff, too.

    The head comes off tonight, so we'll be able to assess if the block needs more than a dip in the hot tank.
    Last edited by MongoMcG; 05-14-2024 at 07:34 AM.
    “The Force is strong with this one.”
    My K04X build thread

  22. #102
    Senior Member Three Rings MongoMcG's Avatar
    Join Date
    Apr 15 2022
    AZ Member #
    691122
    My Garage
    B8 A4, C2 Corvette, Austin-Healey 3000 BJ8, SN95 Mustang, 36 Ford hot rod truck, A4 B9 S-line, A3 8V
    Location
    Michigan

    And they're off!

    The block is down to the crank, pistons and balance shafts. I'll post an update on the head and upper oil pan later. I had to put the balance shaft chain back on so the crank bolt could be used as a counter hold for the dipsy-doo flip-a-roo, reverse-threaded, facing-the-opposite-direction-with-the-counter-hold-that-rotates-in-the-opposite-of-normal pulley bolt. I've wrenched on that bolt three times now, and it still confuses me.

    (don't click on the yellow bar - it will download the file)


    I gotta say, the bores look very good. My boroscope exagerated the scratches in the video. The oily gunk build up on top of the pistons was the worst on #4 (more on that in the head update, later)...(and, yes, I often work in bare feet) .


    I was two-fisted with picks, going to town on the rust scale on the block.


    In some places the hand picks were very effective:
    Before:

    After:


    And in some places they were not so hot:


    Then look what UPS brought me today...

    It's a needle scaler attachment for my air hammer, made by Ingersoll Rand.


    Here's what I got in 30 minutes of gentle (but loud) jack-hammering on one side:


    I wanted to keep the scaling 'gentle', so I ran the tool at only 70 psi with the power dial on the tool cranked all the way up, which helped my 20 gallon, 5 CFM air compressor easily keep up. The tool removed about 90% of paint and rust, and it was fun learning which angles dig most effectively into the Audi block's nooks and crannies. I'll give one more pass under the needles before it goes of to the machine shop.

    Commitments all weekend means I'll get to the intake side on Monday.
    Last edited by MongoMcG; 05-27-2024 at 11:10 PM.
    “The Force is strong with this one.”
    My K04X build thread

  23. #103
    Senior Member Three Rings MongoMcG's Avatar
    Join Date
    Apr 15 2022
    AZ Member #
    691122
    My Garage
    B8 A4, C2 Corvette, Austin-Healey 3000 BJ8, SN95 Mustang, 36 Ford hot rod truck, A4 B9 S-line, A3 8V
    Location
    Michigan

    Prep for the Machinist, Part 1 - Pistons

    Prep for the Machinist, Part 1 - Pistons

    If you're building for power, then tearing down the motor for the machinist is a good idea - not only because it saves a few bucks (IF you could even find a machinist willing to do the teardown), but also because it provides an opportunity to really go over the components and gather data. It's been 40 years since I took a block to the machine shop, and things seem a lot less collaborative. Maybe it's because they don't see a lot of 2.0T's. I suspect the machinist relationship is quite different if one is bringing in one or two motors per year, but the one-off guys get a pretty cold shoulder. A full blown speed shop is an expensive option, but good luck finding one in the Motor City that has any knowledge about hopping up the 2.0T. Sure, they'll bolt together the short block, but they know less about this motor than me, so why would I pay a premium price for that? It's best to dive in and do what I can. But tackling the engineering aspects of lubricating/protecting engine internals while maximizing performance is an exercise in self-learning that has added weeks to the project and some expensive tools to the toolbox. New dial bore gages and mics are coming.

    So let's dive in. Components can tell stories about wear and tear, contaminants, oil consumption, combustion characteristics and more. Once you read the stories about where the motor has been and discovered problem areas that should be addressed during the build, then it is time for a lot of the detail work that helps lubricate and protect during max performance - work that you can do yourself with a die grinder. This includes chamfering the oil drain holes, grinding off casting flash, and easing-over all the sharp edges and hard corners in the block and head. Those edges are unnecessary stress points where cracks can begin. I will post the grindage works later, but an even more important post will follow that one - clean up. The engine prep work for the machinist necessarily includes making metal shavings. Leaving behind just one of those shavings can destroy all of the other work going into the motor; and, regardless of whether components meet the die grinder's fury, everything needs a thorough scrubbing to remove contaminants, metal particulates, and chemical build up. I don't mind putting in the work. The machinist is going to have his own mess to create and clean up, and I don't want him to worry about mine. Give him cleaner stuff, get back cleaner stuff, I hope. Everything gets one final clean-up before assembly, too.

    But let's get back to part 1 - pistons, rods and rod bearings and the stories they tell.

    Tools Required: EP9 external torx socket to remove stock rod bolts, a non-metallic pokey stick to punch the pistons out of the cylinder.
    Note: an 8mm 12 point worked on the rod bolts for a minute, but a rod bolt on #3 complained. I acquired the correct socket before I made a problem.

    Starting at the block, the cylinder walls look perfect, but the new bore gages will tell me more. The engineering team at Integrated Engineering recommends punching out the cylinders to 83 mm in all builds to insure they are straight and round, but if mine are already (still) straight and round, then I'd like to stay at 82.5mm and keep the coated surface on the cylinder walls. The piston crowns are covered in oily, sooty build-up, as are the valves and combustion chambers in the head. That's expected for a car with oil consumption issues, so no news there. Also expected was the level of clogging in the bottom oil ring for all four pistons. All the rings moved freely. Here are some detail shots (I've changed photo servers, so if there is a yellow bar, don't click it - it'll try to download the file):

    Piston #1


    The oil ring is clogged all the way 'round.


    While fiddling with the piston to see how free the rings were, the oil ring popped off of the inner spiral part - same happened on #4.


    PTW contact - 2 and 3 showed a bit more evidence of piston to wall contact. I don't think it is excessive for the high mileage.


    All of the top bearings showed wear. Not unexpected, and these wear patterns are normal. These surfaces face the brunt of combustion which squeezes out the oil (shearing) for a moment. Newer mPAO formulations in engine oil have stronger film barriers and are more resistant to shearing, and, due to the more stable and uniform molecular structure provided by the 'm' in mPAO's, higher viscosities can be run without the power robbing 'traction' of conventional PAO's. I may try an mPAO oil in this build, but they all have high zinc content which potentially harms catalytic converters. The high level zddp additive also precludes these "racing engine" oils from receiving any API certifications, so I'm still undecided.


    The lower rod bearings show no wear. But like the upper rod bearings there were some contaminants that have magically become part of the bearing (the dark spots)


    Rod journals on the crank look pretty good. Nothing to catch a fingernail. If the mains look this good, and if everything measures round and in spec, then I'll probably just run this crank without a polish.


    Piston #2


    The crosshatch on the back of the bearings and the face of the rods and caps are perfect, but there is slight discoloration which I believe is a combination on oil stains and heat induced chemical changes.


    Piston #3


    Pistin #4


    There is a tiny bit of corrosion on the rear main. I've carefully removed the surface rust with a blade, but will hit it with some Mother's metal polish and a light touch.


    And I've made another pass at removing rust from the block with the needle scaler and a spritz of Boeshield T-9...


    My takeaway from the story the pistons told is that nothing in this engine is remarkable or unexpected, so far, but that improved oiling of the rod bearings should be considered due to the higher loads this build will put on those components (also not unexpected). But the story is now ended for these active little plungers. Rest well, little friends. Rest well. All new pistons, rings, wrist pins, rods and bearings will replace these and begin to tell a new story.

    That means green light for the next step, Part 2 of preparing for the machinist, The Crankshaft: main bearings, caps and journals. I want to get the thrust washer axial clearance measurement before I pull the main caps. My old dial indicator doesn't have the resolution for that, so I'm waiting on UPS.
    Last edited by MongoMcG; 06-02-2024 at 11:50 PM.
    “The Force is strong with this one.”
    My K04X build thread

  24. #104
    Active Member One Ring
    Join Date
    Aug 04 2024
    AZ Member #
    993022
    Location
    Londonderry NH

    Amazing work ! Gut - wrenching photos of the trampoline disaster !!!

  25. #105
    Veteran Member Four Rings 19birel's Avatar
    Join Date
    May 10 2015
    AZ Member #
    332119
    My Garage
    '13 A4 Prem+, '00 VW Golf, '21 VW GTI
    Location
    Pittsburgh PA

    Nice to see that there were no surprises on the teardown!
    "Emmaline" Monsoon Grey/Titanium Grey 2013 A4 Prem+ 6MT w/Sport Pkg BUILD THREAD
    S-Line converted | A7 356mm BBK | OEM 19x9" A8 wheels | Spec Stage 3+ Clutch | ECS LWFW | IE 3" downpipe | CTS catback | IEStage2+JB4 Stack Tuned | Meth Injection and more...
    Previous Audi: "Adeline" 1999.5 B5 A4 1.8TQMS

Bookmarks

Posting Permissions

  • You may not post new threads
  • You may not post replies
  • You may not post attachments
  • You may not edit your posts
  •  


    © 2001-2025 Audizine, Audizine.com, and Driverzines.com
    Audizine is an independently owned and operated automotive enthusiast community and news website.
    Audi and the Audi logo(s) are copyright/trademark Audi AG. Audizine is not endorsed by or affiliated with Audi AG.