


Following how to take your gauge cluster out, in the A5 Cluster Swap DIY by Avantagg you get to here:

I am not responsible for any damage you do to your car*
Tips: Give time to let your soldering iron get hot and leave it on.
Use the brass brush to wipe solder off your iron after each attempt. This will make life easier and keep your iron clean. (You brush it off while your iron is on and got)
Here are the things I needed:
Rosin core solder
Fine tip soldering iron
Brass brush
T10
T8
6 LED PLCC-2s (get more in case)

First, take out the screws in the back. You will need a T10 and a T8 for this. I didn't have a T8 so I went down to orielly and they had a set for $15 that included that.

There are 4 tab to lift up to separate the black backing from the circuit board

You will be here (your DIS screen just unplugs)

There are 4 white tabs to press back to separate the white plastic from the circuit board

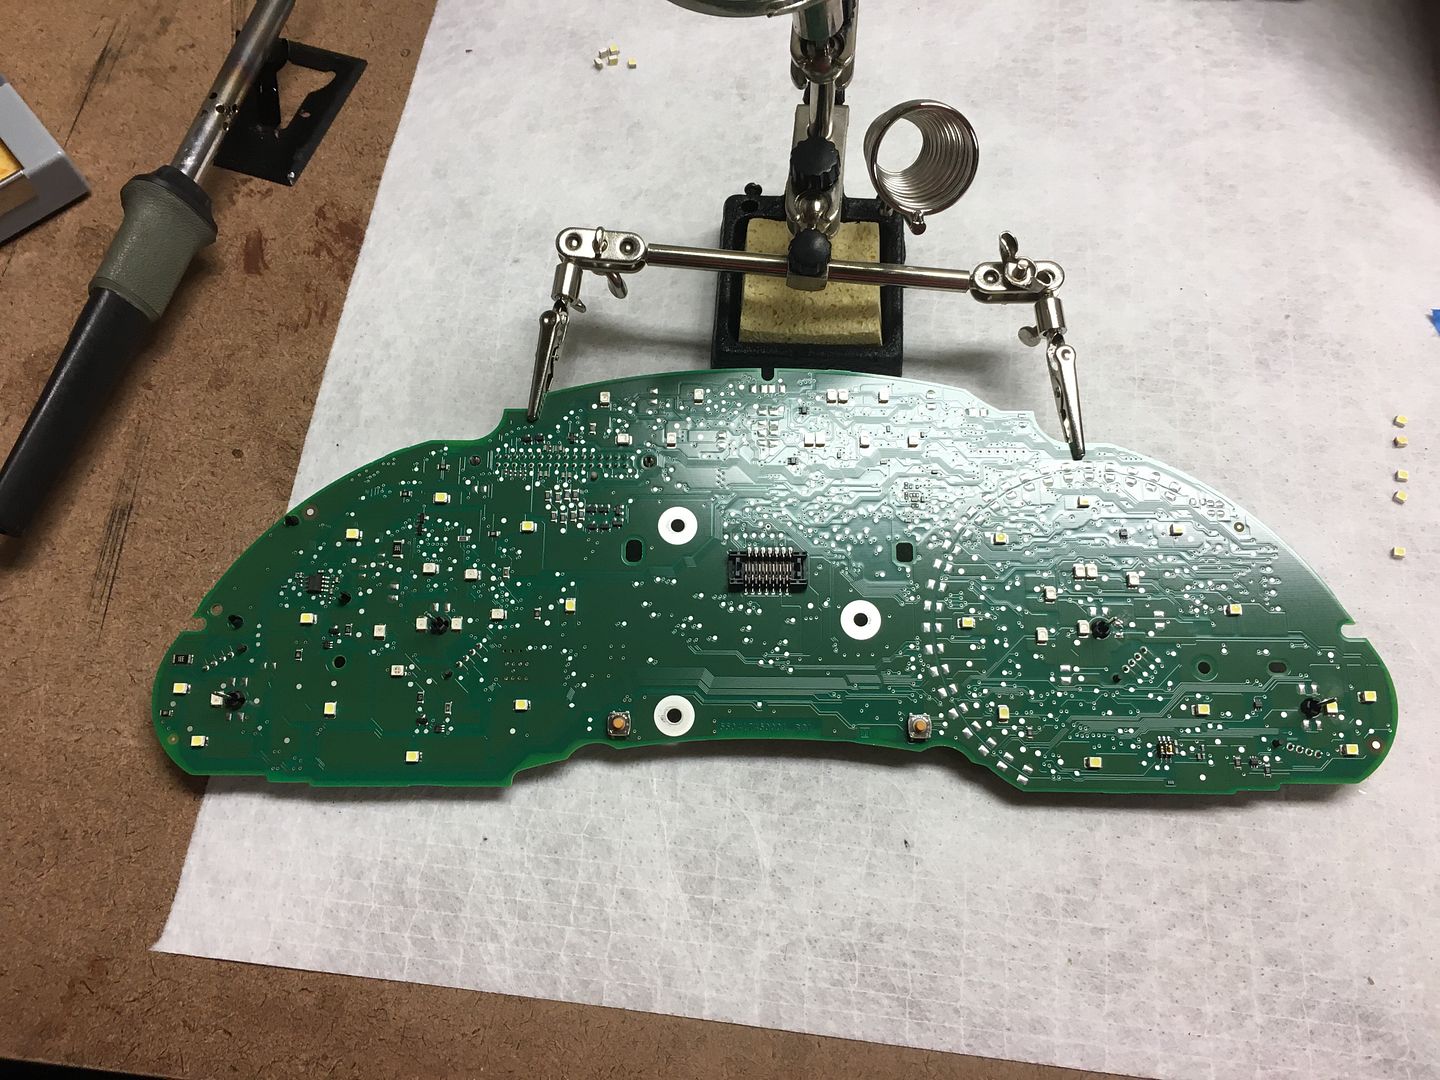
Here we are:

For the needles there are 6 LEDs, they are all right next to the needle shaft. Pretty easy to find. I can get the best clarity on the is LED so I will use it. (This is not a needle shaft LED, example only). The two strips of solder (metal) on each side of it need to come off by pressing the soldering iron to them and melting them. Do each side evenly and be careful. Once it's close to coming off if you apply lots of pressure it will fly off and your iron will scrape across the circuit board


Now that you have the LED off. Flatten out the solder points with your iron.

Prep the surface by flattening out some drops of solder on each solder point

This is where you will need two people:
1. One person holds the LED in place between both points. I used the flat edge of tweezers to do this
2. The other person solders them on. Heat up the solder that is on the board you prepped; then add some more connecting the LED to the board again
(I did not have two people since this was an example, photos are for reference)


The solder won't ever look "factory" which is fine. You won't see it ever again. The above picture looks poor because I was holding the camera while trying to solder. You won't melt your board and your solder points will look much better than that.
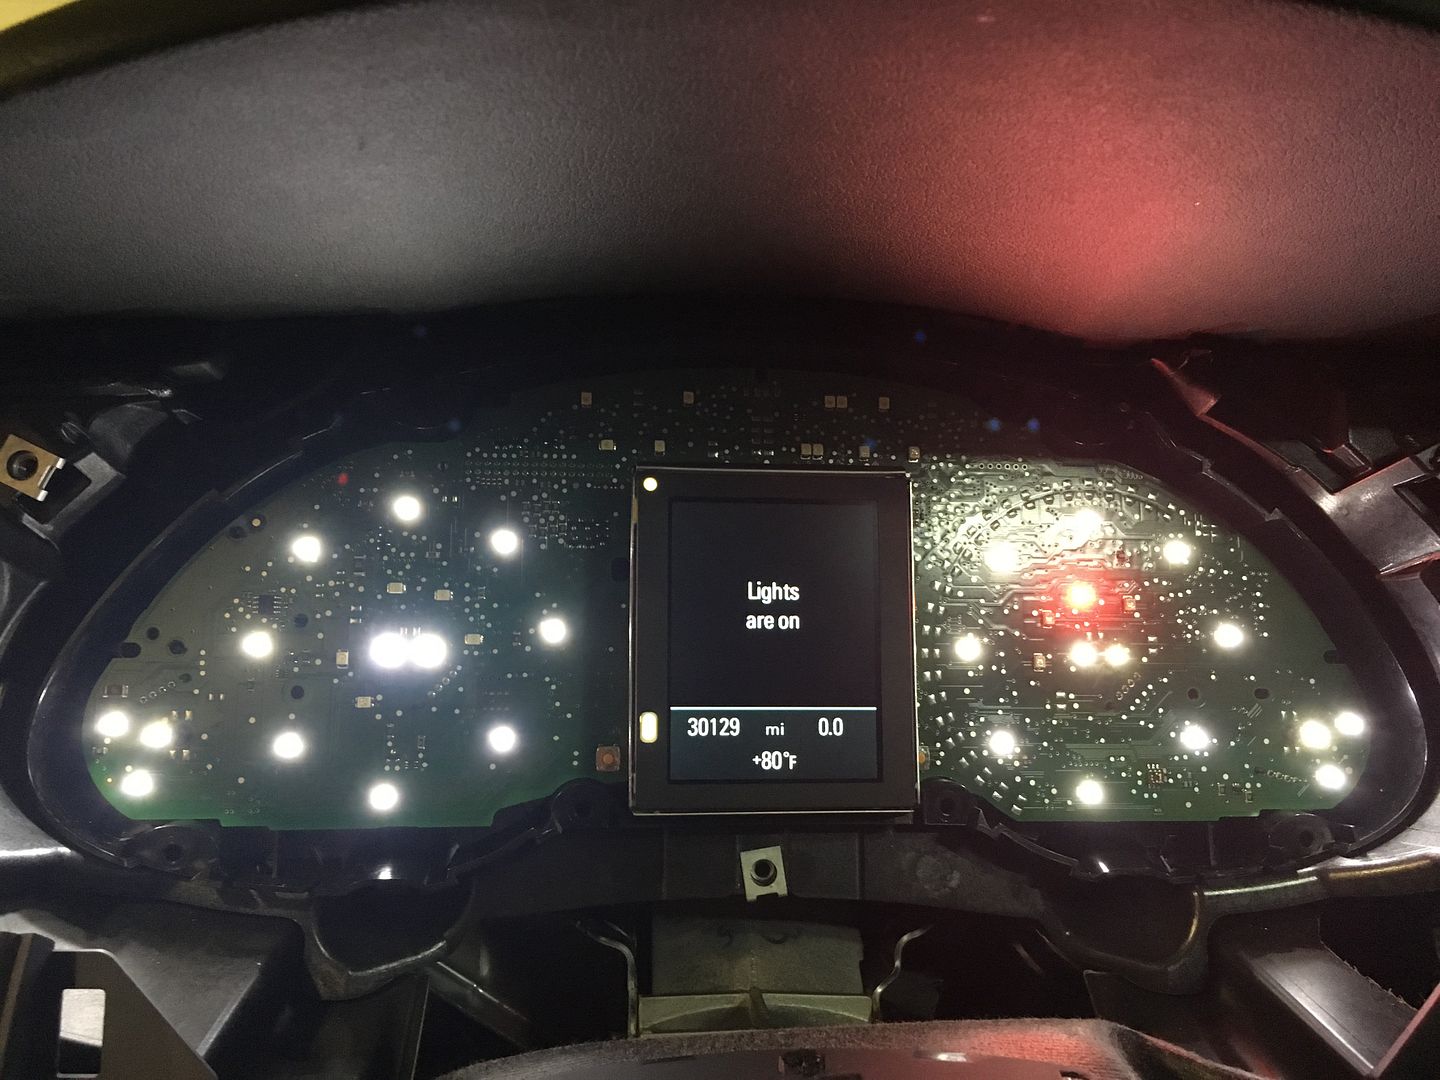
Once all 6 LEDs are soldered in put the white and black plastic on. Plug it into your car and turn it to on and check if they all work. This might seem scary but it really isn't. As long as you have solder connecting the LED to the solder points in the circuit board it will work great.
The ones I used were Cool White 600McD
I bought 10 and only used 6. Combined with shipping it was around $10 for 10. I used this website to buy them:
https://www.oznium.com/plcc-2#tech


The pictures make them look blue but they aren't. Just LED white. I like the A5 cluster because it closes around the chrome gauge ring and reflects the LED light making it seem like the chrome rings light up. You can see from the above photo what I mean.
Good luck, and;
Happy Modding!
Extra: I found that aligning your needles up is hard. Your center two are easy because you know when they start and stop. You should have a full tank, and warm engine to calibrate the other two. Your gas gauge is finicky. I thought I was adjusted mine right. It was full, I took it in a test drive to come out in the morning and it read less than empty... be sure it's holding its position before you put your cluster back in. For me I kept it plugged in and took the front cover off. I adjusted it and put it back on with only the front two screws holding t in. The back screws I left out and have had no issues; if you're struggling that might work for you. Try your best to be careful and not scratch the VW soft touch enamel that is around the key slot, top steering wheel, and bottom cluster holder.
2010 A4 S-Line Prestige

 Reply With Quote


Bookmarks