Audizine - An Automotive Enthusiast Community

Results 1 to 29 of 29
  1. #1
    Senior Member Two Rings nvrfollow's Avatar
    Join Date
    Apr 19 2007
    AZ Member #
    17421
    My Garage
    Silver S4 - Laser S4
    Location
    Montana

    Suspension Refresh -

    Guest-only advertisement. Register or Log In now!
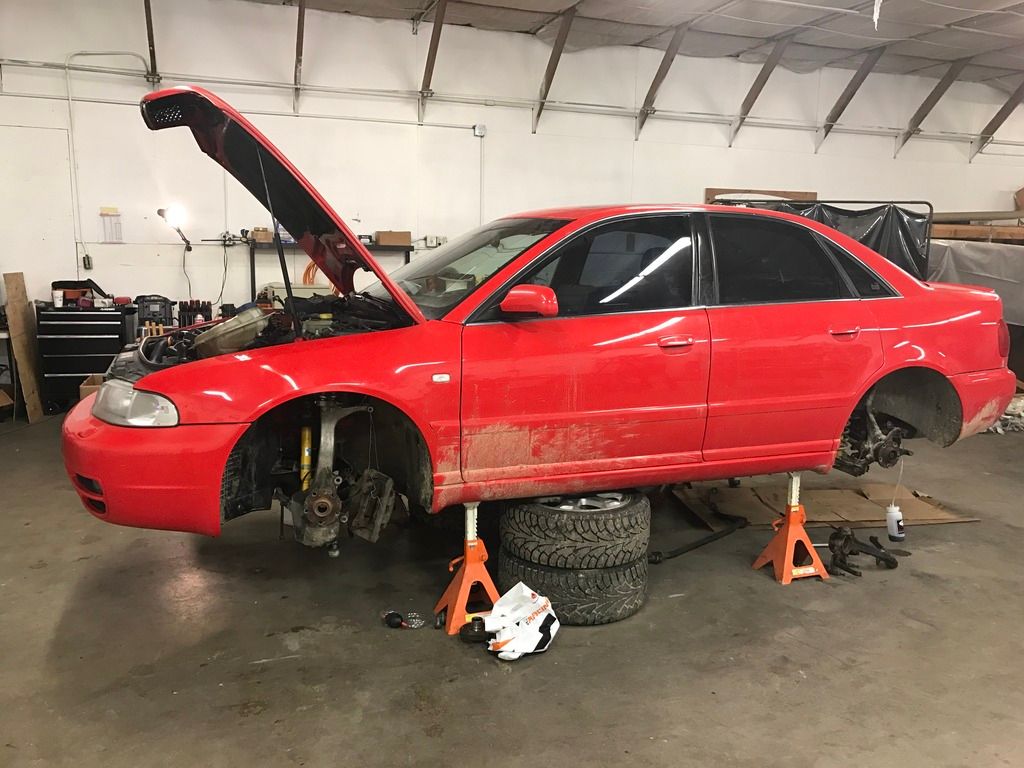
    My B5 S4 time began with years of enthusiasm and was followed by years of neglect. Now I have decided to rebuild the suspension on the S4. I will try to answer any questions and post obstacles as I go. I haven't found a whole lot of good info out there in some areas of this rebuild and these cars are getting to the point where bushings are falling apart. I have some questions for the community as well, indicated with STUCK below. I appreciate any help.


    NEW PARTS:

    Suspension
    Front and Rear Wheel Bearings
    CV Boots all around
    Rotors and Pads
    Brake Master Cylinder
    Front Tie Rod Ends
    Front Upper Adjustable Control Arms (034)
    Front Lower Control Arms - Early Aluminum Wheel Bearing Housing
    Front and Rear Sway Bar Links
    Sway Bar Bushings
    Rear Tie Rods
    Rear Adjustable Upper Control Arms
    Rear Lower Control Arm Bushings
    Rear Wheel Bearing Housing Bushings


    Engine
    Valve Cover Gasket
    Cam Chain Tensionser Gaskets
    Valley Plugs
    Last edited by nvrfollow; 03-05-2017 at 06:35 PM.

  2. #2
    Senior Member Two Rings nvrfollow's Avatar
    Join Date
    Apr 19 2007
    AZ Member #
    17421
    My Garage
    Silver S4 - Laser S4
    Location
    Montana

    Rear Suspension

    Rear Lower Control Arm

    Removal is quite a long process:
    - Drop Exhaust
    - Drop the rear differential slightly to remove passenger side cable
    - Remove Rear Center Console and disconnect e-brake lines at the handle and spray WD40 in the connectors going to the underbody (this was EXTREMELY helpful in my case)
    - Disconnect Cable at the brake
    - Pry fitting out where you spray WD40 but from underneath the car- should come out easy if lubricated if not lubed I wish you luck
    - Remove plastic nuts that attach ABS sensor to lower control arm
    - Remove headlight sensor on driver side
    - Use three screw drivers to disconnect plastic shield w/flange on the rear lower control arm
    - Use two screw drivers to depress locking tabs and a third to pry on the flange
    -Make sure the cable is free of the 2 other supporting brackets and it should come right out

    This process is omits a few of the steps from the Bentley manual that I am not sure are necessary

    Center console removal video: https://www.youtube.com/watch?v=JmuP0zfZFH4


    Alternatively you can just get the plastic flanged fitting out enough to cut off the flange, I would use the three screwdriver maneuver, and skip all the steps except the cable disconnect from the brake.

    Link to guy who just cut the plastic: http://forums.vwvortex.com/showthrea...ICTURE-HEAVY!!


    First Issue: **SOLVED**

    After pulling the old bushing out of the trash I realized that the outer race of the old bushing is stuck inside the housing.

    To remove the stuck housing I sawed one of the bushings into two separate pieces with a hack saw and then beat it out with a hammer and punch. I also used a torch to apply heat to the outer surface of the wheel bearing housing. There might be a better way to do this but it worked for me.


    Last edited by nvrfollow; 03-05-2017 at 06:53 PM.

  3. #3
    Senior Member Two Rings nvrfollow's Avatar
    Join Date
    Apr 19 2007
    AZ Member #
    17421
    My Garage
    Silver S4 - Laser S4
    Location
    Montana

    Front Suspension Tips and Tricks


    The notorious pinch bolt is a pain to get out especially so with the aluminum uprights. Heat, a normal sized hammer and a pneumatic air gun are your friend.

    Steps to remove Pinch Bolt:


    1) rotate bolt with breaker bar and apply penetrating oil
    2) wipe excess oil and heat with torch
    3) hammer on nut ( I found that a normal carpenters hammer works better than a big 2lb mini sledge)
    4) repeat steps 1-3 until bolt moves when hammered
    5) slip the closed end of a 17mm wrench behind the bolt head and spin it with an air gun while prying the back of the head with wrench (post picture)
    6) this works well for me over the years I have also heard an air chisel + heat works good too

    Front Lower Control Arms


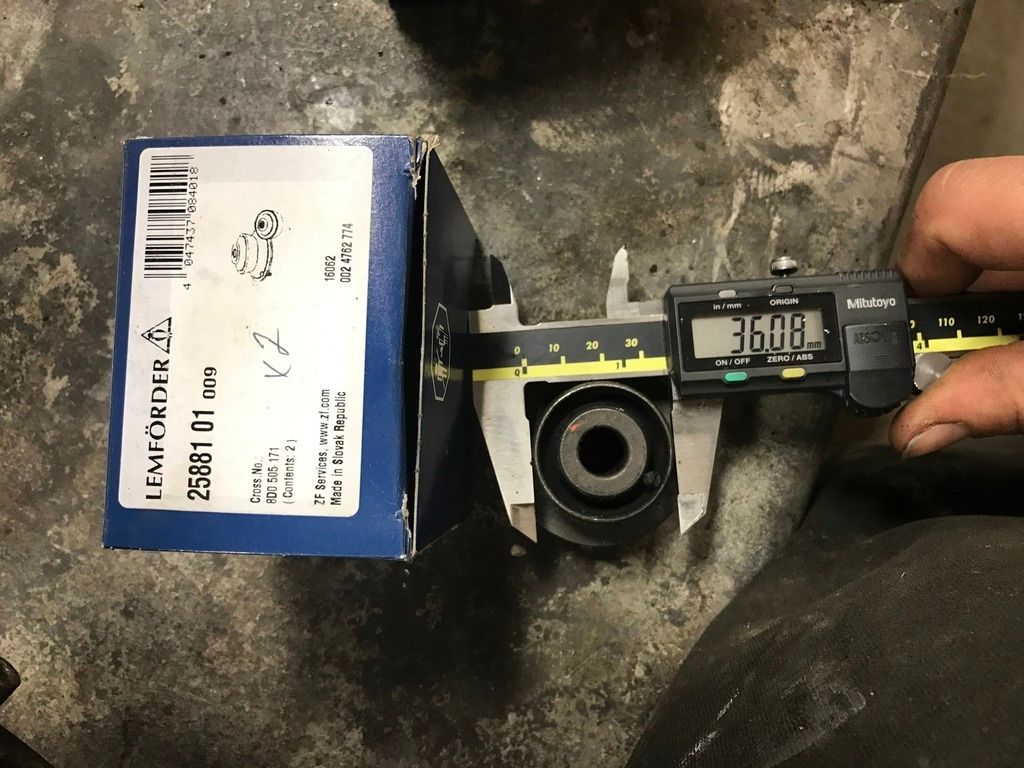
    When replacing the front lower control arms with the aluminum upright make sure you save the bushing circled in red! Mine is stuck on pretty good an I have already broken 1 puller trying to get it off. I will report back with a solution

    Front Upper Control Arms- Adjustable
    I bought some 034 upper control arms at a good price from a member on here. My initial impression is that they are nice because you don't need to remove the pinch bolt maybe ever again, but the downside is they are not turnbuckle style so aligning the car will be more tedious. Also no torque specs or instructions came with the arms.

    ECS tuning has a great DIY for control arms as does FCP with video on youtube. I deviated from ECS instructions and FCP for tightening the uppers becasue they give a measurement height to torque them(relative to the shock mount), but since my car is lowered I instead jacked up the suspension to ride height and tightened them with wrenches.

    FCP Upper Arms https://www.youtube.com/watch?v=tEeMiYWz16c

    FCP Lower Arms https://www.youtube.com/watch?v=wKJ9...1FEC50D310DA1E

    ECS writeup with torque specs http://bd8ba3c866c8cbc330ab-7b26c6f3...Arm_Kit_R2.pdf
    Last edited by nvrfollow; 03-03-2017 at 02:42 PM.

  4. #4
    Senior Member Two Rings nvrfollow's Avatar
    Join Date
    Apr 19 2007
    AZ Member #
    17421
    My Garage
    Silver S4 - Laser S4
    Location
    Montana

    STUCK ?


    Working on removing the rear lower control arms. The parking brake has me scratching my head on what to do. Another option would be to buy an expensive tool and press the bushings out. The new bushings are made of delrin and are from PowerFlex.

  5. #5
    Veteran Member Four Rings JustManson's Avatar
    Join Date
    Oct 11 2016
    AZ Member #
    382924
    Location
    Connecticut

    What a beautiful dog!!!


    Sent from my iPhone using Audizine

  6. #6
    Senior Member Three Rings
    Join Date
    Mar 12 2015
    AZ Member #
    320058
    Location
    Maryland

    I've got a similar project going on. Mine is more of an everything refresh. Picked up a well neglected 01.5 6 speed about a month ago to bring back from the dead. Body and interior are great, but mechanically it has all of the standard problems these cars have when they get let go, plus, no brakes. For the price, I couldn't let it die. That said, I see on your list you have the brake master cylinder as going to be replaced. Have you ever done that job before on one of these cars? If you haven't I've got some useful advice.

  7. #7
    Senior Member Two Rings nvrfollow's Avatar
    Join Date
    Apr 19 2007
    AZ Member #
    17421
    My Garage
    Silver S4 - Laser S4
    Location
    Montana

    Quote Originally Posted by Schtug View Post
    I've got a similar project going on. Mine is more of an everything refresh. Picked up a well neglected 01.5 6 speed about a month ago to bring back from the dead. Body and interior are great, but mechanically it has all of the standard problems these cars have when they get let go, plus, no brakes. For the price, I couldn't let it die. That said, I see on your list you have the brake master cylinder as going to be replaced. Have you ever done that job before on one of these cars? If you haven't I've got some useful advice.
    Hi Schtug, I have never done it. I will be using a power bleeder once everything is hooked up. What is your advice?

    Also still stumped on removing the rear lower control arms in regards to the ebrake cable.

  8. #8
    Veteran Member Three Rings 1thenaton1's Avatar
    Join Date
    May 13 2010
    AZ Member #
    58947
    My Garage
    ^, Q7 TDI
    Location
    SLC

    Looks like a nice workspace - I'll keep an eye out for another B5 around SLC ! Also digging into brakes and suspension this spring

  9. #9
    Senior Member Three Rings
    Join Date
    Mar 12 2015
    AZ Member #
    320058
    Location
    Maryland

    Quote Originally Posted by nvrfollow View Post
    Hi Schtug, I have never done it. I will be using a power bleeder once everything is hooked up. What is your advice?

    Also still stumped on removing the rear lower control arms in regards to the ebrake cable.
    First suggestion would be if it ain't broke don't fix it. Lol. It's just a shitty job unfortunately.

    When I was looking for writeups it seemed like across the board everyone went by way of taking the master and booster out of the car entirely as a single unit. The worst part about that is having to disconnect the brake pedal from the booster under the dash. I pulled the knee bolster off, took one look at what I was going to have to undo and said nope, not even going to try. So, first thing is that despite what the internet indicates, the job can be done without having to go through that miserable step.

    Take the wipers and plastic cowls off. You don't have to, but I liked the extra room it gave.

    There is a black steel brace that runs between the strut towers, it has 5 torx bolts, two on either end and one in the middle that is accessed from the engine bay. Take the bolts out then snake the brace out from the passenger side of the vehicle. The two bolts on the passenger side are made difficult by the ac lines that run over top of them.

    Remove the electrical connector, fluid, soft lines, and hard lines from the master. The soft lines may have oetiker clamps, which are one time use and have to be cut off to be removed.

    The reservoir is held on by one bolt/screw on top and a plastic clip on the bottom. My opinion, it's a two person job to remove the reservoir. One to pry down on the clip and one to fight the reservoir out of the master because those two things need to be done simultaneously. It's not that the plastic clip is difficult to depress, it's more that the reservoir is so well seated and secure in the rubber o-rings/grommets on the master that it takes a lot of force to get it free. I just can't see doing it by yourself. I thought for sure it was going to break as hard as I had to pull and pry on it to get it free.

    Once the reservoir is out of the way you're looking at two torx head bolts and two 22mm(IIRC) nuts. The bolts hold the booster to the firewall and the nuts hold the master to the booster. They do not impede each other in any way. The nuts are loctited on and will fight you the entire way. Take them off first. The master is o-ring fit into the booster so it won't even come close to falling out on its own. Unthread the two bolts holding the booster on all the way so you can pull it out and up from the firewall.

    Pull the master and booster out and up as far as you can. The brake pedal will be on the floor at this point and you will want to chock it in some manner to hold it firmly on the floor. Otherwise the master and booster will want to fall back down into place.

    Use a pry bar to pop the master free from the booster.

    The critical part of the whole job is installing the new master into the booster. You have to be very careful to get the pushrod in the booster into the bore of the master cylinder. It's tricky and you have to get it right. Once you think you've got it right, have someone remove your brake pedal chock while you guide the master and booster back down to their home. Physically hold the master into the booster and have your helper try to pump the pedal. If the pedal pumps, you're good and you can put it all back together. If the pedal is rock hard then the pushrod is not in correctly and you need to try again.

    That's really all I've got. Once the pushrod is in correctly put everything back together and bleed it. You'll also need to cycle the abs pump via vagcom after you get the system bled out.
  10. #10
    Perfect answer

    Sent from my HTC331ZLVWPP using Audizine mobile app

  11. #11
    Senior Member Three Rings
    Join Date
    Mar 12 2015
    AZ Member #
    320058
    Location
    Maryland

    Here's a direct copy and paste from the bentley manual for removing a rear lower control arm.

    Audi > B5 Platform > 1996 - 2002
    Suspension, Wheels, Steering
    42 - Rear suspensionLower control arm, removing and installing Removing
    Vehicle must be standing on its wheels above vehicle lift
    Remove wheel trim.
    On light alloy wheels use puller in vehicle tool kit to remove trim cap
    Loosen wheel bolts.
    Raise vehicle on lift.
    Remove wheel.
    Remove bracket for ABS wheel speed sensor cable.
    Extract brake fluid from reservoir:
    => Repair Manual, Brake System, Repair Group 47
    Disconnect brake line at points indicated.
    Note:
    On vehicles with headlight range control, the linkage for the headlight range control must be disconnected to remove the rear axle or lower control arm => page AUDI-B5-SU01-42-003-0242-48.
    Remove self-locking nut and bolt mounting lower control arm to suspension strut (arrow -1-) => page AUDI-B5-SU01-42-003-0142-40.
    Remove parking brake cable:
    => Repair Manual, Brake System, Repair Group 46
    Remove eccentric bolt for wheel bearing housing to lower control arm (arrow -2-) => page AUDI-B5-SU01-42-003-0142-41.
    Remove both mounting bolts for subframe to lower control arm (arrow) => page AUDI-B5-SU01-42-003-0142-40.
    Note:
    Only one bolt is shown to simplify the illustration.
    Remove control arm.

    Here's group 46 from the brake system manual.

    Audi > B5 Platform > 1996 - 2002
    Brake System
    46 - Brakes - Mechanical componentsParking brake lever, removing and installing Additional information
    Repair Manual, Body Exterior
    Repair Manual, Body Interior
    Removing
    Remove rear part of center console.
    => Repair Manual, Body Interior, Repair Group 68
    Remove hex nuts -1-.
    Use screwdriver to push parking brake cable inward, and remove parking brake lever.
    Installing
    Install parking brake cable into adjustment bracket.
    Tighten hex nuts -1- to 25 Nm (18 ft lb).
    Adjust parking brake => page AUDI-B5-SU03-46-005-0246-39.
    Install rear part of center console.
    => Repair Manual, Body Interior, Repair Group 68

  12. #12
    Senior Member Two Rings nvrfollow's Avatar
    Join Date
    Apr 19 2007
    AZ Member #
    17421
    My Garage
    Silver S4 - Laser S4
    Location
    Montana

    Thank you Schtug for the write up on the master cylinder. I am replacing it because of mushy pedal syndrome. (I have stainelss lines.) I have had the part just sitting in my closet forever to fix this issue and its time to put it in.

    I opted out of cutting the cable. Pulled the exhaust and now am in the final stages of prying the cable out form the parking brake "bracket" I will include the other outside resources and findings, but now I must get back at it.

  13. #13
    Veteran Member Four Rings
    Join Date
    Jun 08 2014
    AZ Member #
    250808
    Location
    Vancouver, Washington

    Might be too late as you already probably ordered parts but an upgraded rear sway will make a huge difference on the "Holy shit this car feels amazing and new!" factor! Coupled with good riding coils, an alignment, and good tires the car is so fun!

  14. #14
    Active Member Two Rings jnaarnold's Avatar
    Join Date
    Feb 22 2017
    AZ Member #
    393822
    My Garage
    2011 Range Rover HSE Sport Lux, 2005 Yukon XL
    Location
    Triad, NC

    Suspension Refresh -

    Quote Originally Posted by nvrfollow View Post
    STUCK ?


    Working on removing the rear lower control arms. The parking brake has me scratching my head on what to do. Another option would be to buy an expensive tool and press the bushings out. The new bushings are made of delrin and are from PowerFlex.
    Off topic...but love the Maligator!!
    We have three GSD's...they don't get in the S4 though...
    Gemma

    Maggie

    Max

    J


    Sent from my iPhone using Audizine
    2015 Audi A6
    2011 Land Rover Range Rover HSE Sport LUX
    2005 Yukon XL
    2001.5 Audi S4 AWE Stage 3 456hp

    Instagram: @three_dot_knives

  15. #15
    Senior Member Two Rings nvrfollow's Avatar
    Join Date
    Apr 19 2007
    AZ Member #
    17421
    My Garage
    Silver S4 - Laser S4
    Location
    Montana

    Thats Kona^ she rides in the back seat

    ^^Thanks for the input on the sway bar Marlin.. I have been running a Neuspeed rear bar for a while now and it makes cloverleaf on ramps and snow drifting a lot of fun!

  16. #16
    this is Makoa my rider sorry but since you broke topic I had to share

    Sent from my HTC331ZLVWPP using Audizine mobile app

  17. #17
    Senior Member Three Rings
    Join Date
    Mar 12 2015
    AZ Member #
    320058
    Location
    Maryland

    From here on out this shall be the official b5 s4 canine thread. Please share details of pictured pooches such as year, make, and model so others may more easily search them. There shall be one rule and one rule only. Absolutely no cats or ducks are to be pictured...

    Correction, ducks are fine but still no cats.


  18. #18
    Lol
    How's the s4 working out

    Sent from my HTC331ZLVWPP using Audizine mobile app

  19. #19
    Veteran Member Four Rings jaychen's Avatar
    Join Date
    Feb 19 2011
    AZ Member #
    71196
    Location
    Earth

    Good thread.

    About to overhaul all the rear bushings on my car.

    Looking forward to having that fresh feeling back after 110,000miles on most of the rear suspension bushes.
    2000 Achat S4

  20. #20
    Senior Member Two Rings nvrfollow's Avatar
    Join Date
    Apr 19 2007
    AZ Member #
    17421
    My Garage
    Silver S4 - Laser S4
    Location
    Montana

    Project is going well. I'm waiting on some parts from ECS and need a hydraulic press to get the rear wheel bearing housing bushings in all the way. I hear you can wack it with a hammer and the appropriate sized socket as well.

    Also don't worry, The entire refresh will all be posted regardless of any more dog pictures.

  21. #21
    Quote Originally Posted by nvrfollow View Post
    Project is going well. I'm waiting on some parts from ECS and need a hydraulic press to get the rear wheel bearing housing bushings in all the way. I hear you can wack it with a hammer and the appropriate sized socket as well.

    Also don't worry, The entire refresh will all be posted regardless of any more dog pictures.
    Use a large bench vise

    Sent from my HTC331ZLVWPP using Audizine mobile app

  22. #22
    Established Member Two Rings shepa401's Avatar
    Join Date
    Oct 20 2011
    AZ Member #
    82802
    Location
    Wisconsin

    I just did all of this on my S4 last summer/fall (Front/Rear Control Arms & Bushings/Suspension). I decided to just dremel off the plastic flange on the parking brake cable to be able to pull it thru and take the control arm off. Went back together just fine and stills works perfectly.

  23. #23
    Veteran Member Four Rings jaychen's Avatar
    Join Date
    Feb 19 2011
    AZ Member #
    71196
    Location
    Earth

    Quote Originally Posted by shepa401 View Post
    I just did all of this on my S4 last summer/fall (Front/Rear Control Arms & Bushings/Suspension). I decided to just dremel off the plastic flange on the parking brake cable to be able to pull it thru and take the control arm off. Went back together just fine and stills works perfectly.
    did you use a bit of rubber hose (cut length ways with an exacto knife to slip over) to replicate the sheath part that you removed to stop it slapping around inside the hole?
    2000 Achat S4

  24. #24
    Established Member Two Rings shepa401's Avatar
    Join Date
    Oct 20 2011
    AZ Member #
    82802
    Location
    Wisconsin

    I only removed the collar part to pull it thru. I Still needed to use a small screw driver to help get the little tabs thru the hole.


    Sent from my iPhone using Tapatalk

  25. #25
    Senior Member Two Rings nvrfollow's Avatar
    Join Date
    Apr 19 2007
    AZ Member #
    17421
    My Garage
    Silver S4 - Laser S4
    Location
    Montana

    Quote Originally Posted by Cysco abt S4 View Post
    Use a large bench vise

    Sent from my HTC331ZLVWPP using Audizine mobile app
    This will only work on 1 side! I found this out trying to press in the bushing applying load to the outer face with a 50 ton press. It does not work. You need to press on the flange of the inner race! If not the two bushings will deflect enough to contact each other.

  26. #26
    Senior Member Two Rings nvrfollow's Avatar
    Join Date
    Apr 19 2007
    AZ Member #
    17421
    My Garage
    Silver S4 - Laser S4
    Location
    Montana

    Quote Originally Posted by shepa401 View Post
    I only removed the collar part to pull it thru. I Still needed to use a small screw driver to help get the little tabs thru the hole.
    In hindsight I would have gone this route. I guess I was just too curious.
    Last edited by nvrfollow; 03-13-2017 at 11:26 AM.

  27. #27
    Senior Member Two Rings nvrfollow's Avatar
    Join Date
    Apr 19 2007
    AZ Member #
    17421
    My Garage
    Silver S4 - Laser S4
    Location
    Montana

    Quote Originally Posted by jaychen View Post
    did you use a bit of rubber hose (cut length ways with an exacto knife to slip over) to replicate the sheath part that you removed to stop it slapping around inside the hole?
    This is not a bad idea however shepa401 cut the flange off so cleanly that the integrity of the plastic housing was not compromised.

    If your are going to attempt this make sure you pull the flange out about 1/4" or more towards the rear of the car else its going to be a major PIA to cut the flange off. To do this get a good visual on the two locking tabs and depress each one with a screwdriver and use a third screwdriver to pry on the flange. 1 of the locking tabs is denoted below with a red arrow. The other is 180 deg opposite.


  28. #28
    Veteran Member Four Rings jaychen's Avatar
    Join Date
    Feb 19 2011
    AZ Member #
    71196
    Location
    Earth

    Quote Originally Posted by nvrfollow View Post
    This is not a bad idea however shepa401 cut the flange off so cleanly that the integrity of the plastic housing was not compromised.

    If your are going to attempt this make sure you pull the flange out about 1/4" or more towards the rear of the car else its going to be a major PIA to cut the flange off. To do this get a good visual on the two locking tabs and depress each one with a screwdriver and use a third screwdriver to pry on the flange. 1 of the locking tabs is denoted below with a red arrow. The other is 180 deg opposite.

    Gotcha.

    I will report back after I have undertaken this refresh shortly.
    2000 Achat S4

  29. #29
    Established Member Two Rings shepa401's Avatar
    Join Date
    Oct 20 2011
    AZ Member #
    82802
    Location
    Wisconsin

    Quote Originally Posted by nvrfollow View Post
    This is not a bad idea however shepa401 cut the flange off so cleanly that the integrity of the plastic housing was not compromised.

    If your are going to attempt this make sure you pull the flange out about 1/4" or more towards the rear of the car else its going to be a major PIA to cut the flange off. To do this get a good visual on the two locking tabs and depress each one with a screwdriver and use a third screwdriver to pry on the flange. 1 of the locking tabs is denoted below with a red arrow. The other is 180 deg opposite.

    I already had the line disconnected from the caliper when I went at it with the dremel. I switched between a couple different bits until it was flush(ish) to be able to pull it out. I haven't noticed any issues but if there were, I was planning to find a washer and adhere it to the line to keep it in place.

Tags for this Thread

Bookmarks

Posting Permissions

  • You may not post new threads
  • You may not post replies
  • You may not post attachments
  • You may not edit your posts
  •  


    © 2001-2025 Audizine, Audizine.com, and Driverzines.com
    Audizine is an independently owned and operated automotive enthusiast community and news website.
    Audi and the Audi logo(s) are copyright/trademark Audi AG. Audizine is not endorsed by or affiliated with Audi AG.