


first, I'm a french canadian, sorry about the language error... :)
I had purchased last summer a 2012 A4 out of warranty. One tail light had dead LED. I decide to fix it by myself.
tools that you need :
- flat and phillips screw driver
- knife
- spare LED light (I don't have source for the LED, I take one from a salvage car)
- small soldering gun
- 5 minutes epoxy glue
- 1 hour of labor
- a precise hand...
1- remove the tail light of the car
2- remove the back panel and disconnect the wire connector
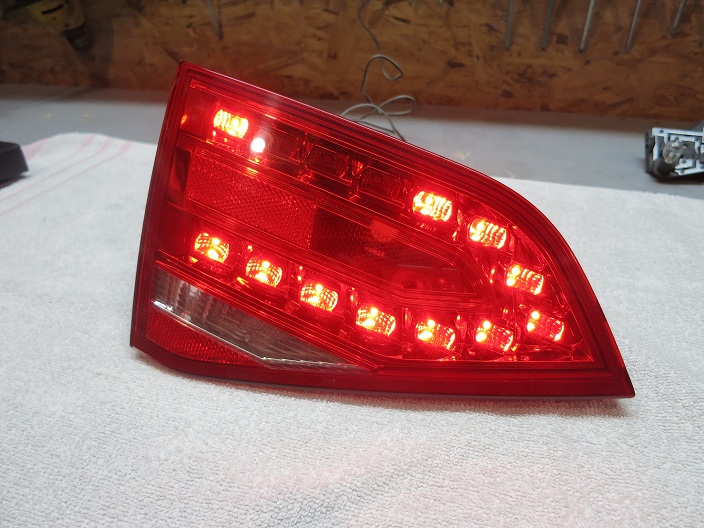
3- separate the lens of the back section, use a flat screw driver. Note that tail light have no glue between the lens and the back section, it's a hot plating process (melted plastic). You need to gently turn and the lens will separate the case. The lower section of the lens is more difficult to separate.


4- remove rear philips screws


5- take in memory the LED orientation (look in the middle of the LED)


6- remove the dead LED, use a sharp knife on the side of the LED for best result. Don't use a soldering gun, you may overheat the electric board and destroy the board.


7- reinstall the new LED, be very carefull, do not overheat the LED and the board, if not you can burn the LED, it's a precision job !!!


8- verify if LED is working, you can use a little toy power supply, voltage must be between 6Vdc and 12 Vdc. Depends of voltage, LED will be brightness ( 6V for parking light intensity and 12 V for brake/turn signal intensity)

9- clean the len with fresh water (don't use a towel, this one can create static inside the lens and may create durty). Reinstall the lens on the case with 5 minutes epoxy self mixing glue. Don't use liquid "super glue", when this glue come dry, some white spot appear inside the lens.


10- reinstall the back plate and put the tail light in your ride!
Enjoy.

 Reply With Quote
 I did put on wrong way first, had to redo it
 😜
😜


Bookmarks