Audizine - An Automotive Enthusiast Community

Page 1 of 2 12 LastLast
Results 1 to 40 of 58
  1. #1
    Veteran Member Four Rings victimdumper's Avatar
    Join Date
    Dec 20 2011
    AZ Member #
    85523
    Location
    Boston / South Shore

    quik-latch bumper quick release setup (semi-DIY)

    Guest-only advertisement. Register or Log In now!
    posted this in the quick release bumper thread and it got enough interest, so I figured id make a really quick thread briefly showing how its done.
    This was an after thought, so realize all images are after the install and taken with a cameraphone, so use your imagination on some steps.

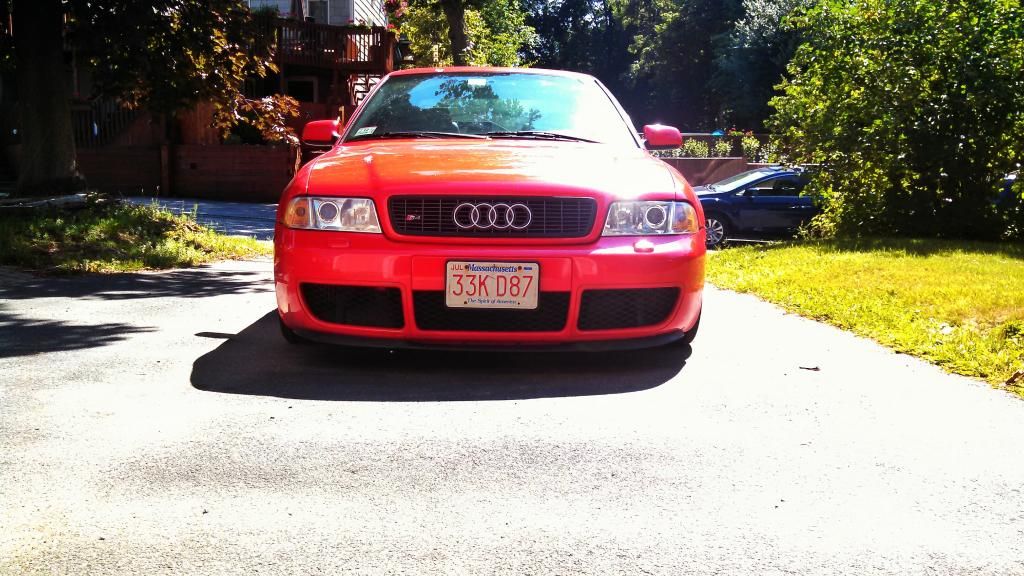
    first how it looks:
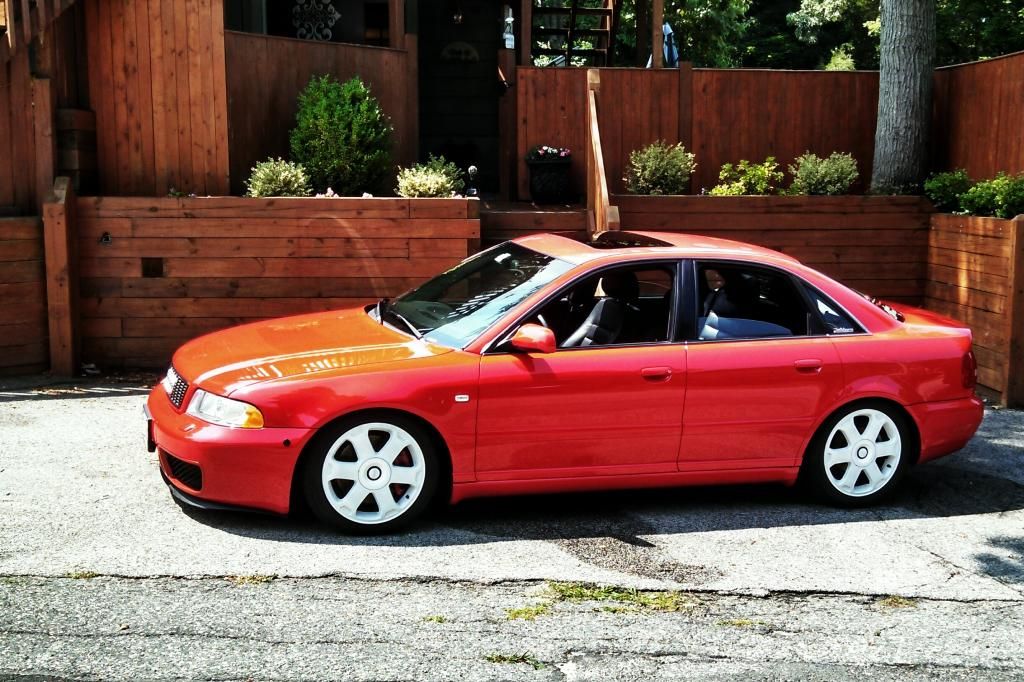


    I was aiming for something that didnt look ridiculous, and didnt look cheap.
    I think this is something decent, and if painted to match the body, it would be less noticeable.
    It holds the bumper very tight the way I have done this, and as far as I can tell the bumper fitment is very close to OEM.

    Ok, so basically you have to take the headlights and bumper off like you would normally have too. (should know how to do this)
    The biggest PITA part for most people is the two side clips, which is what this mod eliminates mostly.
    some cars are somewhat easy to get these off, and others (like mine) are a total nightmare to remove. Just deal with it this one last time
    Once the bumper is removed, I then removed the black clips from the car to modify. (just pry it off without bending the bender)
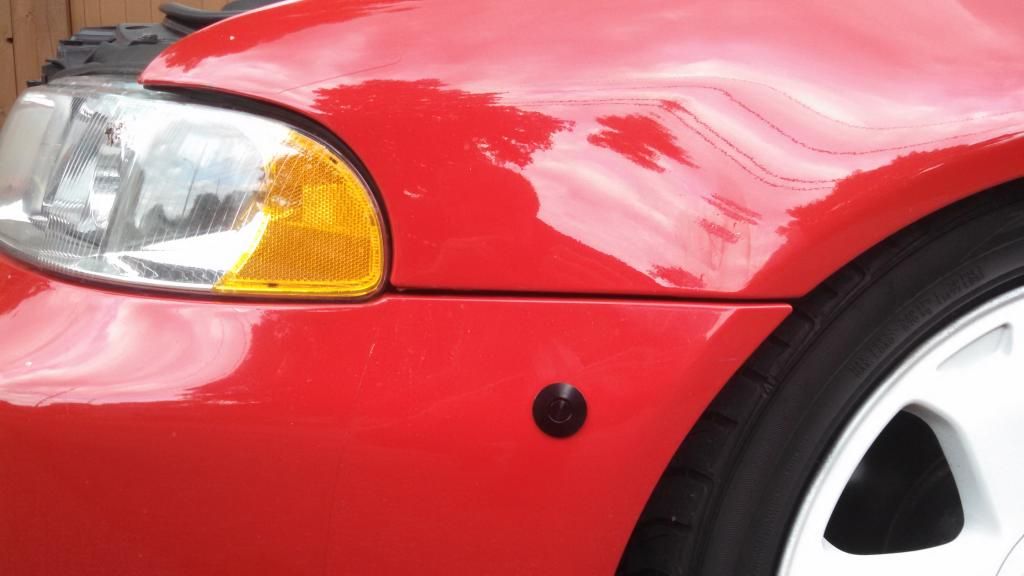
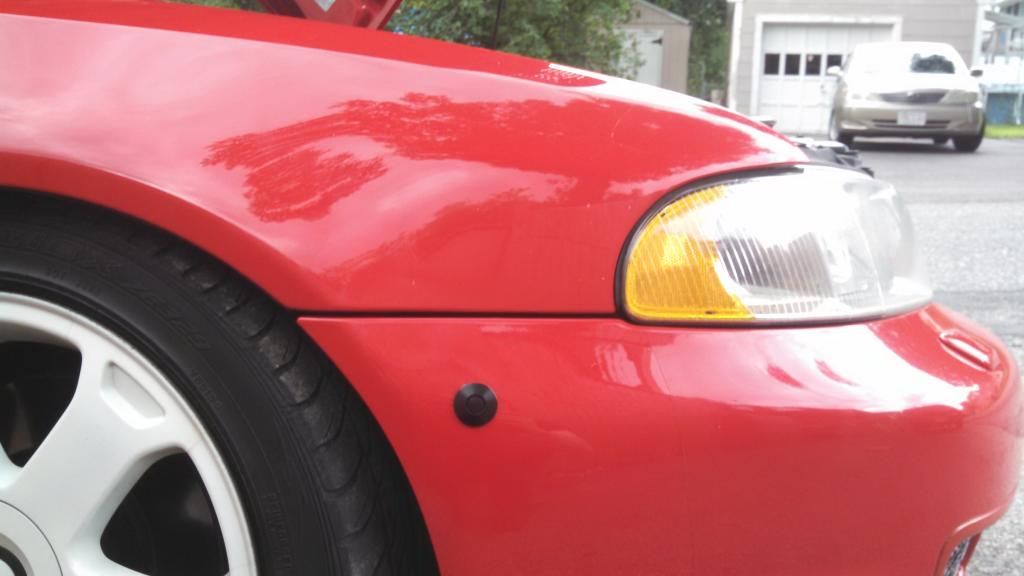
    Here's a picture of what I've done to the passenger side:
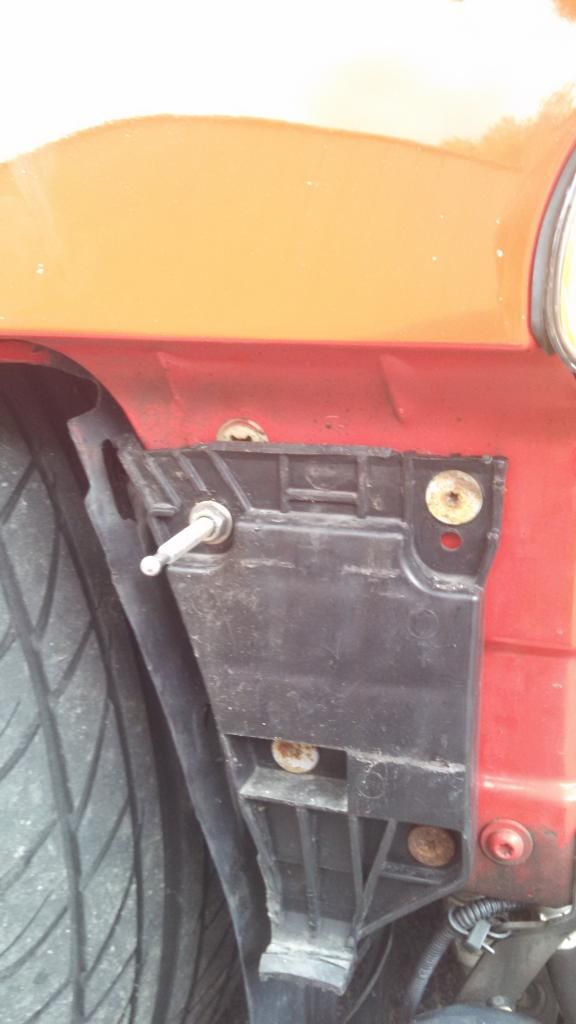

    once removed from the fender, you can turn this piece around and use a torx bit to remove the white pegs that hold it to the fender.
    I removed a single white clip so that i had a hole to use for the quik-latch stud.
    I then completely cut off the top two black clips that are part of this black plastic piece and hold the bumper to the fender
    (i did this very sloppily and would suggest a dremel)
    This allows the bumper to still have the bottom clip and black piece for correct space-ment (thats a word now) and fitment from the fender, along with a-lot of support.
    (i originally tried this without the black piece at all, and yes it does work, but the entire weight of the sides of the bumper are then resting on the single pin, if you want to go this route, I would recommend a second pin)

    I then reattached the black piece to the fender as it just clips in, reach my hand around and attach the bolt & stud sections from the kit.
    here's a picture from the back side:
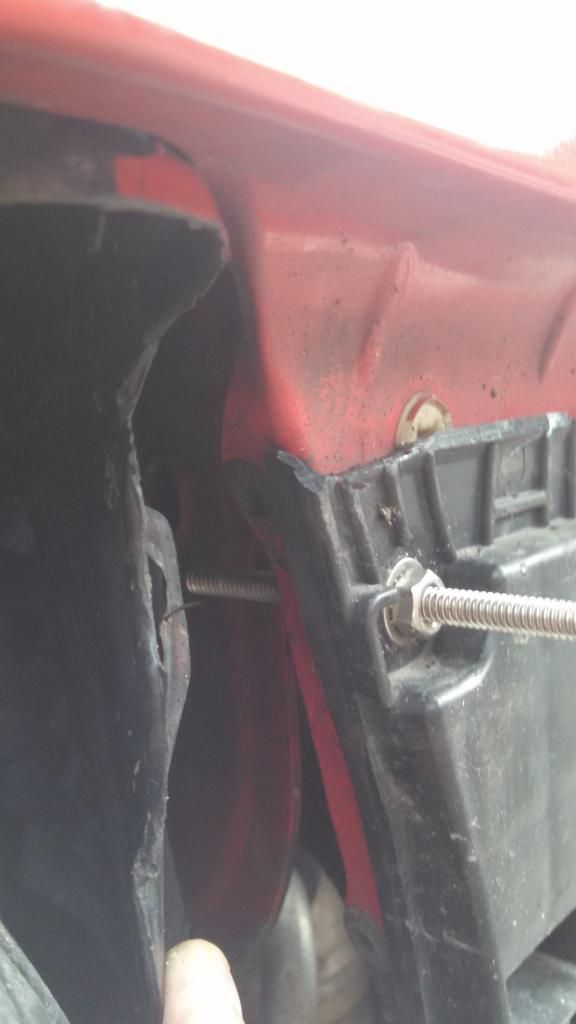
    (NOTE: I have a cone filter aka hot air intake, and have completely removed the air box, this might be significantly trickier with the air box in, I'm not sure)

    also, when installing the pins on the drivers side, the washer fluid reservoir may seem like its in the way. the way i solved this was removing the very top nut holding the washer and power steering fluid reservoirs to the inside of the fender and you can then pivot the washer reservoir every so slightly towards the front of the car to get the stud by. the best solution would be to then cut the stud to the correct length so you don't have this slight pivot on the reservoir. I did not do this. There are other mounting points for the reservoirs and I'll probably fix it later.

    Before you go crazy and start drilling the outside of the bumper, take a look inside the bumper and realize you have to do some slight dremel cutting in here as well to allow access to the latches.
    feel free to do this how ever you'd like. I removed quite a bit of material. but this was because after numerous times test fitting i realized its much easier to remove this large section to line everything up and place the pin into the latch.
    example:


    Once this is done and you have the pin correctly attached, everything trimmed, you can then finally start lining up the bumper and preparing to drill.
    This takes the longest time, I used a large variety of blue tape, rulers, string, markers, to make sure everything is perfect.
    you want the pins to hold the bumper in the correct position (obviously) but you also want to have some pressure holding the bumper rebar onto the supports so its not flopping around in the wind or whatever loose bumpers do.
    Also realize the latches have a somewhat wide angle of grabbing the pin, so just figure it out.
    bad case scenario: you messed up slightly and your gap is too large or too small just a hair. Lucky for you the fender is somewhat bendable and the pin is very hard to bend, you can bend where the fender and pin meet ever so slightly without deforming anything too much to fix the fitment.
    Worse case scenario: you really messed up and its not even close, i would suggest trying to drill a whole in the fender area and moving the pin, like i said the latch "seems" to have a wide angle of grabbing, so this is your best bet. but don't quote me, I took some time to do this so situation wouldn't happen.

    some pictures of where my latches ended up:


    And a video for everyone who wanted to see how easy this is:


    For the people the mention the security issue: the two mounting points for the long bolts that connect the rebar to the bumper are never even touched and the bolts can be installed again if desired, therefor having mostly the same amount of security as a stock bumper without those side clips.

    So much for a quick write up, this is way longer than i wanted it to be.
    I'm still trying to figure out a way to put some sort of single hidden quick release system in the front middle that is easily accessible but not easily seen by a passerby to keep security (not necessarily a quik-latch). So I'm taking all advise on something along those lines before I try to figure something out.
    any questions or anything, let me know
    2005.5 B7 A4 Avant

  2. #2
    Senior Member Three Rings Marioh's Avatar
    Join Date
    Jun 26 2010
    AZ Member #
    60721
    Location
    Denver, CO

    That's awesome man, thanks so much for sharing!

    Do you not run those vertical bolts then?

    For the security piece... you could potentially rig up something like the hood latch (so a cable release system) that attaches to the bumper near the center and have the unlock mechanism be mounted in the engine bay somewhere. That would be rad.

  3. #3
    Veteran Member Four Rings victimdumper's Avatar
    Join Date
    Dec 20 2011
    AZ Member #
    85523
    Location
    Boston / South Shore

    glad people like it!
    as of right now I'm not running the vertical bolts (at home I park with the bumper pointed towards a wall 99% anyways lol)
    though the bolts are sitting in my trunk with a wrench if i ever feel the need to put them it, or i may just leave them in.
    they are quite easy to remove when you want to remove the bumper so its not a huge effort to leave them in if you decide to.
    2005.5 B7 A4 Avant

  4. #4
    Veteran Member Four Rings bobkatkat's Avatar
    Join Date
    Jun 07 2012
    AZ Member #
    94826
    Location
    North of the 49th parallel

    Thank you for the post!! I was just about to do another engine pull and was dreading the bumper on and off process. Question for you, now that you have done this do you think it would be possible to cut the bottom tab off the Black mounting plastic rather than the two top tabs and put the quik-latch pin on the bottom??


    Oh also, what version of the quik-latchs did you use? Mini? long pin?

  5. #5
    Veteran Member Four Rings getslideways's Avatar
    Join Date
    May 16 2008
    AZ Member #
    28851
    Location
    WA

    Thanks for the writeup

  6. #6
    Veteran Member Four Rings victimdumper's Avatar
    Join Date
    Dec 20 2011
    AZ Member #
    85523
    Location
    Boston / South Shore

    Quote Originally Posted by bobkatkat View Post
    Thank you for the post!! I was just about to do another engine pull and was dreading the bumper on and off process. Question for you, now that you have done this do you think it would be possible to cut the bottom tab off the Black mounting plastic rather than the two top tabs and put the quik-latch pin on the bottom??


    Oh also, what version of the quik-latchs did you use? Mini? long pin?
    In don't see why not!
    I ascetically wanted the pin towards the top of the bumper.
    but towards the bottom would allow the top clip to help hold the bumper in place. Which may allow for an easier fitment setup but idk. may be worth a shot if you want to try
    2005.5 B7 A4 Avant

  7. #7
    Senior Member Three Rings
    Join Date
    Feb 26 2010
    AZ Member #
    55204
    Location
    Santa Ana, Ca

    Awesome wright up. Definitely adding this to the list.
    Especially since I have some extra nogaro paint sitting at home.

    Where did you get the clips from?
    You might be an S4 owner when......
    You spend more time pulling you engine out than driving your car.

  8. #8
    Veteran Member Four Rings victimdumper's Avatar
    Join Date
    Dec 20 2011
    AZ Member #
    85523
    Location
    Boston / South Shore

    I ordered them from jegs for the price and free shipping. Quik-latch.com is where they come from.

    FYI I forgot to mention
    Doing it the way I describe here **** REQUIRES THE EXTENDED STUDS OFFERED BY QUICK LATCH ****

    the small ones are just a bit too short
    2005.5 B7 A4 Avant

  9. #9
    Senior Member Three Rings
    Join Date
    Feb 26 2010
    AZ Member #
    55204
    Location
    Santa Ana, Ca

    Ok cool. So you got the studs from quik-latch. The elongated 4" ones?
    I'm buying some next month. Probably just get the whole thing from quik-latch.
    You might be an S4 owner when......
    You spend more time pulling you engine out than driving your car.

  10. #10
    Active Member Four Rings
    Join Date
    Sep 14 2009
    AZ Member #
    47766
    Location
    s.e. mass

    your from MA too? Wonder where you found the inspiration... both of my personal vehicles


    should have removed the guides when you did. Did you run the springs, if otherwise why not?
    IG: @PB5S4

  11. #11
    Veteran Member Four Rings victimdumper's Avatar
    Join Date
    Dec 20 2011
    AZ Member #
    85523
    Location
    Boston / South Shore

    Quote Originally Posted by naudlee View Post
    your from MA too? Wonder where you found the inspiration... both of my personal vehicles


    should have removed the guides when you did. Did you run the springs, if otherwise why not?
    I am from MA! I've never seen you around though? hell I rarely see another b5 s4. where abouts are you?
    I thought I was the only one to run these on a b5 so far lol. Looks good!

    yours seem to be mounted much higher than mine, so I take it you removed the guides?
    and I considered the spring setup, but it doesnt seem to need them at all to stay flush.
    2005.5 B7 A4 Avant

  12. #12
    Veteran Member Three Rings ama's Avatar
    Join Date
    Oct 02 2013
    AZ Member #
    124227
    Location
    World

    So is the bumper just holding on those two things?

  13. #13
    Veteran Member Four Rings jaychen's Avatar
    Join Date
    Feb 19 2011
    AZ Member #
    71196
    Location
    Earth

    Quote Originally Posted by ama View Post
    So is the bumper just holding on those two things?
    yes.

    you still have the front crash bar over the two front things that are bolted to the rails..

    but it looks like these mini latches have enough force that they can hold the bumper in nice and tight
    2000 Achat S4

  14. #14
    Veteran Member Three Rings Tec_Nine's Avatar
    Join Date
    Sep 17 2012
    AZ Member #
    100643
    Location
    Riverside, IL

    Don't want to be a debbie downer but what is the point of having this?

  15. #15
    Veteran Member Three Rings
    Join Date
    Oct 12 2011
    AZ Member #
    82470
    Location
    WA

    helps to quickly remove the front bumper when working on the car, also eliminates the ugly gap between the fender and bumper from constantly removing it.
    01 Nogaro 605, AMD tuned with custom no-mod list signature.

  16. #16
    Veteran Member Three Rings Jmills's Avatar
    Join Date
    Jun 20 2012
    AZ Member #
    95565
    Location
    USA

    Awesome Writeup! I may have to do this mod in the future
    '00 Hibiscus Red Pearl B5 S4 203k on stock k03s! MTM Stage 2...273 AWHP 344WTQ - SOLD Sadly
    2006 Tarmac Black Evo IX 325whp 310 wtq - Daily while I figure out the next Audi
    The Other FB group, the SFW English speaking one, 10,000+ Members

  17. #17
    Veteran Member Four Rings RedB5S4's Avatar
    Join Date
    Dec 06 2010
    AZ Member #
    67918
    My Garage
    BfiveSfour
    Location
    I'd like to keep my car.

    just ordered me a set
    Stg. III+ K24 CaS4

  18. #18
    Veteran Member Four Rings Gujuhammer's Avatar
    Join Date
    Oct 07 2010
    AZ Member #
    65402
    My Garage
    02' Avant
    Location
    Florida

    Thanks for the write up. I wouldn't mind seeing how Naudlee mounted his up either...If you have the time?

    Quote Originally Posted by RedB5S4 View Post
    just ordered me a set
    Same here, and I'm thinking about using them on my belly pan also: http://www.quik-latch.com/quik-latch...skidplate.html

    I found them cheaper on quik latch's site if you get the long pins.

  19. #19
    Established Member Two Rings estoniancartel's Avatar
    Join Date
    Aug 10 2009
    AZ Member #
    46185
    My Garage
    2001 S4 Avant 6 MT
    Location
    Boulder, CO

    Thank you for writing this up - definitely cleared up the questions I had! Now to order some..
    2001 S4 Avant 6MT OEM RS6 on E85
    2008 A4 Titanium Avant 6MT
    2015 Allroad APR Stage 1
    2024 RS3

  20. #20
    Veteran Member Four Rings Austonwerner4's Avatar
    Join Date
    Feb 01 2011
    AZ Member #
    70343
    My Garage
    00 S4 & 04 A8L
    Location
    MKE

    I'll post some pictures of mine tonight. I'll be installing them tonight.
    I have a RS4 front bumper.
    Single Turbo on it's Way

    PM me for 17z and 18z Caliper Needs

  21. #21
    Established Member Two Rings
    Join Date
    Feb 25 2004
    AZ Member #
    879
    My Garage
    02 S4
    Location
    Philly

    about to start this, i will be doing the plain polished on a silver car so will be interesting to see how well it blends. if successful i plan on doing the red anodized on my other laser eventually.

    any chance you could measure length of exposed stud length from black plastic to tip? similarly center of bumper hole from vertical and horizontal? would be helpful for starting off the measurement process. thank you.
    S4x2

  22. #22
    Veteran Member Three Rings Dr.d's Avatar
    Join Date
    Jun 20 2012
    AZ Member #
    95544
    My Garage
    2001 S4, 2024 Model 3
    Location
    Vancouver, WA

    Thanks for sharing!

  23. #23
    Veteran Member Four Rings
    Join Date
    Nov 21 2012
    AZ Member #
    104451
    Location
    Ohio

    Wanting to buy a set but I'm not sure what kit to get. Do I get the mini kit with the elongated 4" mini pins?
    K24's

  24. #24
    Established Member Two Rings
    Join Date
    Feb 25 2004
    AZ Member #
    879
    My Garage
    02 S4
    Location
    Philly

    Came out well. This car was totaled and things have been very off so this alignment is far better than expected. Another adjustment or two and it can be made a bit better. About 2 inches exposed off the fender for the threaded bits.


    S4x2

  25. #25
    Veteran Member Four Rings Gujuhammer's Avatar
    Join Date
    Oct 07 2010
    AZ Member #
    65402
    My Garage
    02' Avant
    Location
    Florida

    Started to plan how I could tackle this and can see the passenger side won't be too bad but the driver side with the washer fluid reservoir seems like a real problem. I know where the top bolt is to move it out of the way, but where can/should it go to make room for the bolt?

  26. #26
    Established Member Two Rings
    Join Date
    Feb 25 2004
    AZ Member #
    879
    My Garage
    02 S4
    Location
    Philly

    nowhere, i just gave it a little push and was able to get the bolt in place. the washer and nut on the back are a challenge and require you to push the bottle farther, but once it clears the bottle area there is room. the bolt basically rests against the back of the bottle.

    to the person up a couple, yes you need the elongated pins. there is a lot of bolt on the back side so it seems extra but the normal sized ones are quite short and wouldn't cut it.
    S4x2

  27. #27
    Veteran Member Three Rings
    Join Date
    Nov 30 2010
    AZ Member #
    67682
    Location
    saint louis , MO

    Hmmmm this may be the route I need to take when installing my RS4 bumper....
    Fuck those sheep. Fuck em hard. Do something right with your life.

    -Matador

  28. #28
    Veteran Member Four Rings 8520's Avatar
    Join Date
    Feb 07 2008
    AZ Member #
    25012
    My Garage
    2011 F350 Diesel, 2006 Touareg V8, 2002 RS6 Avant project
    Location
    The boonies, near Seattle

    In before all the "my front bumper got stolen" threads.
    -dre

  29. #29
    Veteran Member Four Rings Sole_'s Avatar
    Join Date
    Oct 29 2009
    AZ Member #
    49965
    Location
    Toronto

    Quote Originally Posted by 8520 View Post
    In before all the "my front bumper got stolen" threads.
    HAHA! So true..
    Imola<3

  30. #30
    Veteran Member Four Rings NYEuroTuner's Avatar
    Join Date
    Oct 24 2008
    AZ Member #
    34539
    My Garage
    "Silvaro" B5 S4, 2013 B8 S4, 2018 RS3
    Location
    SoCal

    Quote Originally Posted by 8520 View Post
    In before all the "my front bumper got stolen" threads.
    lol True, but it does make things more convenient and a great way to tighten the gap.

    Might do this, of course I'd keep the center bolts for added stability/security, but non the less this looks cool.
    -- George
    SEMPER FI
    Build Thread--------------->My VR6 Journey<-Click it, Click it good.
    IABEDINDUSTRIES

  31. #31
    Veteran Member Four Rings topquarkpc's Avatar
    Join Date
    Aug 03 2009
    AZ Member #
    45871
    Location
    PNW

    imma try one on my rs4
    '01 Imola Yellow Avant Sport Package 6-Speed (stage 3 w/Frankenturbo F4H)

  32. #32
    Veteran Member Three Rings
    Join Date
    Nov 30 2010
    AZ Member #
    67682
    Location
    saint louis , MO

    Quote Originally Posted by Austonwerner4 View Post
    I'll post some pictures of mine tonight. I'll be installing them tonight.
    I have a RS4 front bumper.

    Did you ever do this? Getting ready to do my rs4 bumper soon and would like some tips.
    Fuck those sheep. Fuck em hard. Do something right with your life.

    -Matador

  33. #33
    Account Terminated Two Rings
    Join Date
    May 17 2014
    AZ Member #
    229178
    Location
    The Killzone

    not bad. look a hell of a lot better than the one with the rubber bands lol

  34. #34
    Veteran Member Four Rings
    Join Date
    Nov 21 2012
    AZ Member #
    104451
    Location
    Ohio

    Yeah I just finished my install. I love them and will never go back to the conventional method lol.
    K24's

  35. #35
    Veteran Member Four Rings topquarkpc's Avatar
    Join Date
    Aug 03 2009
    AZ Member #
    45871
    Location
    PNW

    Quote Originally Posted by qU/\TTRŲ View Post
    not bad. look a hell of a lot better than the one with the rubber bands lol
    I have them rubber bands on my wife's car and I kinda dig it... jus say'n
    '01 Imola Yellow Avant Sport Package 6-Speed (stage 3 w/Frankenturbo F4H)

  36. #36
    Veteran Member Four Rings JKnight41's Avatar
    Join Date
    Oct 11 2012
    AZ Member #
    102018
    Location
    Southern Illinois

    -00 Hibiscus S4 Sedan (FOR SALE)
    -09 Audi S5 / SOLD
    -01 Audi S4 Avant / SOLD
    -04 Audi S4 / SOLD
    -00 Audi S4 Stage 2 / SOLD

  37. #37
    Active Member Four Rings landfill's Avatar
    Join Date
    Nov 14 2013
    AZ Member #
    130116
    Location
    Pompano Beach, Florida

    Shit if someone wants my hacked up stock front bumper go ahead and take it.
    I actually would overlook that possibility just to have this convenience. It might
    not be for everyone but if your always fucking with your car this is the way to go.
    Does anyone have any insight how I could incorporate these while using the CF
    fender flares. I've been trying to see what I can do but it seems like the flares and
    bumper kind of get in the way of each other.

  38. #38
    Veteran Member Four Rings JKnight41's Avatar
    Join Date
    Oct 11 2012
    AZ Member #
    102018
    Location
    Southern Illinois

    Can anyone chime in for me before I place my order? Thanks
    -00 Hibiscus S4 Sedan (FOR SALE)
    -09 Audi S5 / SOLD
    -01 Audi S4 Avant / SOLD
    -04 Audi S4 / SOLD
    -00 Audi S4 Stage 2 / SOLD

  39. #39
    Established Member Two Rings Mr.Z's Avatar
    Join Date
    Mar 19 2012
    AZ Member #
    90226
    My Garage
    audi junk stuff
    Location
    Richland WA

    not sure if any body cares got 2 of these 4 inch studs included will see how it works. http://www.jegs.com/i/Quik-Latch/658...ductId=1669515
    totall was about 55$ free shipping

  40. #40
    Veteran Member Four Rings Seerlah's Avatar
    Join Date
    Dec 05 2007
    AZ Member #
    23104
    Location
    A place between here and there

    Been running these for about a year now. One thing i can say, loctite the locking nuts. Mine always loosed over time.
    I hate it when my car acts like a little bitch, treating me like a bitch

Bookmarks

Posting Permissions

  • You may not post new threads
  • You may not post replies
  • You may not post attachments
  • You may not edit your posts
  •  


    © 2001-2025 Audizine, Audizine.com, and Driverzines.com
    Audizine is an independently owned and operated automotive enthusiast community and news website.
    Audi and the Audi logo(s) are copyright/trademark Audi AG. Audizine is not endorsed by or affiliated with Audi AG.