


LED Tail Light units (ebay)
8K9 945 096 D
8K9 945 095D
8K9 945 094 E
8K9 945 093 E
Connectors (online Audi dealer)
8K0973705B 2 : Outer
8R0973605 2 : Inner
Cables with pins (online Audi dealer)
000979025E 5 : Outer connector pins
000979164E 4 : Inner connector pins
000979009E 2 : Inner connector pins (ground)
Note: Despite what's reported in other posts, with a little care, you may be able to release and reuse pins from the existing connectors by inserting a needle into the upper part of every pin and unlock the tab that keeps it in place. In my case, I was able to reuse the most of the outer pins, and used brand new pins for the inner connector.
Tools/Other:
*VCDS, to perform the coding to controller 46-Central Conv.
*Two rolls of speaker cable (one pink, one white in this guide) to run two cables from the outer adapter to the inner lights thru the trunk lid (pink), and two from the gray cables out of the controller compartment to the outer lights (white).
*Heat gun, to ensure the wire splitting for the above cable is insulated from the elements
Hardware Installation
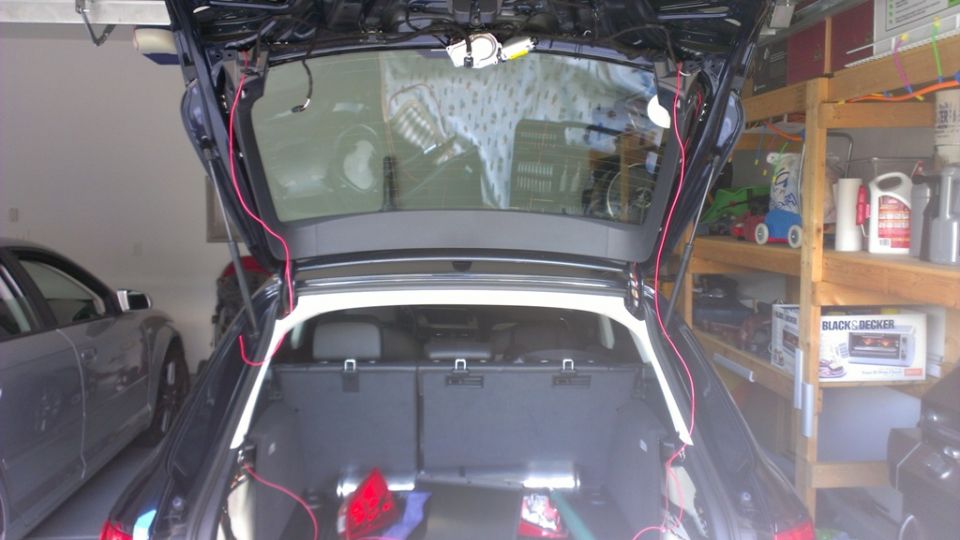
Run the extra (pink) cables from both sides of the trunk lid into the D pillar as shown. While I had to remove the plastic covers of the trunk lid, I *did not* have to remove the headliner or D pillar lining; just run the cables using a hard wire or similar thru the D pillar into the lower portion of the trunk walls.
You will also have to run a second pair of cables (white) from the controller panel, with the left one going under the metal trunk lid trim over to the rear left side of the trunk, and the right one just being long enough to reach the outside. Again, with a little care and patience, no need to remove pieces to route the cable.
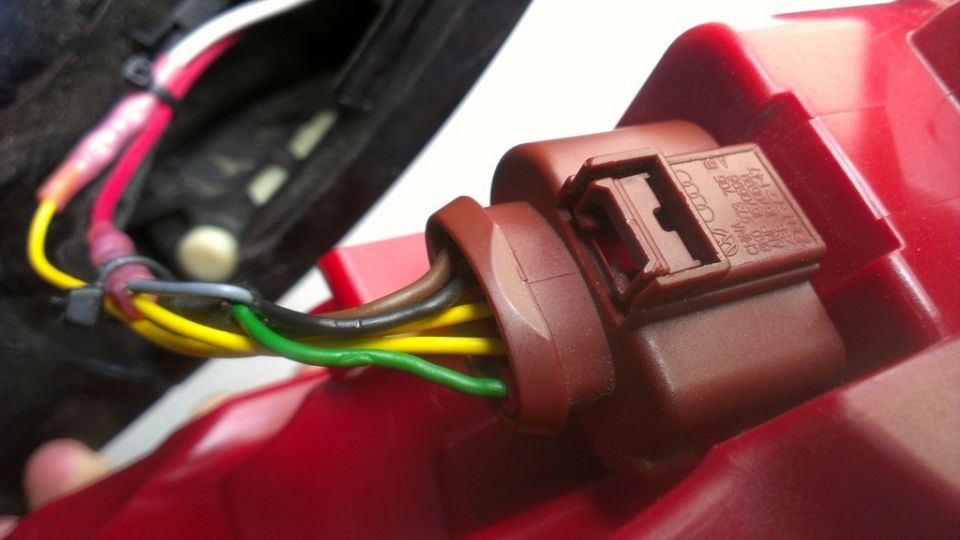
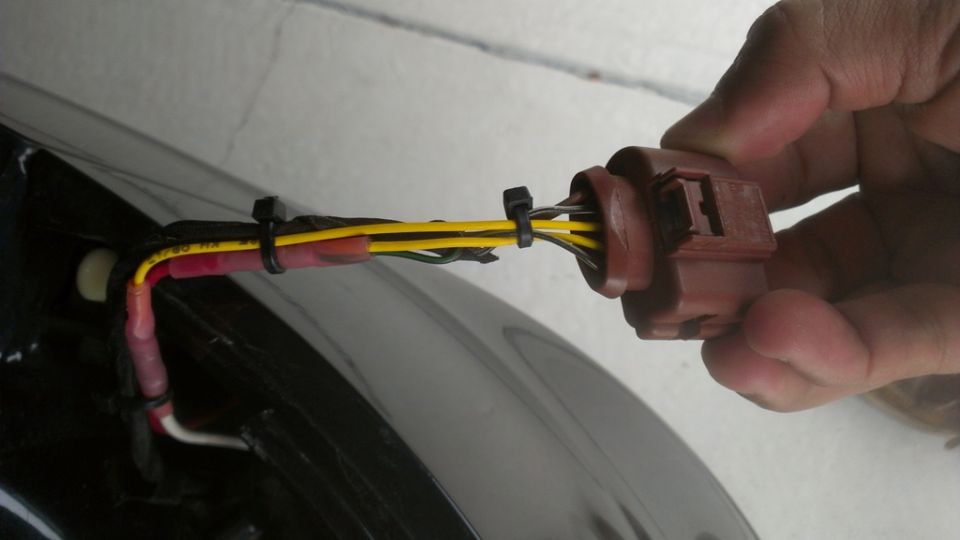
Build your adapters: Either remove the pins from existing connectors by unlocking their tab, or use the new pins.
To give an idea of the rationale, here's the wiring for an euro-spec car:

Now here's the wiring for my US-spec car (MY2012):
Left Outer
Pin 1: Turn, Green
Pin 2: Brake, Gray-Black (feeds Pin 2 left inner thru trunk lid)
Pin 3: Red Stripe (feeds from Pin 3 left inner coming from controller compartment)
Pin 4: Back-up light, Black
Pin 5: Ground, Brown
Left Inner
Pin 1: Turn, Yellow-Gray
Pin 2: Brake (feeds from Pin 2 in left outer)
Pin 3: Red Stripe, Gray
Pin 4: Fog light, Black-Blue
Pin 5: Ground, Brown
Right Inner
Pin 1: Turn, Gray-Blue
Pin 2: Brake (feeds from Pin 2 in right outer)
Pin 3: Red Stripe, Gray
Pin 4: Fog light, Gray-White
Pin 5: Ground, Brown
Right Outer
Pin 1: Turn, Black-Yellow
Pin 2: Brake, Black-Green (feeds Pin 2 right inner thru trunk lid)
Pin 3: Red Stripe (feeds from Pin 3 right inner coming from controller compartment)
Pin 4: Back-up light, Black-White
Pin 5: Ground, Brown
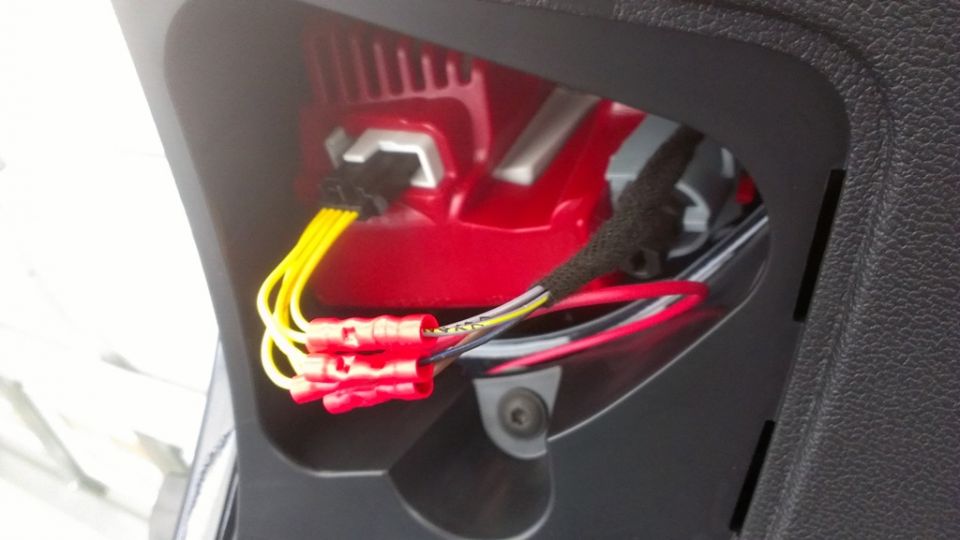
Use a crimp tool to punch together internal cables. Use a crimp tool plus heat gun, for binding together the additional cables going to the trunk lid and from the controller compartment, as they will be exposed to the elements.
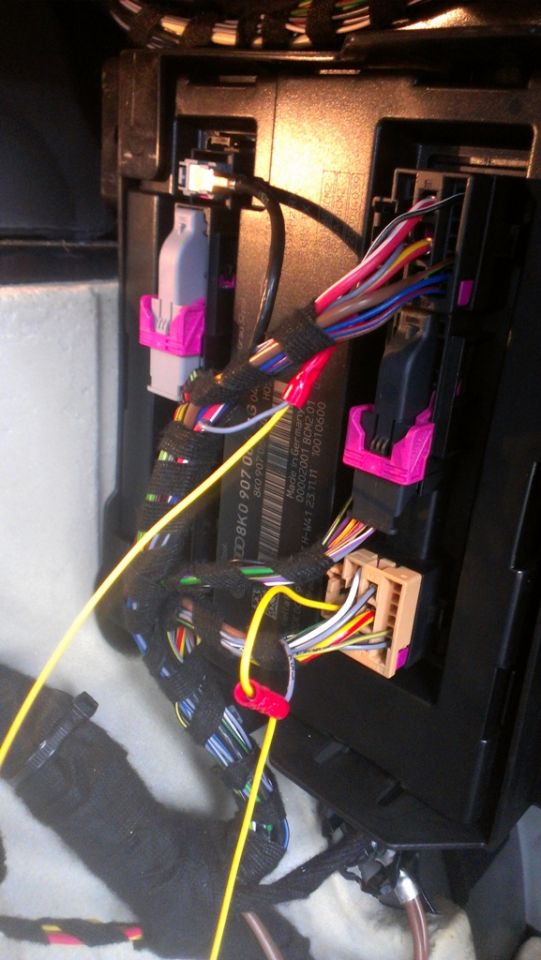
Here's a detail of the wiring done near controller 46-Central Conv. (right side cover in trunk), in order to bridge the gray cable on each side over to the outer lights (see diagram above). Tip: Locate the gray cable on each of the square connectors (black at top, beige on bottom) going into the panel. Then cut where convenient and crimp to bind the extra cable.
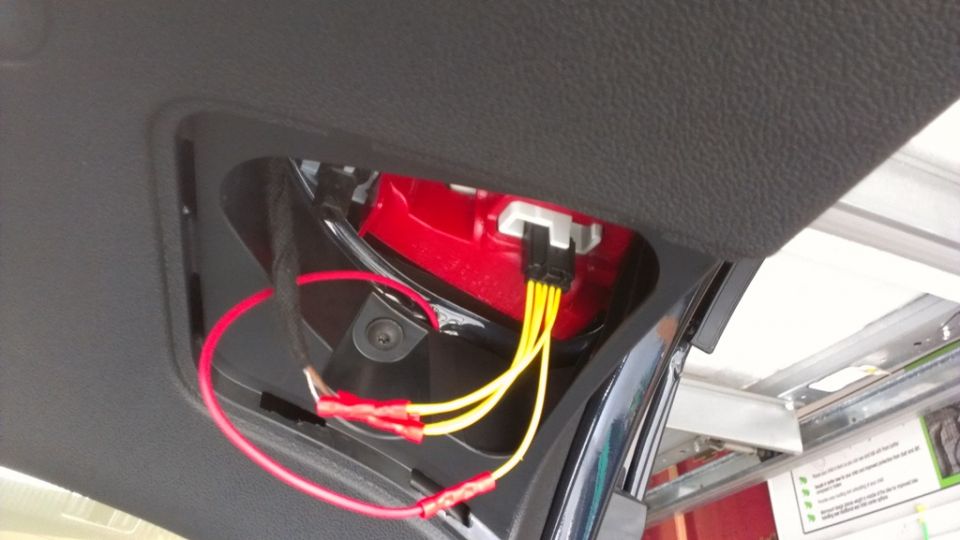
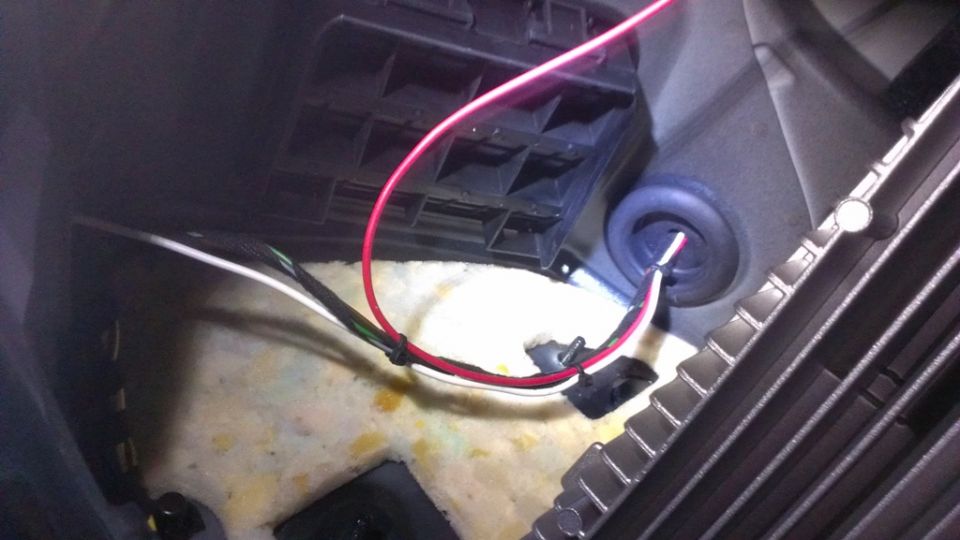
I found convenient and ideal to run the outer cables thru the grommet next to the vents. Note how pink and white extra bridge cables go out to the outer light units.
Per Audi's install guide, make sure to vibration-proof loose cables before closing everything.
Coding
Much has been said about the complexity of coding these lights when, in fact, coding is pretty straightforward. Login to the control unit 46 by entering security code 16017. Then, using the Coding opiton, change the following channel values:
Channel Old Value New Value New Purpose
195 14849 14849 Red stripe left
196 14881 14881 Red stripe left
197 13320 5125 Brake right
198 13352 5157 Brake right
203 14849 12 Turn left inner
204 14881 44 Turn right inner
205 13 13 Reverse left
206 45 45 Reverse right
207 73 73 Fog left
208 105 105 Fog right
209 51202 12 Turn left outer
210 51234 44 Turn right outer
Optionally, if you want to enable your LED strips as DRLs, go to 09-Cent. Elect., long coding adapter, and enable the option "Daylight running lights via LED tail lights". Downside: This will also cause your plate lights to also light during the day.
Credit goes to our friends in Germany for this extreme useful 76-page thread:
http://www.motor-talk.de/forum/fl-ru...65.html?page=4
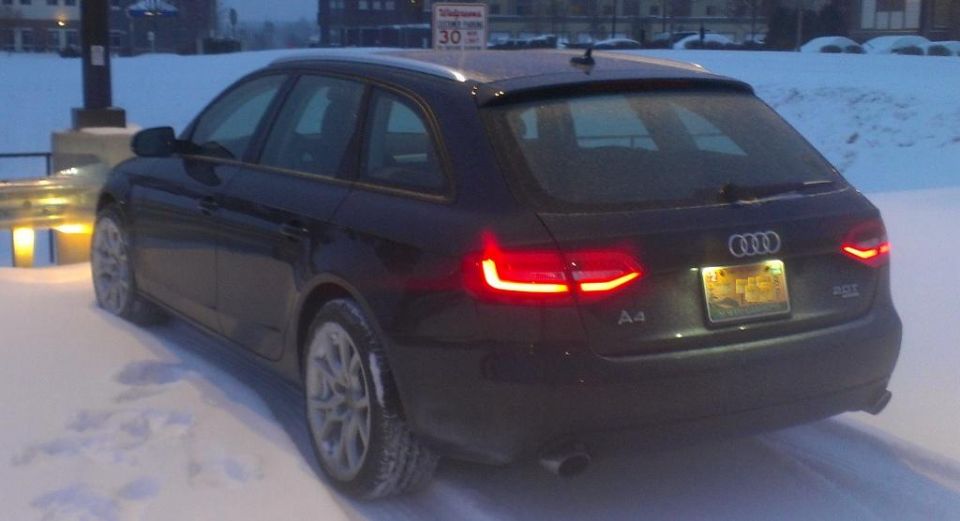
Here's the only picture I've taken of the new lights. The truth is, the car looks much better, even when they aren't on.

 Reply With Quote


 Retrofits: FL taillights / MMI 3G & 3G+(Street view incl.)/ Color Cluster & FL S5 Cluster/ BiXenon/ ADS Lite
 Another thing I'm confused about: if each connector has five wires (x4 connectors), why does the OP list only 11 pins to buy?


Bookmarks