


Needed to replace my clutch slave cylinder and MEC gave me these steps to make it easier, I thought they could be usefull for other members so im posting them here.
Step 1: Remove coolant reservoir (Remove the philips screw and unclip the hose held under it before putting it aside)
Step 2: Find your allen socket set, and find the one that is either 6 or 8mm. I forget. (6mm in my case, I heard it varies)
Step 3: Reach into the engine bay and feel the tranny, you should be able to find the slave pretty easily, its located on top, find the one bolt that holds it in. It has blue loctite so it takes some working to get out. Wrench it out using that allen bit.
Step 4: Pull the slave out super slowly and be careful not to damage the rubber.
Step 5: Look at the slave, it has a smaller bleeder screw cover, take it off and hold it in your hand, you are about to use it.
Step 6: Take a small flathead and pry up on the little metal tab that retains the slave to the hydraulic line, Ok. Get ready. Quckily pull off the line and slip the rubber grommet onto the line to keep it from leaking fluid everywhere. Hmm Hmm that worked quite nicely. You have to be carefull not to lose the cup washer on the hydrolic line (Ask me how I know) it might stay stuck in the old slave, might fall on the ground or it might remain where it should be on the tip of the hydrolic line.
Metal clip :

Cup washer :
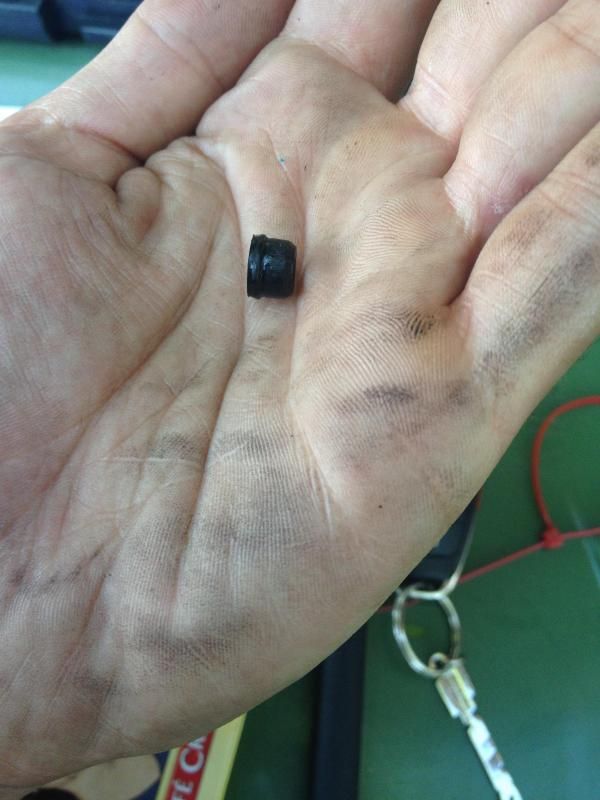

Cup washer :

Step 7: Get your new slave, or your old slave whatever you are doing. Just make sure it is dry. Because you will have to compress it by hand, and air is much easier to compress than liquid. hydraulics or something like that, rocket science.
Step 8: Grease up the slave, and throw her in the hole. Heh heh, alright now use that same bolt you had, throw some loctite on it and screw it in. By hand first to avoid crossthreading. Cool.
Step 9: Pull the grommet off the hydraulic line, and quickly stick it into the slave, press down on the metal retaining tab and you are good to go!
Step 10: Blueballs, car won't go into gear.
Different techniques to bleed your system :
YOU NEED DOT 4 BRAKE FLUID
Technique 11.1 & 11.2: (From the JHM DIY)
YOU NEED DOT 4 BRAKE FLUID
Technique 11.1 & 11.2: (From the JHM DIY)
11.1 : Gravity bleeding : (My favorite)
A : Car as to be level or the rear of the car a little bit higher than the front (If the front is jacked, it will make the bleeding near impossible)
A : Make sure the brake fluid reservoir is full (clutch master and slave share this reservoir with the brakes)
B : Crack the bleeder screw at least 1 full turn (360 degrees) to 2 full turns (720 degrees) Note : 6mm wrench
C : Put a drop pad or rag below it on the ground.
D : Take a break and within 5 to 30 minutes you should see fluid dripping out.
E : Once the fluid starts dripping tighten down the bleeder.
F : It is now about 90% ot 95% bled and now you may only have to do the above bleeding procedures once or twice. This saves a lot of headache and aerated fluid.
E : Pump the clutch pedal several times, then hold it to the floor. While the pedal is on the floor crack the bleeder and then close. Repeat this 2 to 4 times just to be sure. At this point the pedal should feel great. Once you think you have it, give it a 30 minute break to make sure any incedental aeration settles down. Then come back and bleed it one more time
11.2 : Forced bleed :(Get ready she's a squirter)
A : Crack the bleeder first, then push the pedal to the floor and hold it. Then while still holding the pedal to the floor close the bleeder. Then pull the pedal up, only once the bleeder is closed. Repeat this procedure several times until fluid comes out. (Get ready she's a squirter)
B : Once fluid comes out then do it at least two more times to be careful.
C : At that point you can switch to the old pump it up and hold it to the floor method. To do that, you just pump the clutch pedal several times, then hold it to the floor. While the pedal is on the floor crack the bleeder and then close. Repeat this 2 to 4 times just to be sure. At this point the pedal should feel great. Once you think you have it, give it a 30 minute break to make sure any incedental aeration settles down. Then come back and bleed it one more time, if you hear or see air do it again. If at any point you start with the pump it up first then crack it method you should give it a 30 minute break to let the aeration go away in the fluid. Once you aerate the fluid and just keep trying, you will be there forever and it will never bleed properly. PATIENCE AND PROPER PROCEDURE ALWAYS PREVAIL.
11.3 : MEC's bleeding procedure : (Power bleeder)
A : Lets make that slave bleed. This is tricky because the slave is quite stubborn. So Take your favorite pair of jacks, and raise the rear as high as possible. Keep the nose of the car on the ground, and try to go as high as possible on your jack stands to get the rear to elevate. There are weird air pockets in the slave lines, however, using witchcraft we can get around this. Start by drawing a circle around you using only the ashes of a loved one. Doesn't have to be your loved one so thats a plus. Draw a star within the circle and start chanting whatever makes you feel spiritual. You will need to make a sacrifice, I suggest lamb, because later you can cook it up and make some tasty gyros. Your taste may vary. Next have someone flicker the garage lights on off on off really quick. Also light some candles and incense. Cool thats probably enough.
B : Hook up your power bleeder to the brake reservoir cap, and then hookup a line onto the slave bleeder valve. Ok! Lests do this, Pressurize the fluid that you put into the power bleeder to 15-20psi, open and close the bleeder valve repeatedly until no more air bubbles are coming out.
C : Gyros and beer. mmmmmmm
I'm not taking credits for this DIY since some was from the JHM B5 S4 DIY and some from MEC's voodoo techniques, hope it helps.

 Reply With Quote


Bookmarks