


Anyway, this will unstick you intake manifold flap for free or nearly free, depending on what you already own. I had to buy a wire brush for dremel/drill that cost $3, and that was the only cost other than fuel to get to the store. Read on:

^We start by putting the car in service position. This is required. There are many write-ups out there for this, and many of you are probably already pretty good at it. Note some tricks in the following photos: put some tape over the edge of your fenders where the bumper studs poke through. This will help keep your paint nice.


^Stuff stuck in between the radiator core and the frame rails. The little plastic damper cushions from the packing on new Audis work great.

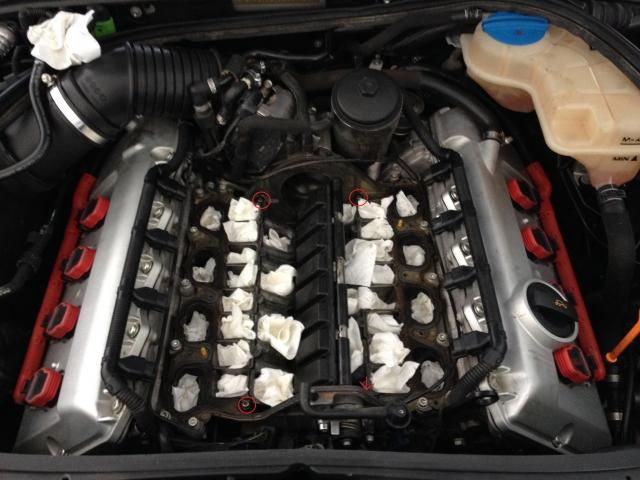
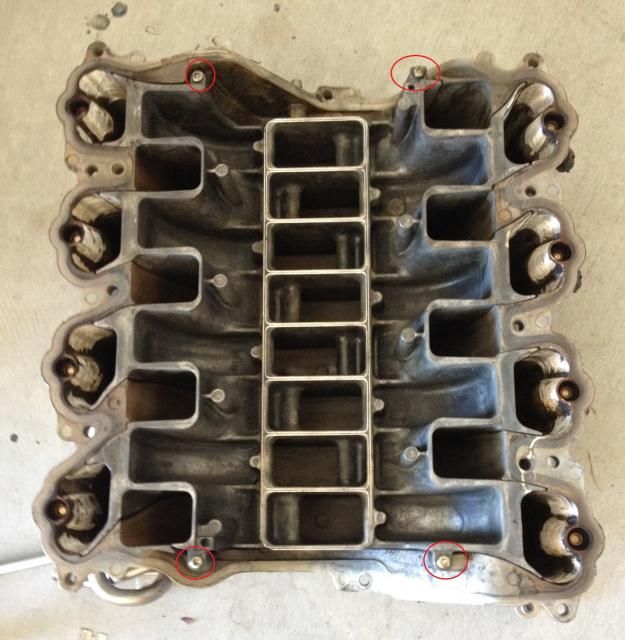
^The beast we are here to slay

^Take the bumper bolt and thread it into one of the holes from the bumper holder on the core support, and you can hang the core support on this. Works great! Just be careful when reinserting the bolt into the bumper bar bracket on the core support - there is a plastic keeper in there that holds on to it. You'll have to align it when you return it to its rightful post.

^Note the orientation of the shaft. Down is the low RPM position and to the left is the high RPM position. If yours is stuck but moveable by hand, PLEASE put it in the high RPM position until you fix it. You'll understand why later.
disclaimer, I am told that this is backwards. It's been a while and my memory is not so good sometimes, so let's just go with those folks being correct


^Now, remove these two torx bolts, then gently but firmly pry the cup of the long actuator arm off the ball of the rotating arm of the flap. No need to remove the vacuum line; just move the thing out of the way. Better than risking breaking an old vacuum line that can be hard to get down to.

^This is what it should look like now.

^Now remove the center bolt, hex, on the flap arm itself.

^And this is what it looks like.

^Now, pull the hose circled in green and squeeze the clip shown in red, and set this aside as well.

^And we're here now. Good time to mark the orientation of the arm to the shaft, before we remove the arm. This will help later.

^Now pull the arm off. Immediately when it comes off, it will want to spin counterclockwise. DO NOT LET IT MOVE THE SHAFT. Let it rotate gently about 120* or so, and it will easily come off. The spring will come with it. Set both aside.

^Now we're here.

^You want the big aluminum housing to come off of the plastic covered shaft here. Sounds easy, but this is the exact part that is refusing to let it turn, so be prepared for a huge pain the rear.

^Start by prying the aluminum housing out away from the manifold a little. Use tiny screwdrivers and tap them in. You won't hurt anything as long as you don't make big gouges. It's a good idea to mark the orientation of the housing to the manifold, and to the shaft as well.


^Put progressively larger items behind the aluminum housing as you tap away. You can use the housing's bolts to keep it from coming out too far. Once the housing comes out far enough, it will pop off, but the shaft will try to come with it, which won't do you any good. Not to worry if the flap shaft falls out of the rear housing - you can fish it back in in about 20 seconds or less. You'll probably get pretty quick at it by the time you're done with this
Keep tapping the shaft toward the rear of the car, using a piece of wood to protect the shaft nose from your tools. You do NOT want to bust it up.

^Once you get the shaft nose all the way into the housing, this strategy will cease to work. So stop!

^Now you can put the shaft bolt back in. Make sure it's threaded in several threads, and begin to whack on that. Here I am holding the housing out with a pair of pliers. Unthread it a bit if needed, but not too much. When you get near the end, you'll have to man it up or risk breaking those little threads. Just cowboy the F up and twist and pull it the last tiny bit.

^This is our culprit. You can kind of see the galling inside.

^Note the seal in red and the outside o-ring in blue. The o-ring can be had at the hardware store, but I don't know about the seal. Let's just be careful and not damage either, okay?

^This is what the shaft looks like without its housing. There is only plastic on metal, so we will need to make sure this thing is *perfect* when it goes back together.

^The tool I chose for the task. STEEL wheel ONLY, NOT STAINLESS. You want to very slowly move through the part, making even passes up and down, and making very sure to get the opening behind the inside seal but NOT hit the seal. You can't buy this part separately. Take your time, making motions like honing a steel cylinder in a block. Do this in little bits, and test fit at least as many times as you can stand it. This thing will hone quickly if you lay into it, and you can't add back material. So be patient.

^You can still see a little of the worst part of the galling. This isn't really important - the fit is much more important.

^Test fit it backwards, too - you want to make sure that you're being even in removing material, so you don't want to find out that one side fits better than the other. If you do, obviously, work on the side that's still too tight.

^Reinstalled - fits perfectly. It should slide on smoothly, there should be no wiggle at all, and it should rotate freely. Clean it up, take a soft brush to the plastic shaft for basic cleaning, apply a little silicone grease to the moving surfaces, the o-ring, and the seal, and reinstall. Torque spec = Gutentite, the typical German small bolt spec.

^Proper orientation of the spring on the arm.
 20lb wheels + Michelin PSS
 Reply With Quote


 His: 2012 Moonlight Blue Metallic S5 Prestige
 Hers: 2014 Lava Gray Metallic Q5 2.0T
")


Bookmarks