Audizine - An Automotive Enthusiast Community

Results 1 to 23 of 23
  1. #1
    Established Member Two Rings dlev91's Avatar
    Join Date
    May 19 2012
    AZ Member #
    93771
    Location
    Ft Lauderdale

    Question Amber delete help

    Guest-only advertisement. Register or Log In now!
    Hey all

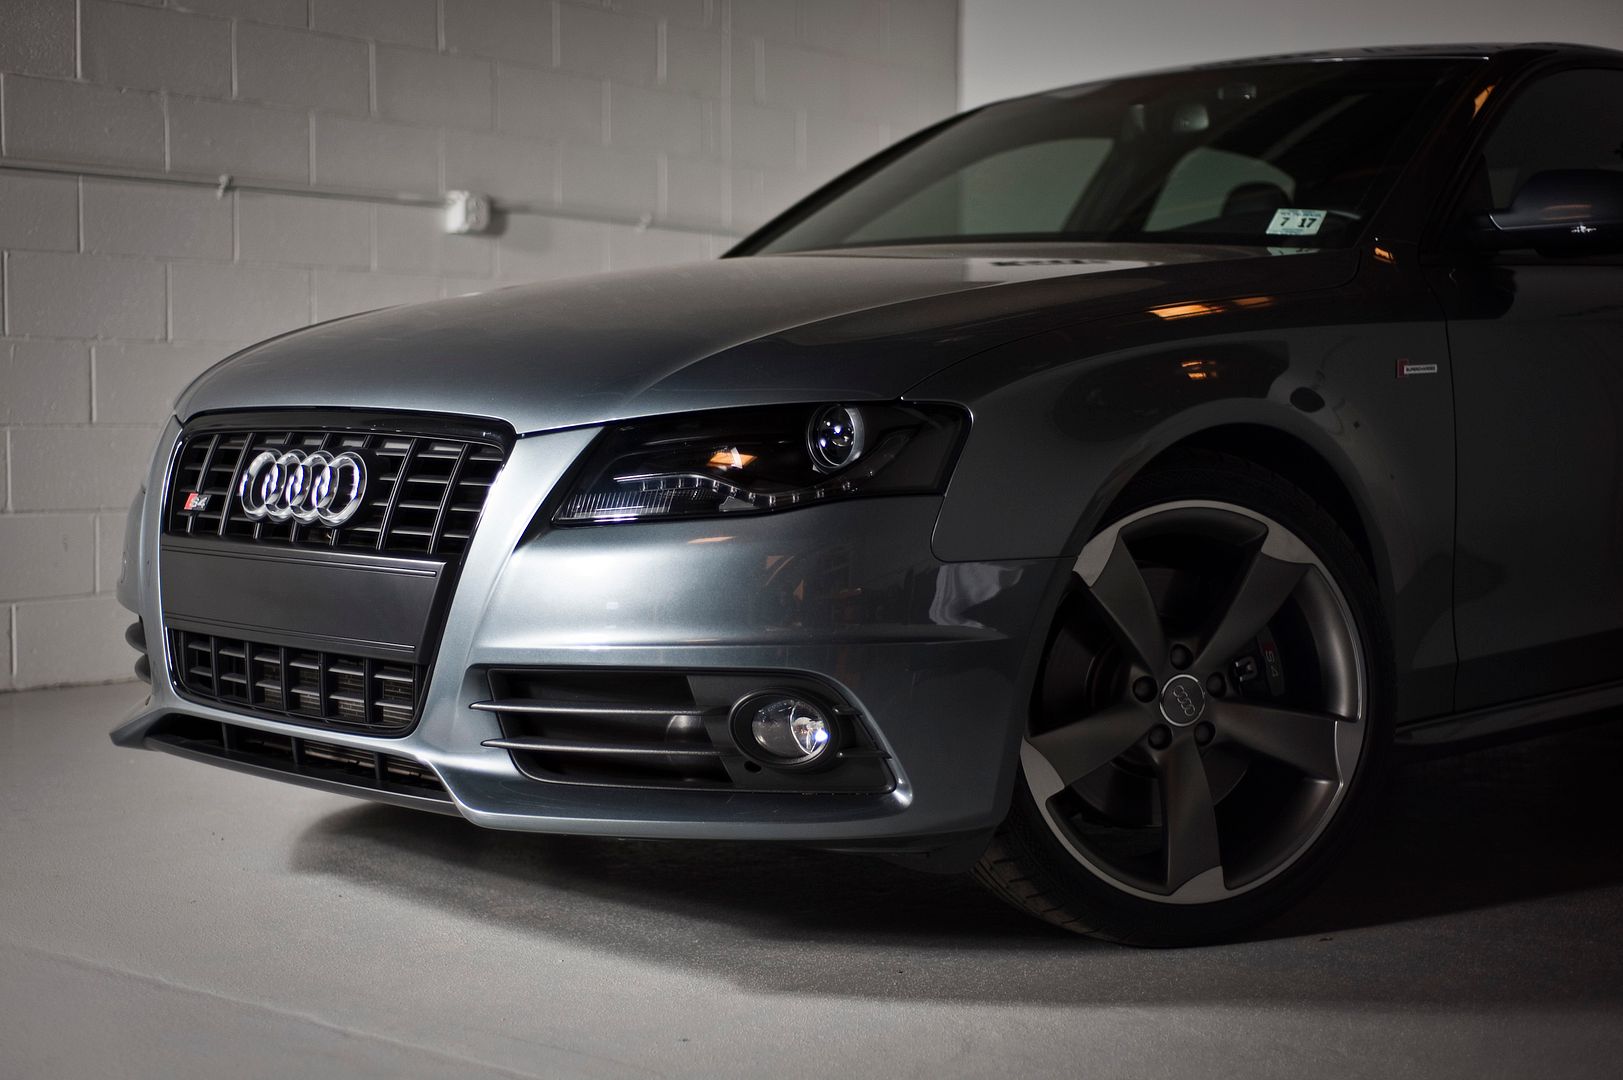
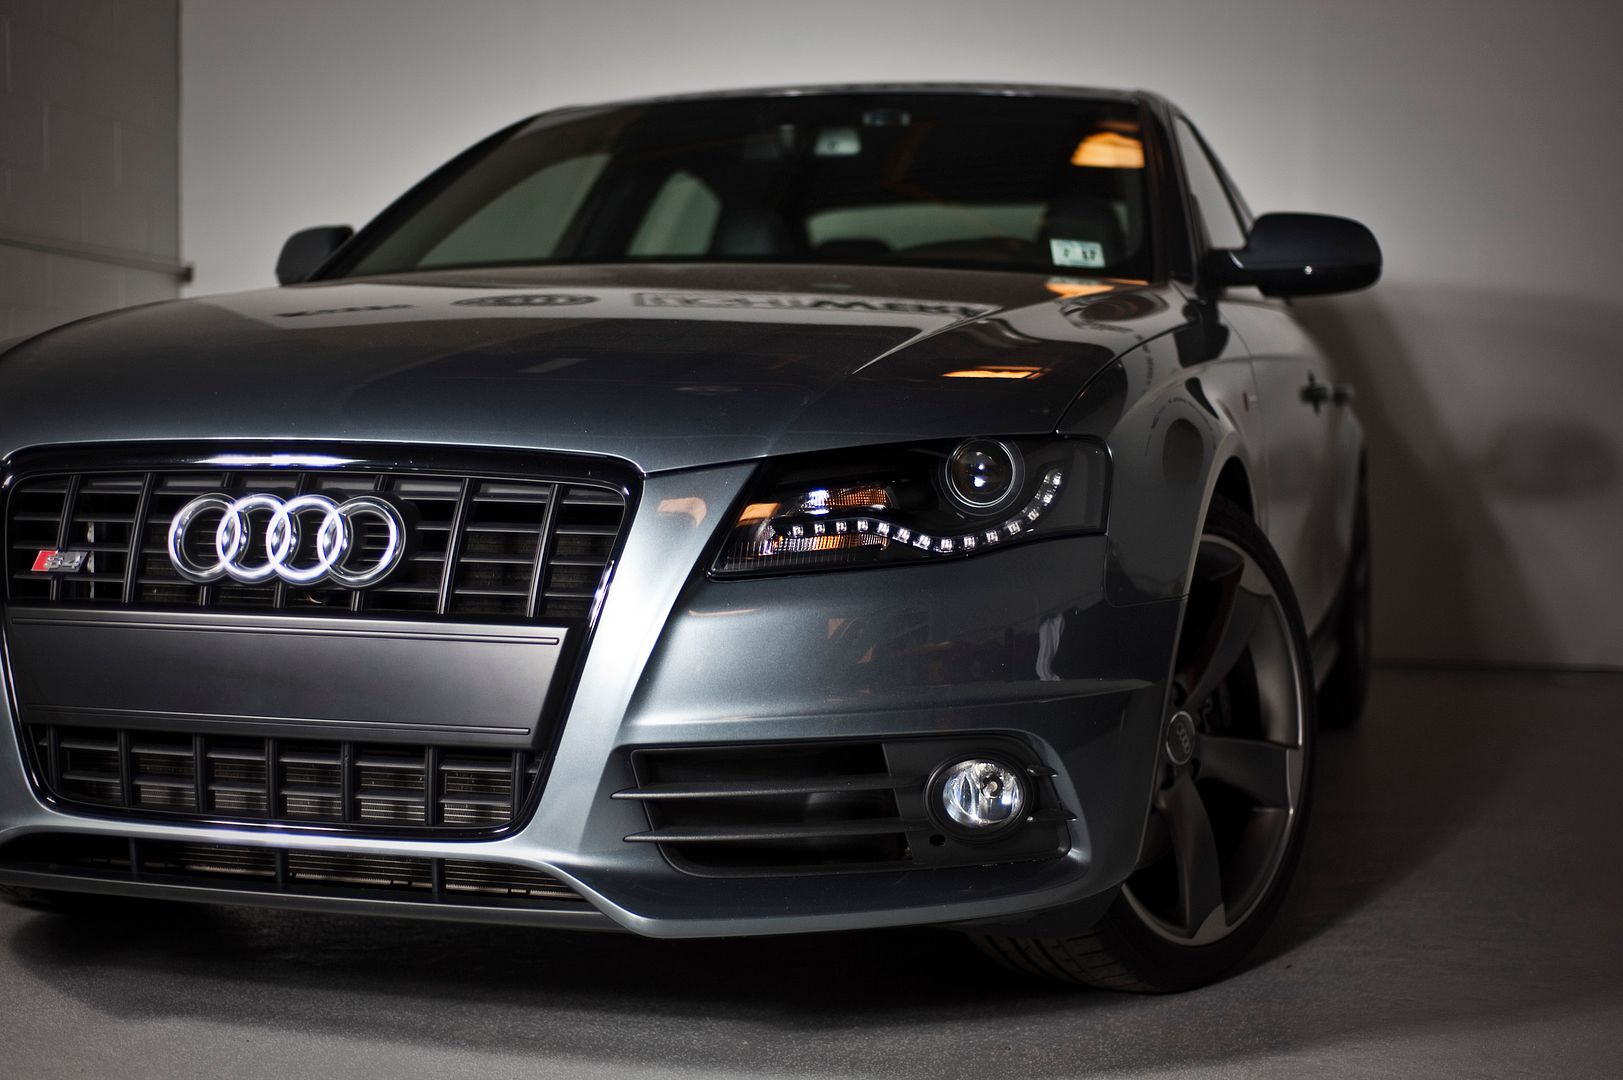
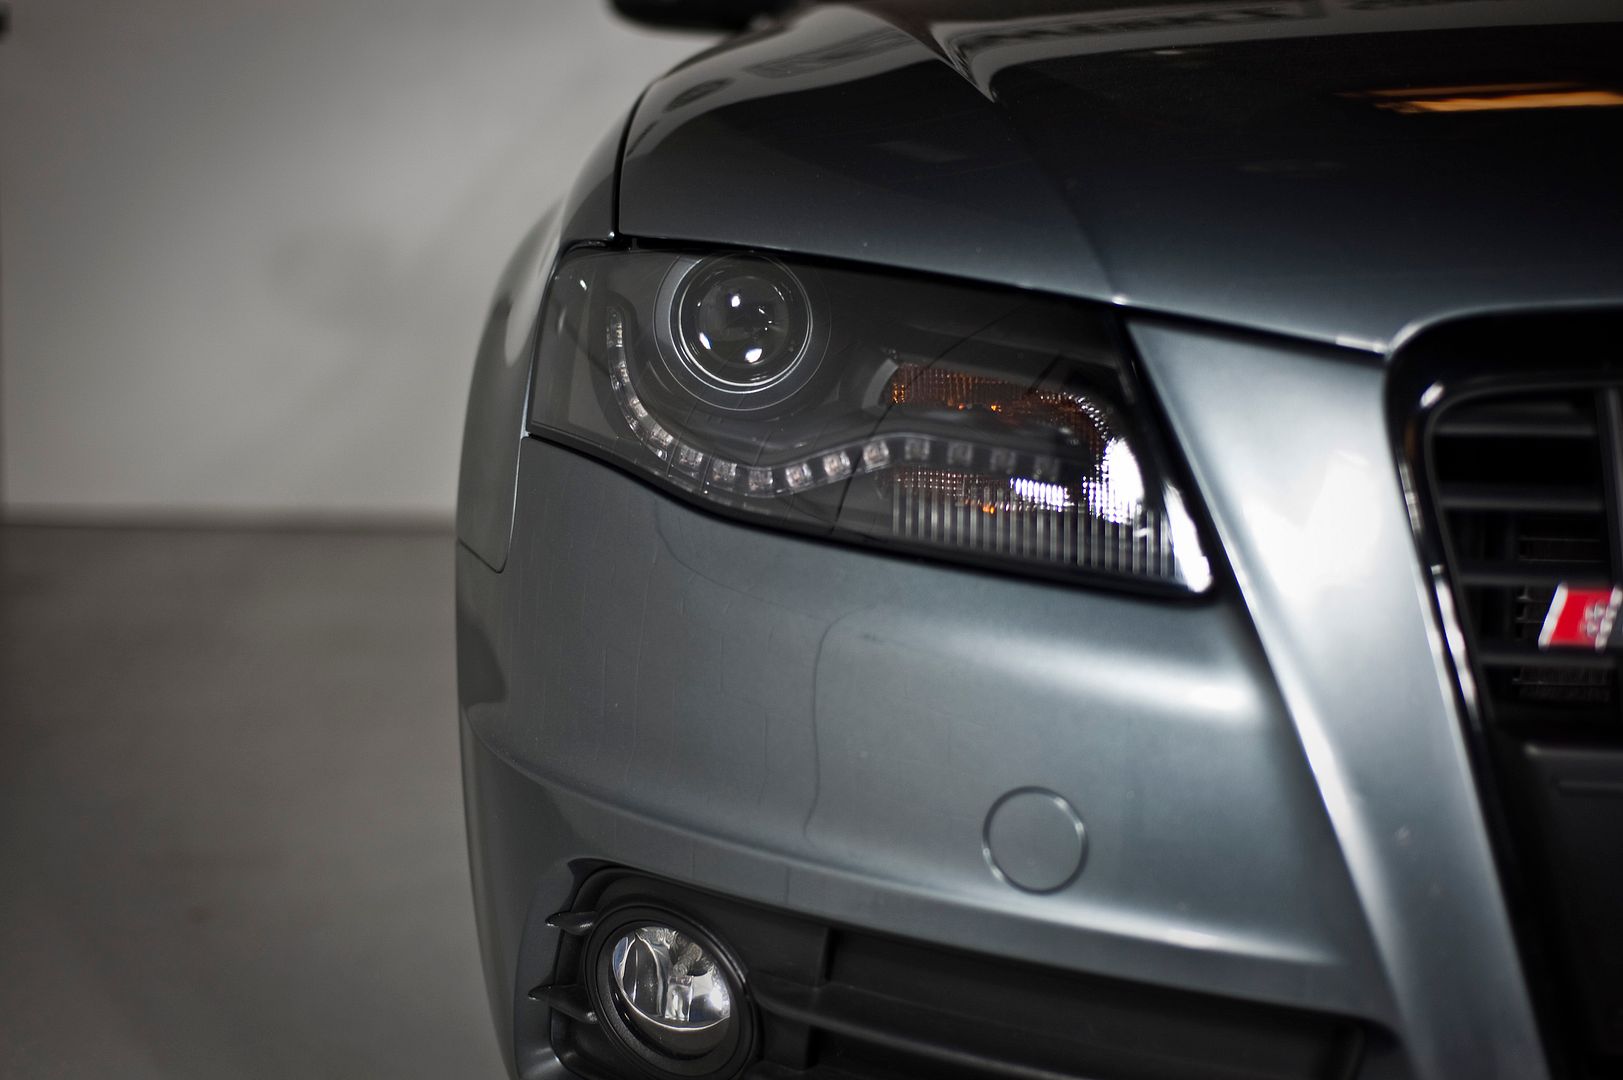
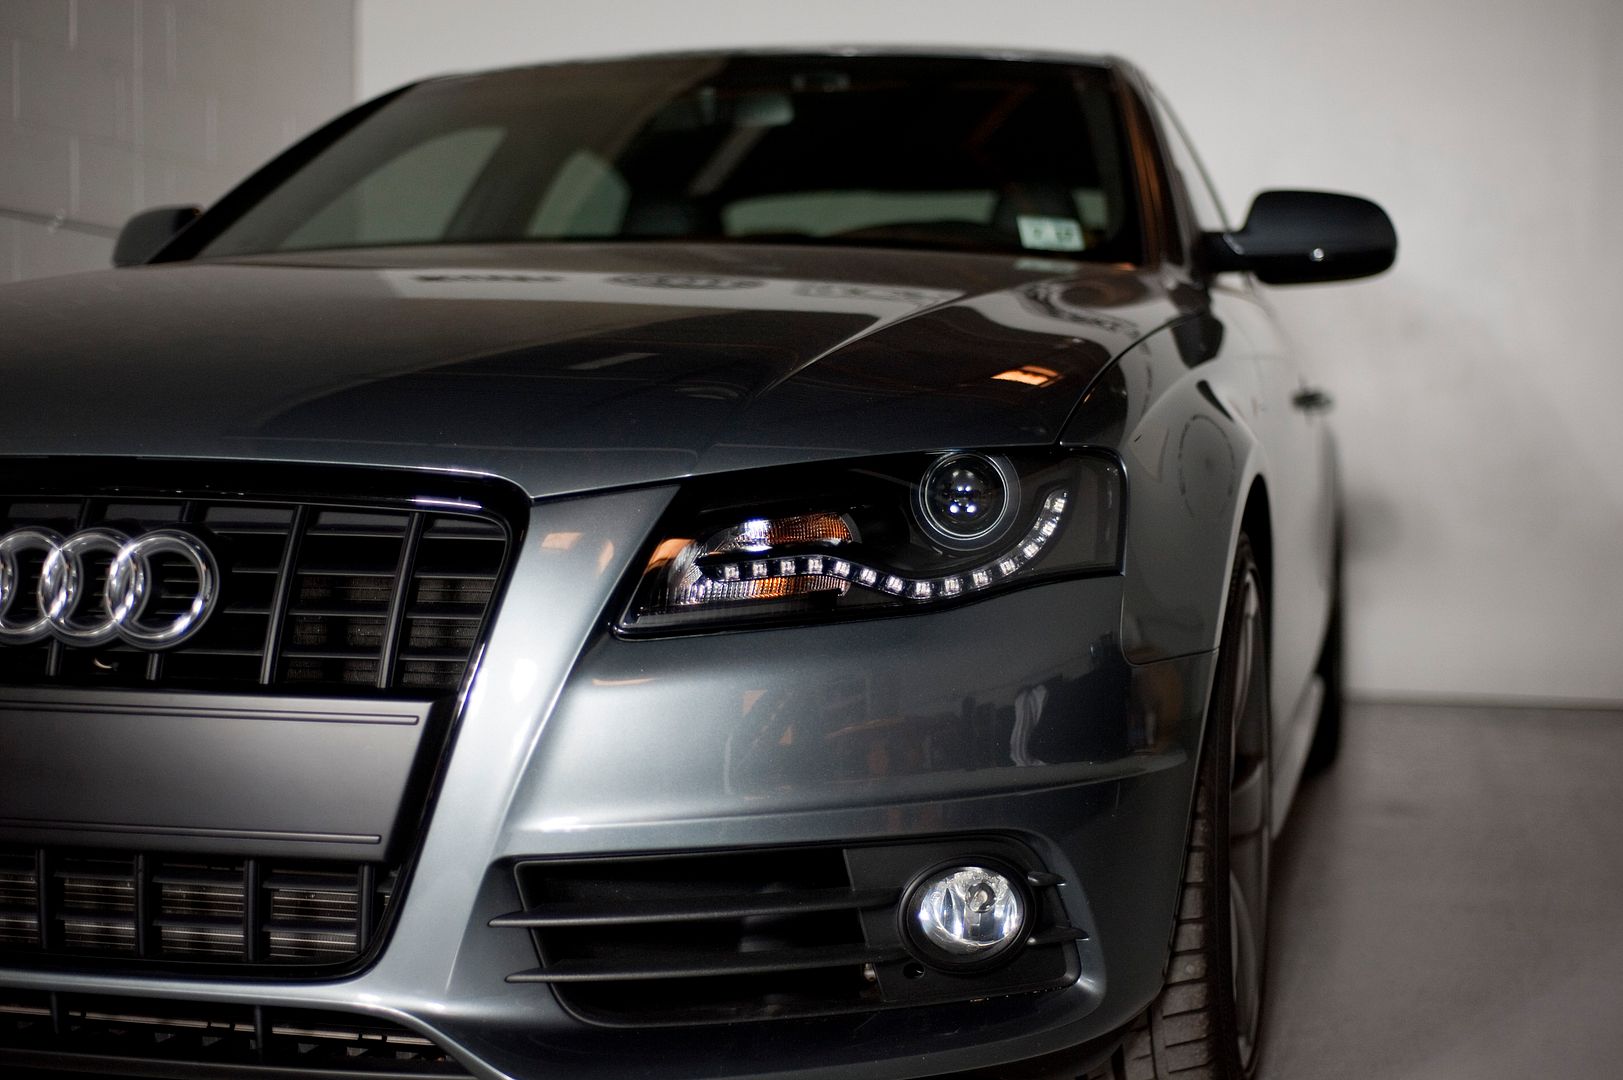
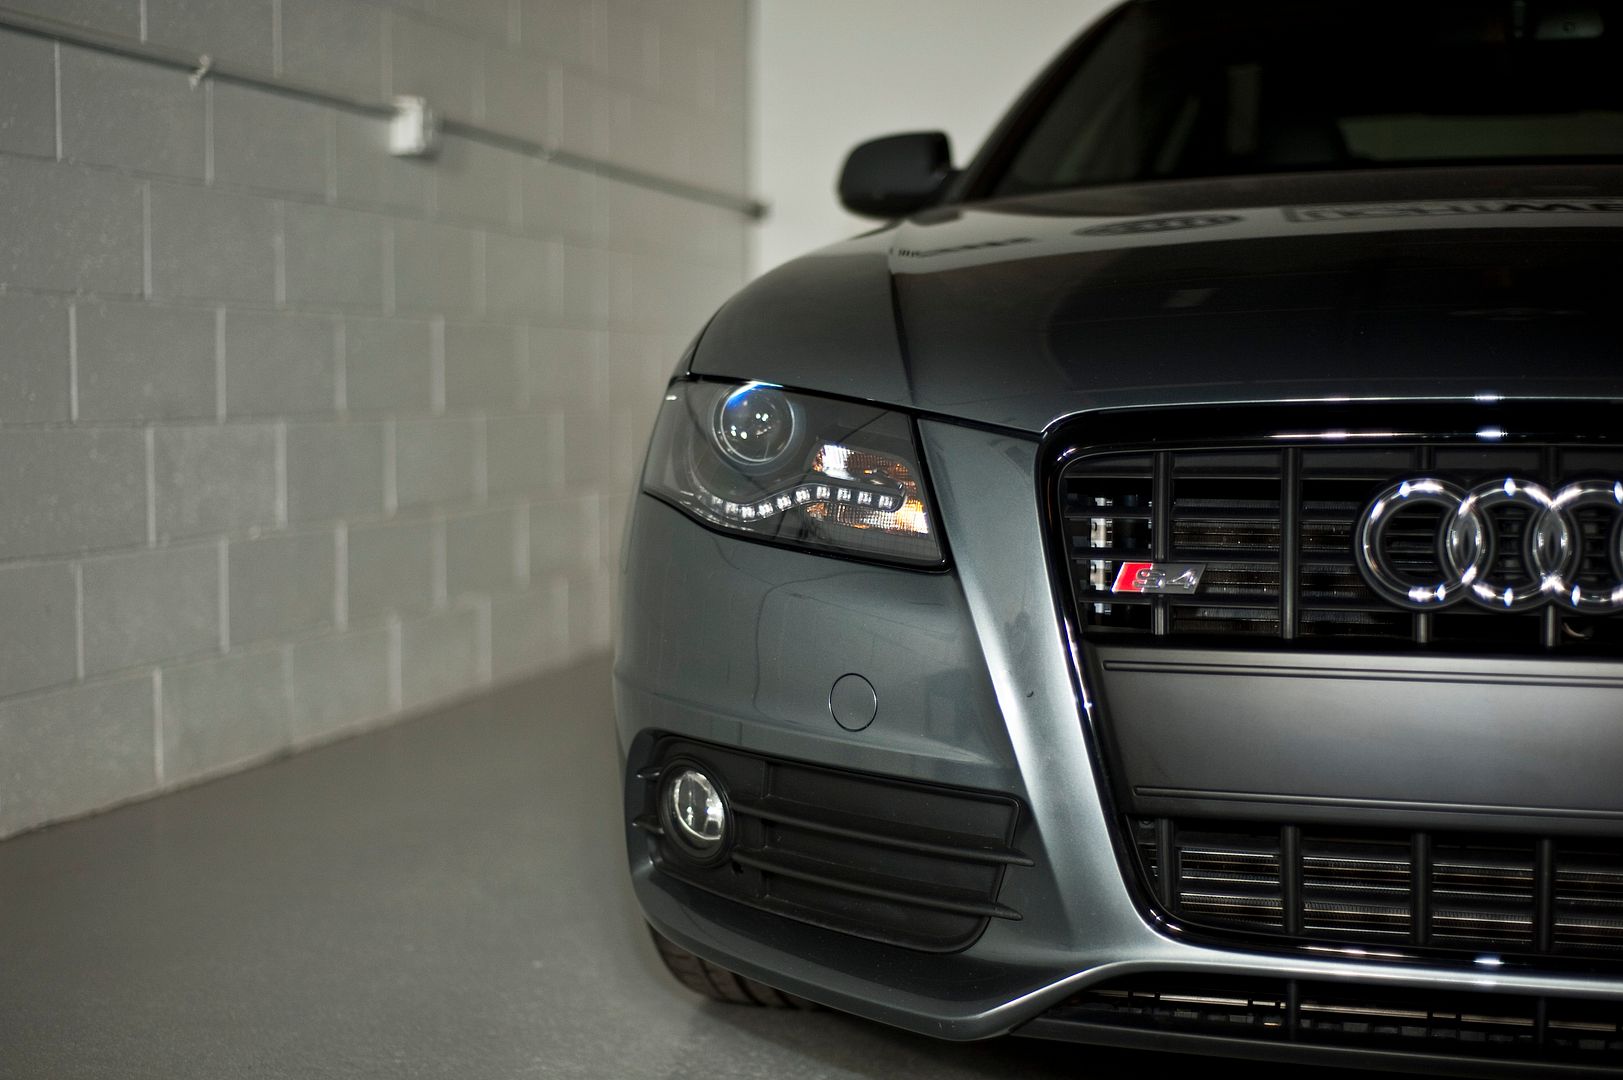
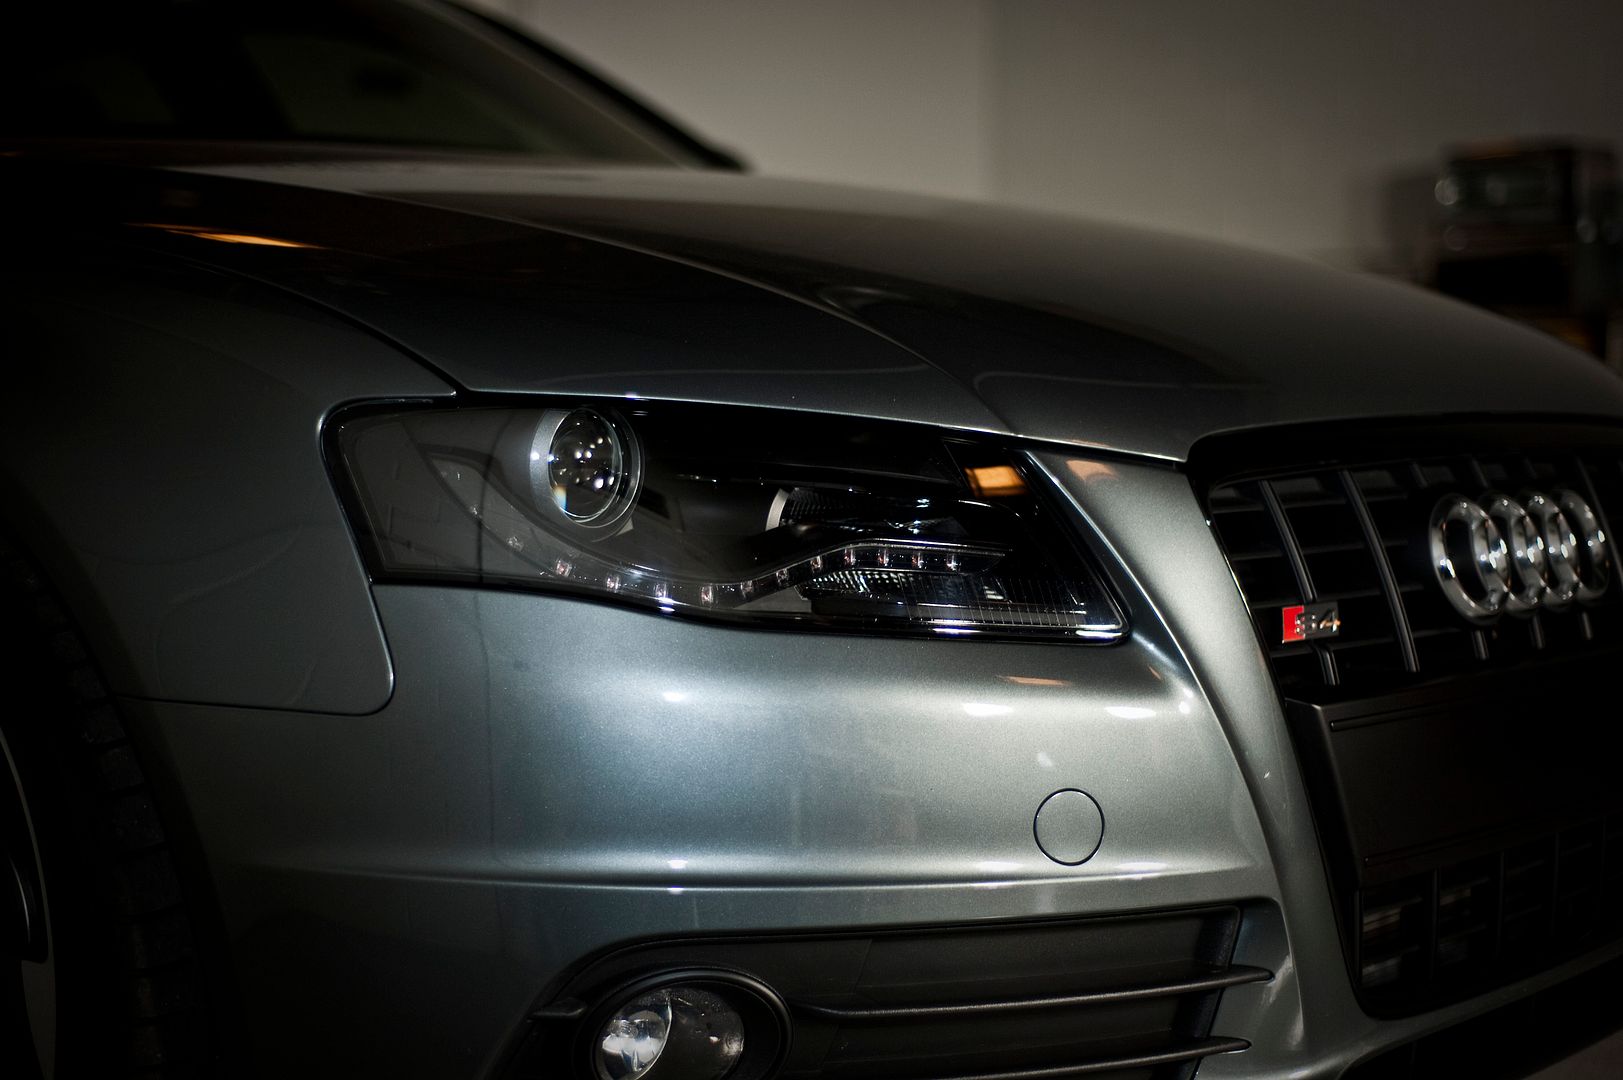
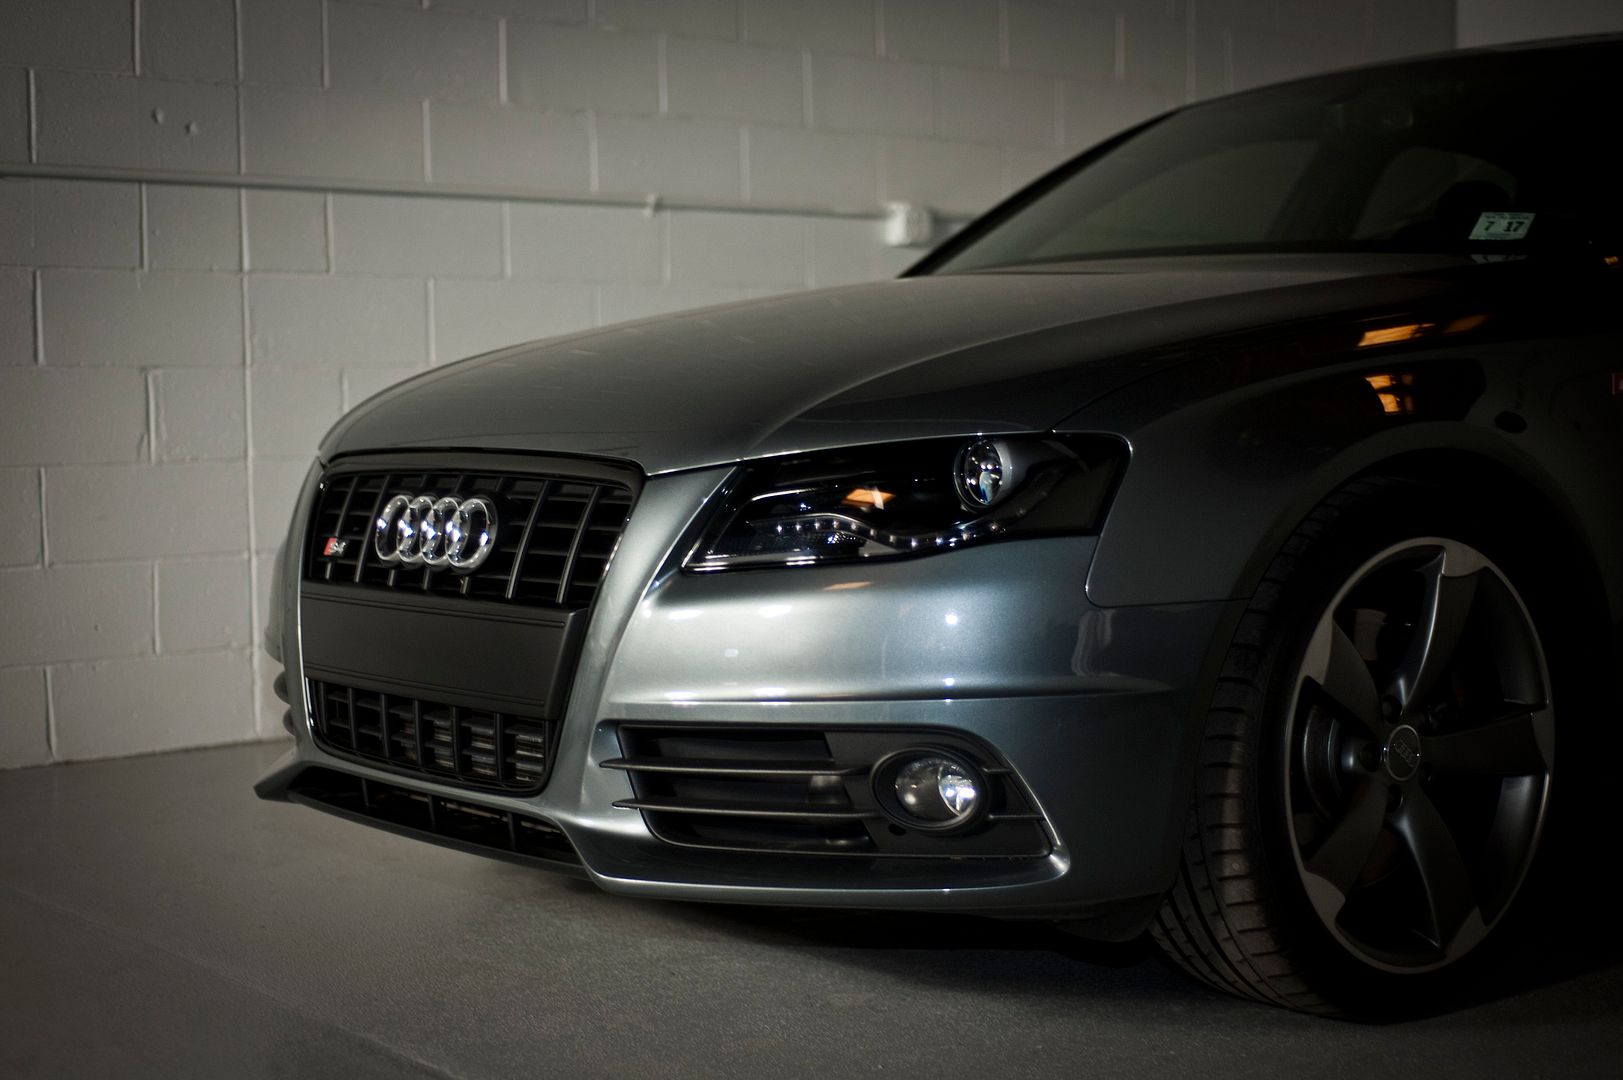
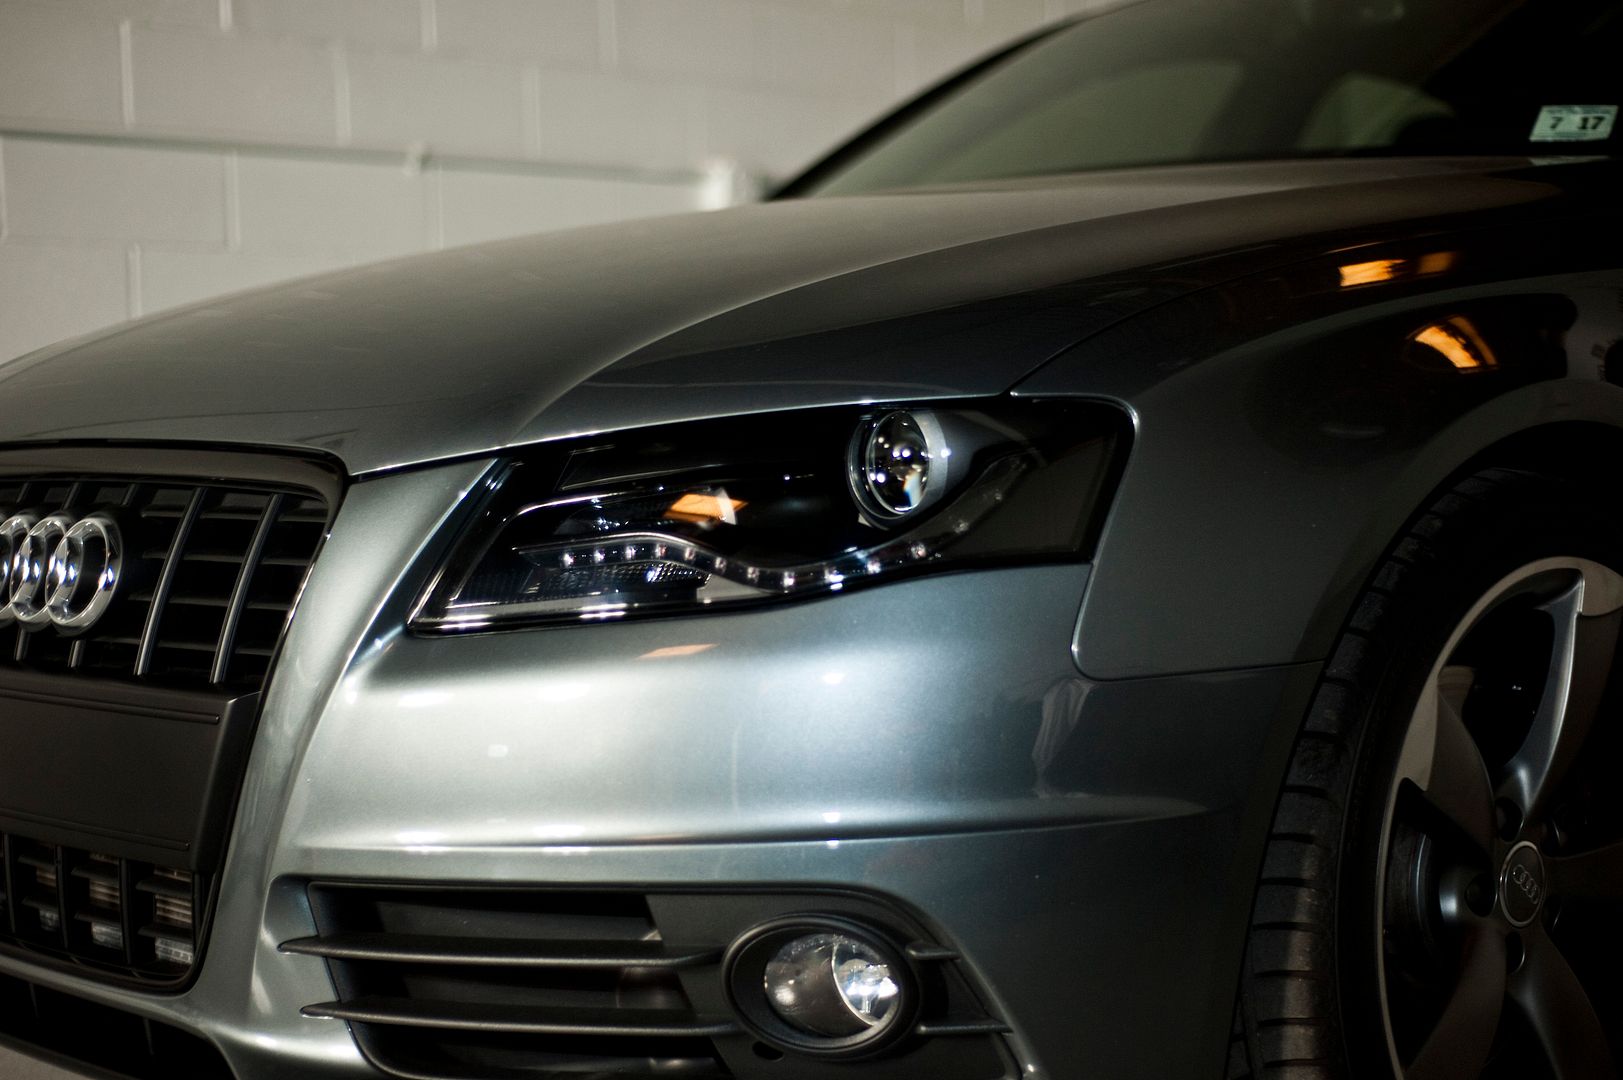
    I think we all agree that the amber on the outside parts on the headlights is a below average feature of our cars. I would love to figure out a more cost effective way to get rid of it rather than going out and buying e-codes. I've seen some take the head light apart and wrap the amber part in a silver carbon wrap, but that was just one.

    Can you guys give me some suggestions/examples of ways to get rid of the amber?
    Any help would be appreciated.

    Thanks
    2012 Brilliant Red S4 Titanium Prestige DSG, black alcantara, sport diff w/ADS, carbon inlays
    Mods: Roc Euro Intake, AWE diamond black exhaust w/ Res DP's

  2. #2
    Senior Member Three Rings sirpickles's Avatar
    Join Date
    Jun 26 2012
    AZ Member #
    95874
    Location
    The Mid-West

    the only other option is to buy some vinyl and put it on top. You can find kits on ebay.
    B8 S4 | 6spd | Brillant Black | Prestige | B&O | Carbon Inlays | Magma Silk Nappa | ADS/Rear Diff | Driver Assist
    Mods | 20% tint | AluFelgen SF-71 19x9.5 ET42 | H&R Sport Springs

  3. #3
    Veteran Member Four Rings phillips2024's Avatar
    Join Date
    Mar 03 2011
    AZ Member #
    71787
    Location
    Southern NH

    Amber delete help

    Take apart the lights and wrap or plastidip the amber

    The vinyl overlay looks very cheap imo
    2017 Audi S8+ | 2021 Audi RSQ8 | 2021 Cadillac Escalade Sport Platinum | 2007 Porsche Turbo
    2021 Sea Ray 350 SLX | 2020 Polaris Ranger Crew XP1000 | 2022 Polaris Indy VR1 850/650

  4. #4
    Veteran Member Four Rings
    Join Date
    Oct 14 2012
    AZ Member #
    102231
    My Garage
    Empty...for now...
    Location
    SE PA

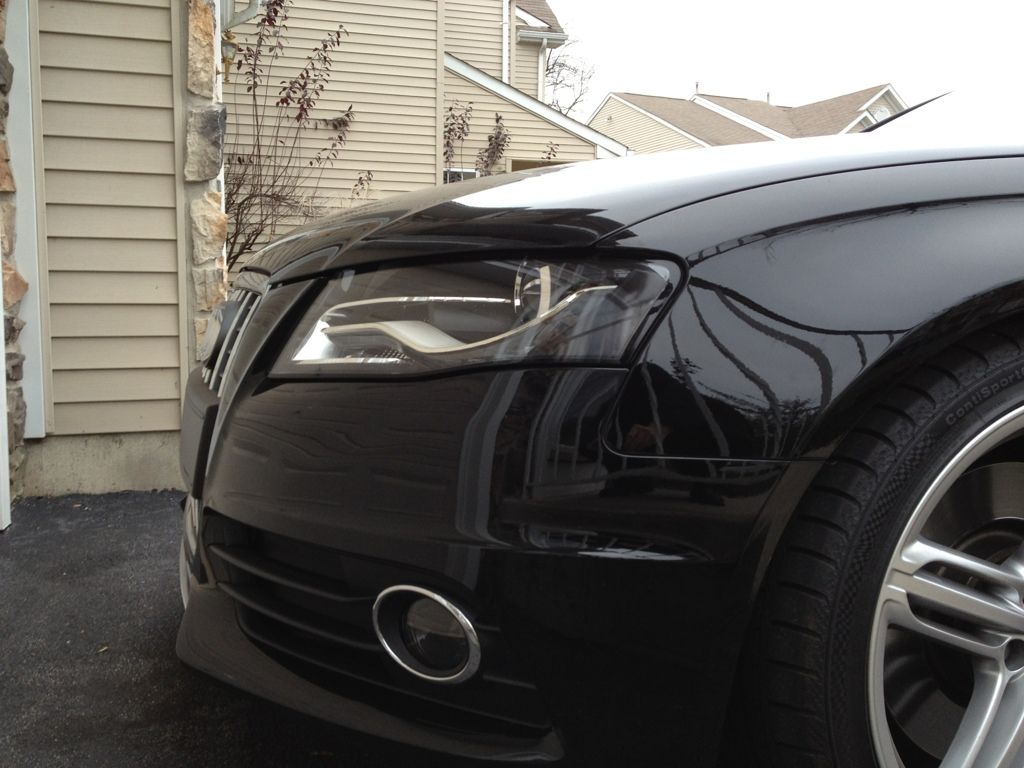
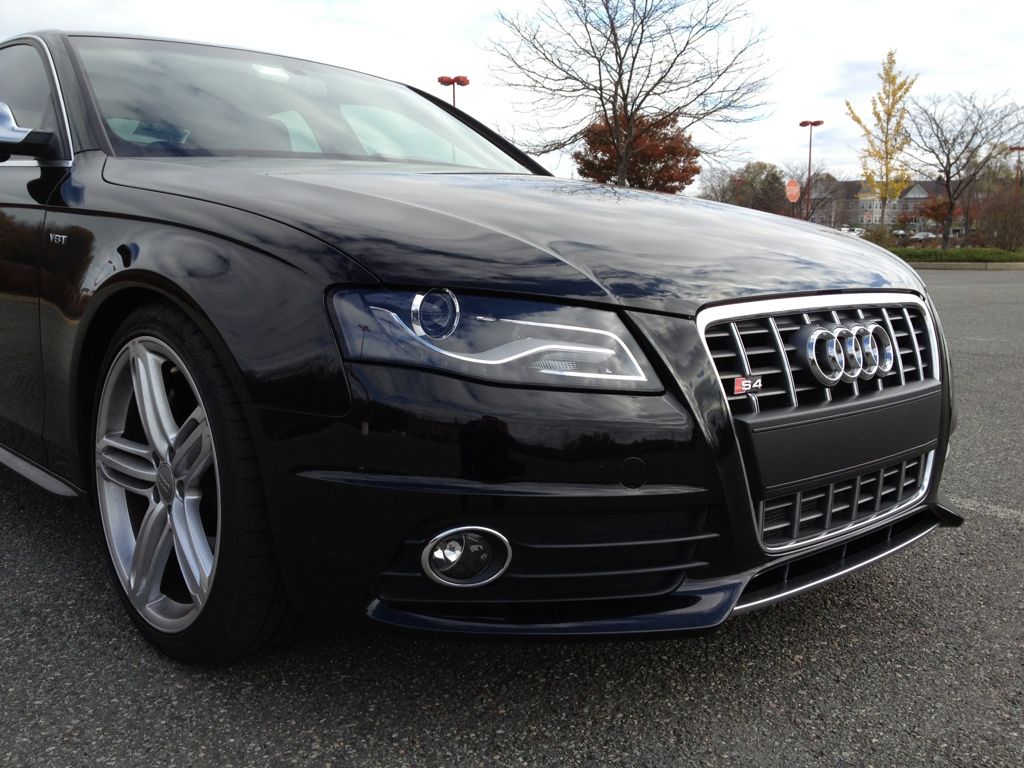
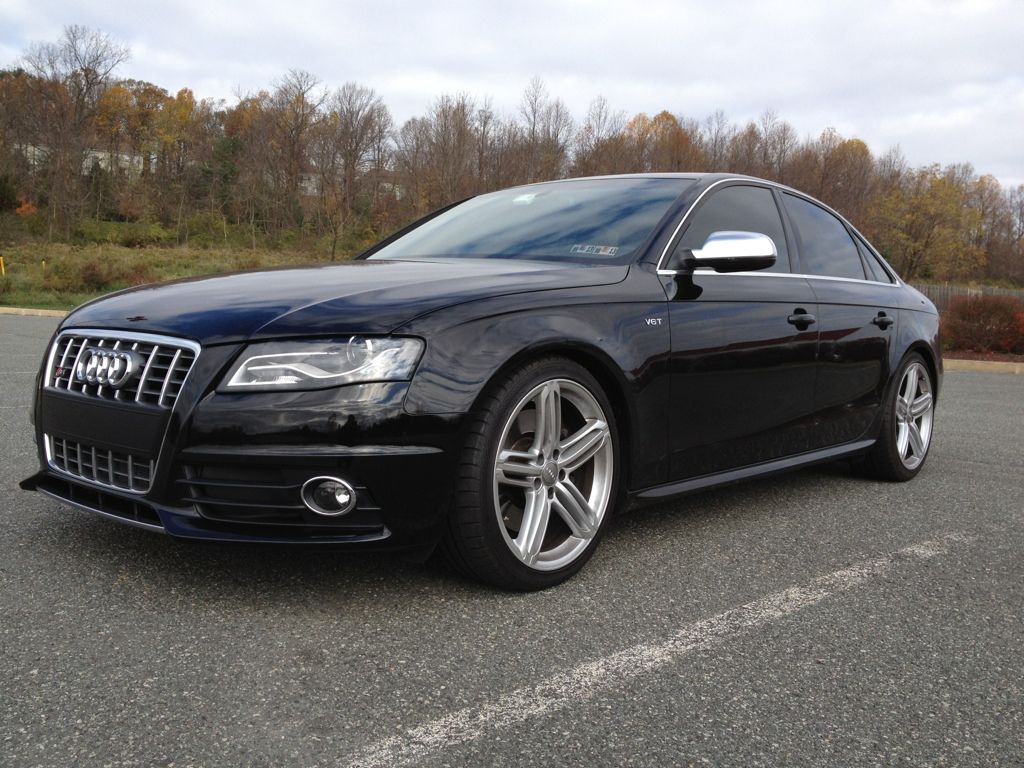
    I took mine apart, removed the reflectors and sprayed them with four (4) coats of VHT Niteshades spray tint. They appear black in ambient light, yet some of the amber still shines through when under direct bright light. Meanwhile the side marker lights still shine through at night, for safety. Cost me 6 hours of my life on a weekend, and part of a $10 can of Niteshades.

    Here are some pics of how it turned out:


    Or, you can buy E-code housings from this place on eBay. They appear to be legit. You get the housings with projectors, wiring and LED strips, but you would have to transfer over your existing bulbs and ballasts. A good bit cheaper than buying complete E-Codes with all the electronics and bulbs:
    http://www.ebay.com/itm/2010-Audi-A4...60909747119%26
    SOLD 2015 Daytona Gray S4
    6MT / Sport Diff / B&O / Tech Pkg / Carbon Atlas / Black Alcantara
    Mods: Xpel Ultimate, 3M Color Stable Tint 35%, Bilstein PSS10, Euro Code Alu Kreuz, Eurocode Sway Bars, Moog Endlinks, CR-15, Eurocode Meisterwerk ASTS, AWE Resonated Touring Exhaust, 034 Transmission Mount, HCX LED 3000k Fog Lights, Apikol Rear Diff Mount

  5. #5
    Veteran Member Four Rings dropshadow's Avatar
    Join Date
    Mar 28 2009
    AZ Member #
    40470
    Location
    Minneapolis, MN

    It can be done in a half hour. You don't even need to remove the bumper.

    Quote Originally Posted by dropshadow View Post
    Headlights out:


    Lenses removed:


    Markers painted:


    Back on the car:
    | 18 Q7 | PAST: 13 allroad | 18 allroad | 12 Q7 TDI | 13 allroad | 13 allroad | 13 S4 | 11 A4 Avant | 11 S4 | 05.5 A4 Avant | 03 A4 |

  6. #6
    Veteran Member Four Rings
    Join Date
    Oct 14 2012
    AZ Member #
    102231
    My Garage
    Empty...for now...
    Location
    SE PA

    ^ Half an hour? I dunno....took me at least 20 minutes to remove the headlights from the car, due to a couple of the screws holding the headlight housings being semi buried. I ended up removing the intake to get to one of the bottom screws on the passenger side. Then it took me a while to separate the lenses from the housings using my heat gun, and then 4 coats of Niteshades at 30 minutes between coats.

    NOTICE: Do NOT touch any part of the inside of the headlights. Wear powder-free latex gloves to avoid getting fingerprints anywhere.
    If you do happen to get a fingerprint or smudge on the chrome "eyebrow" parts, DO NOT clean with rubbing alcohol or any other solvent. It will strip the chrome plating right off. Learned this one the hard way.
    SOLD 2015 Daytona Gray S4
    6MT / Sport Diff / B&O / Tech Pkg / Carbon Atlas / Black Alcantara
    Mods: Xpel Ultimate, 3M Color Stable Tint 35%, Bilstein PSS10, Euro Code Alu Kreuz, Eurocode Sway Bars, Moog Endlinks, CR-15, Eurocode Meisterwerk ASTS, AWE Resonated Touring Exhaust, 034 Transmission Mount, HCX LED 3000k Fog Lights, Apikol Rear Diff Mount

  7. #7
    Veteran Member Four Rings staticuxo's Avatar
    Join Date
    Sep 16 2008
    AZ Member #
    33091
    Location
    NY

    i've done this twice on my B7's.. but for some reason i'm much more hesitant to do it on my B8! i need to do it soon, especially on a black car.
    B9 S4 - DAYTONA | BLACK OPTICS | ABT HAS | AWE TRACK w/ RES DP
    B8.5 SQ5 - SEPANG | BLACK OPTICS | KW SC | AWE TOURING | ROC-EURO | VORSTEINER V-FF 103 21x10.5 | CONTI DWS06 295/35-21
    C5 A6 - 4.2L | 6MT SWAP | H&R | OEM TTRS ROTORS 19x9

    PREVIOUS:
    B7 S4 AVANT 6MT | B8.5 S4 6MT | B8 S4 S-TRONIC | B8 S5 6MT | B7 S4 6MT | B7 A4 6MT


  8. #8
    Veteran Member Four Rings jlaudio's Avatar
    Join Date
    Mar 26 2009
    AZ Member #
    40375
    Location
    SLC, UT

    removing the lense and regluing it makes me nervous. i've had too many condensation issues on previous audi's to attempt to CC mod the lights.
    plus i want e-codes anyway
    it does look spectacular though
    '21 SQ5

    Previous: '10 B8 S4 6MT, 09 B8 A4, 06 S4 6MT, 07 A4 6MT, 02 A4 QM, 99 A4 QM

  9. #9
    Established Member Two Rings JRunior's Avatar
    Join Date
    Aug 03 2012
    AZ Member #
    98041
    Location
    New Jersey

    +1 on painting!

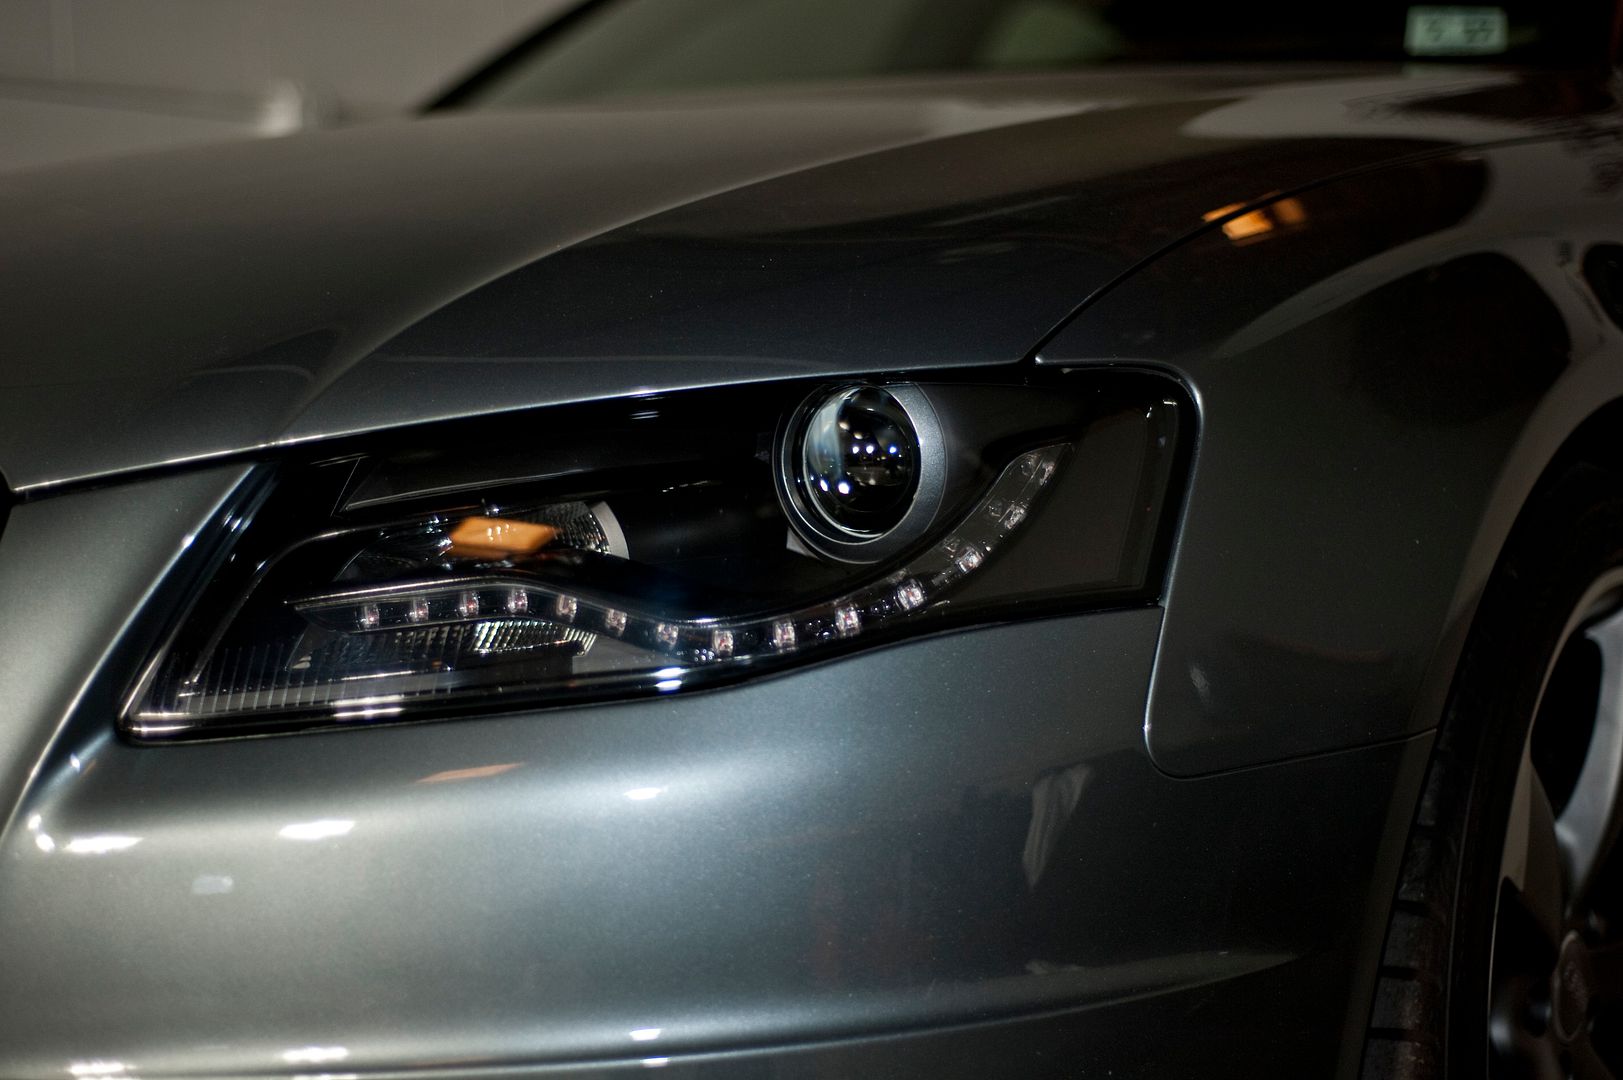
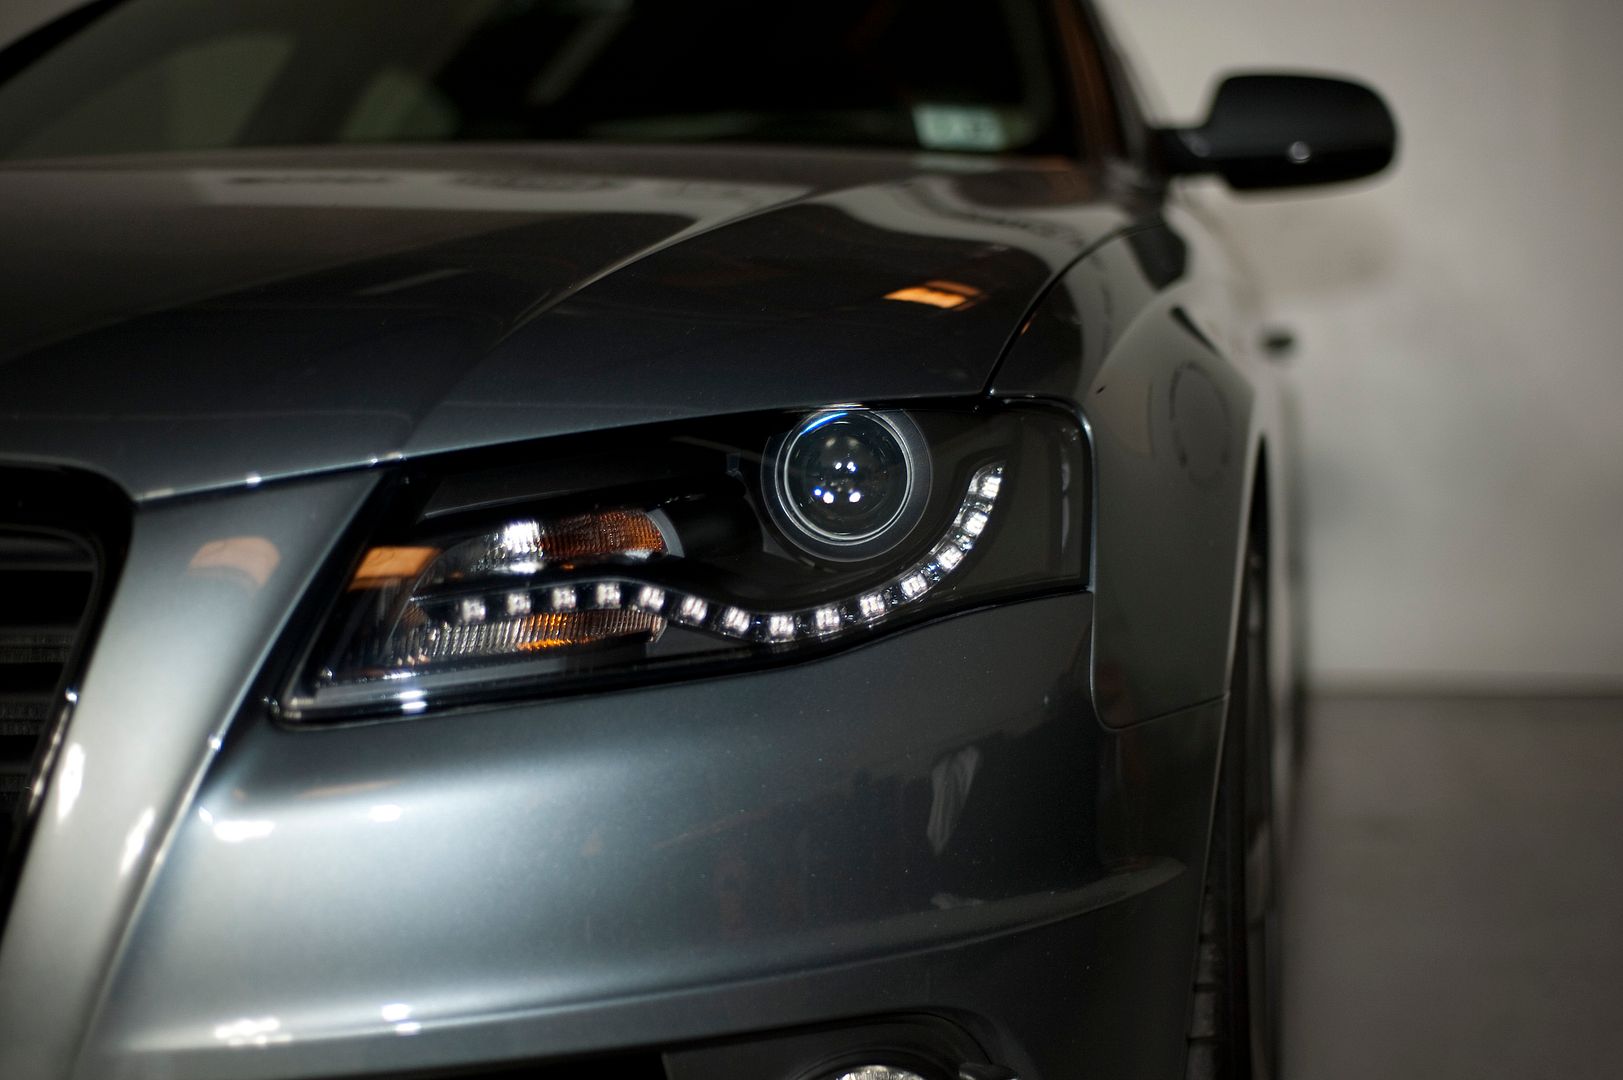
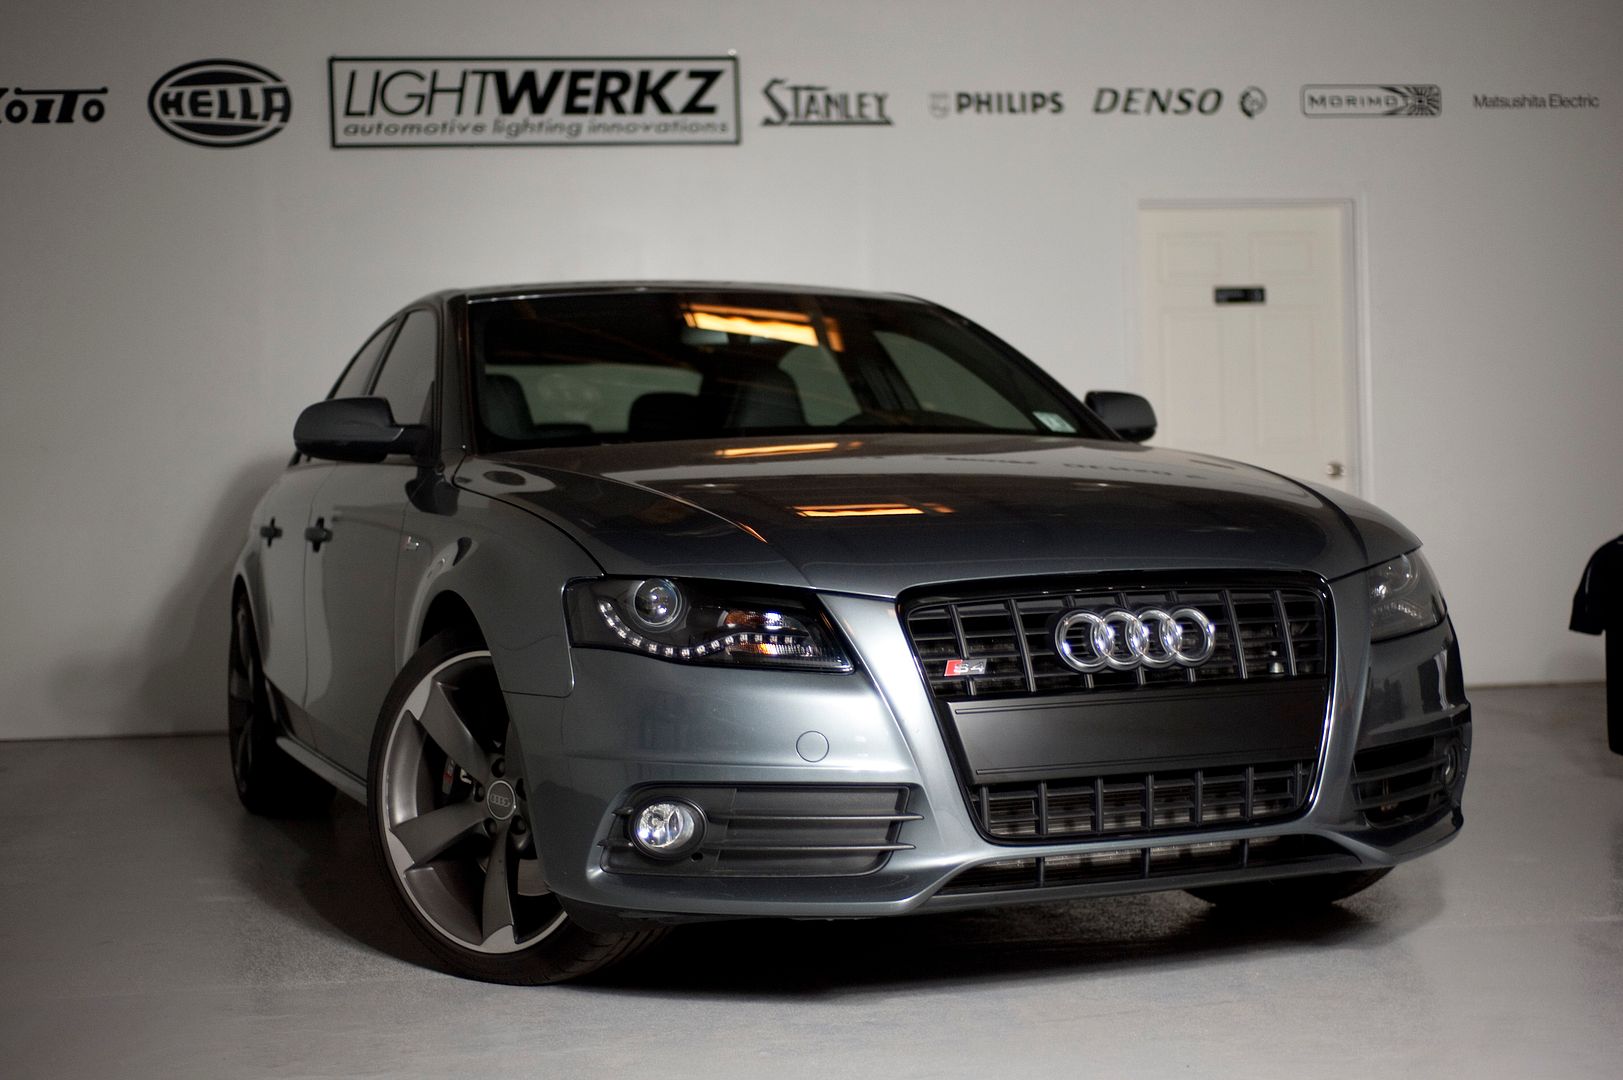
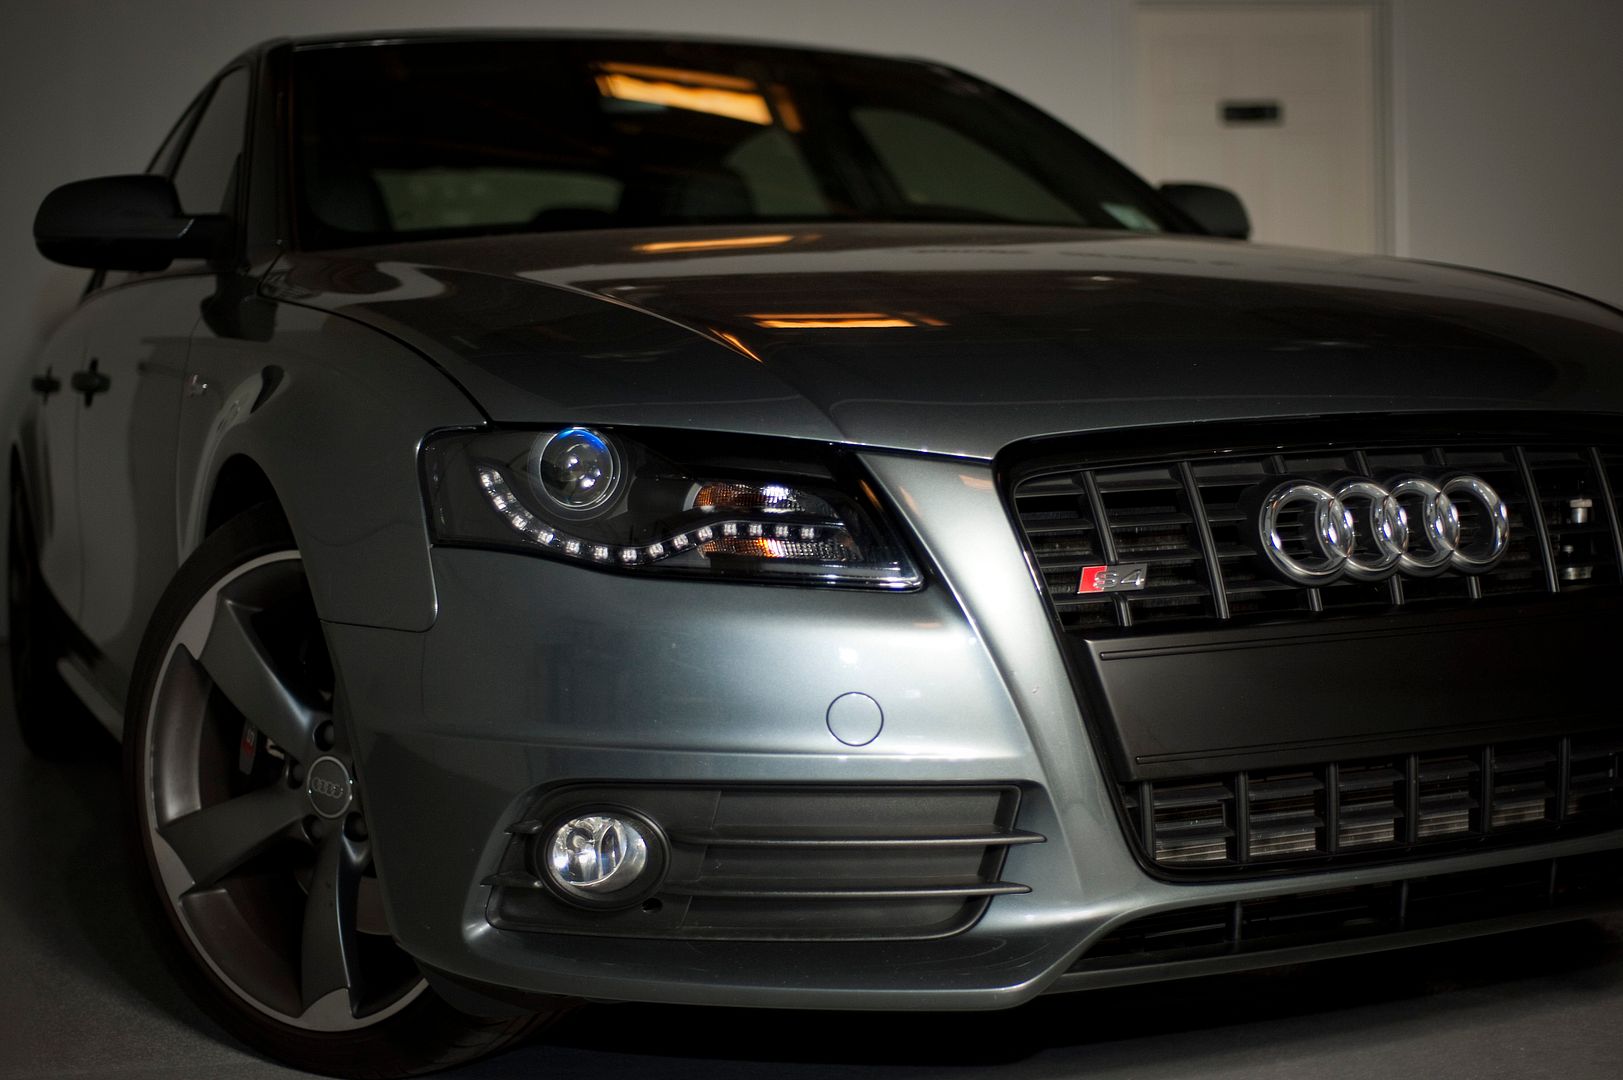
    I went with an amber delete, chrome delete, lens swap, and a color matched bezel


    2012 S4 Monsoon Gray | 6MT | Prestige | Sports Differential | Titanium package | Black Silk Nappa Leather | Stainless Steel Mesh Inlays

  10. #10
    Veteran Member Four Rings dropshadow's Avatar
    Join Date
    Mar 28 2009
    AZ Member #
    40470
    Location
    Minneapolis, MN

    Quote Originally Posted by SteveYem View Post
    ^ Half an hour? I dunno....
    It's quicker when you're friends with an experienced body tech.
    | 18 Q7 | PAST: 13 allroad | 18 allroad | 12 Q7 TDI | 13 allroad | 13 allroad | 13 S4 | 11 A4 Avant | 11 S4 | 05.5 A4 Avant | 03 A4 |

  11. #11
    Senior Member Three Rings sirpickles's Avatar
    Join Date
    Jun 26 2012
    AZ Member #
    95874
    Location
    The Mid-West

    looks cool and different but I love the chrome inside there too much to remove!
    B8 S4 | 6spd | Brillant Black | Prestige | B&O | Carbon Inlays | Magma Silk Nappa | ADS/Rear Diff | Driver Assist
    Mods | 20% tint | AluFelgen SF-71 19x9.5 ET42 | H&R Sport Springs

  12. #12
    Veteran Member Four Rings thedollardoctor's Avatar
    Join Date
    Oct 28 2012
    AZ Member #
    103033
    Location
    Dayton, OH

    I plan to do this VERY SOON with my Ice Silver S4! I want to vinyl wrap the amber corners in silver to match the car. Saw this on here somewhere on another silver S owners car and it looked sick!

    I have pulled apart and painted or modded several different sets of healights, it's not that difficult AT ALL and so worth saving the $850 for ecodes IMO.
    2013 Audi S4 | Ice Silver | DSG | GIAC/AWE Stage II with DSG Tune | Roc Euro Intake | AWE Full Exhaust w/ Resonated DPs | VMR V713 19x9.5 et45 Matte Black | H&R OE Sport Springs | USS Sway Bars and End Links | Alu Kreuz | Color Coded Custom Painted Headlights and Emblems by ONEighty Customs | RS4 Style Honeycomb Grille by ECS

  13. #13
    Senior Member Two Rings Hsiang's Avatar
    Join Date
    Sep 20 2012
    AZ Member #
    100850
    Location
    Artesia/CA

    anyone did this on a B8.5?
    2013 Audi S4 Phantom Black / S Tronic / B&O / Sports Differential / Advance Key / CF Supercharged Badge / Llumar Air 80 / Matte Black Window Vinyl / 3M 1080 Blk Brushed Aluminum Vinyl / ECS RS4 Front Grille / Roc-Euro Intake / KW Variant 3 Coilover / Vorsteiner VVF 101 Textured Gunmetal 19 x 10 et45 / Continental Extreme Contact 255-35-19

    Previous Ride:
    01 BMW 330ci / 03 Nissan 350Z / 04 BMW M3 / 08 Porsche Cayenne / 10 BMW 335i M Sport

  14. #14
    Veteran Member Four Rings FatalBert's Avatar
    Join Date
    Apr 19 2011
    AZ Member #
    74284
    Location
    US

    Quote Originally Posted by dropshadow View Post
    It can be done in a half hour. You don't even need to remove the bumper.
    What adhesive did you use to reseal?

    Quote Originally Posted by JRunior View Post
    +1 on painting!

    I went with an amber delete, chrome delete, lens swap, and a color matched bezel


    Did you do it yourself or have it done by someone?

  15. #15
    Veteran Member Four Rings
    Join Date
    Oct 14 2012
    AZ Member #
    102231
    My Garage
    Empty...for now...
    Location
    SE PA

    Quote Originally Posted by FatalBert View Post
    What adhesive did you use to reseal?

    When you separate the lens from the housing, most of the original black sealant stays in the "groove" where the lens fits into the housing. Some of it will stick to the lens, which you should peel/roll off and jam back into the groove in the housing (wherever you see sealant missing). When you're finished your modification and ready to put the lens back on, press the lens back into its mating groove and use your heat gun to re-melt the sealant, and keep pressing the lens back onto the housing. If you do a good job heating up the sealant all around, you should create a good seal. To be safe, after it cooled I also ran a healthy bead of silicone RTV sealant (auto / marine grade stuff purchased from Home Depot....nothing special) around the joint between the lens and the housing. It doesn't look pretty, but none of that is visible until you pop the hood and can see the top side of the headlight housings. One month and many 100% humidity days later, I have no signs of moisture inside my housings.

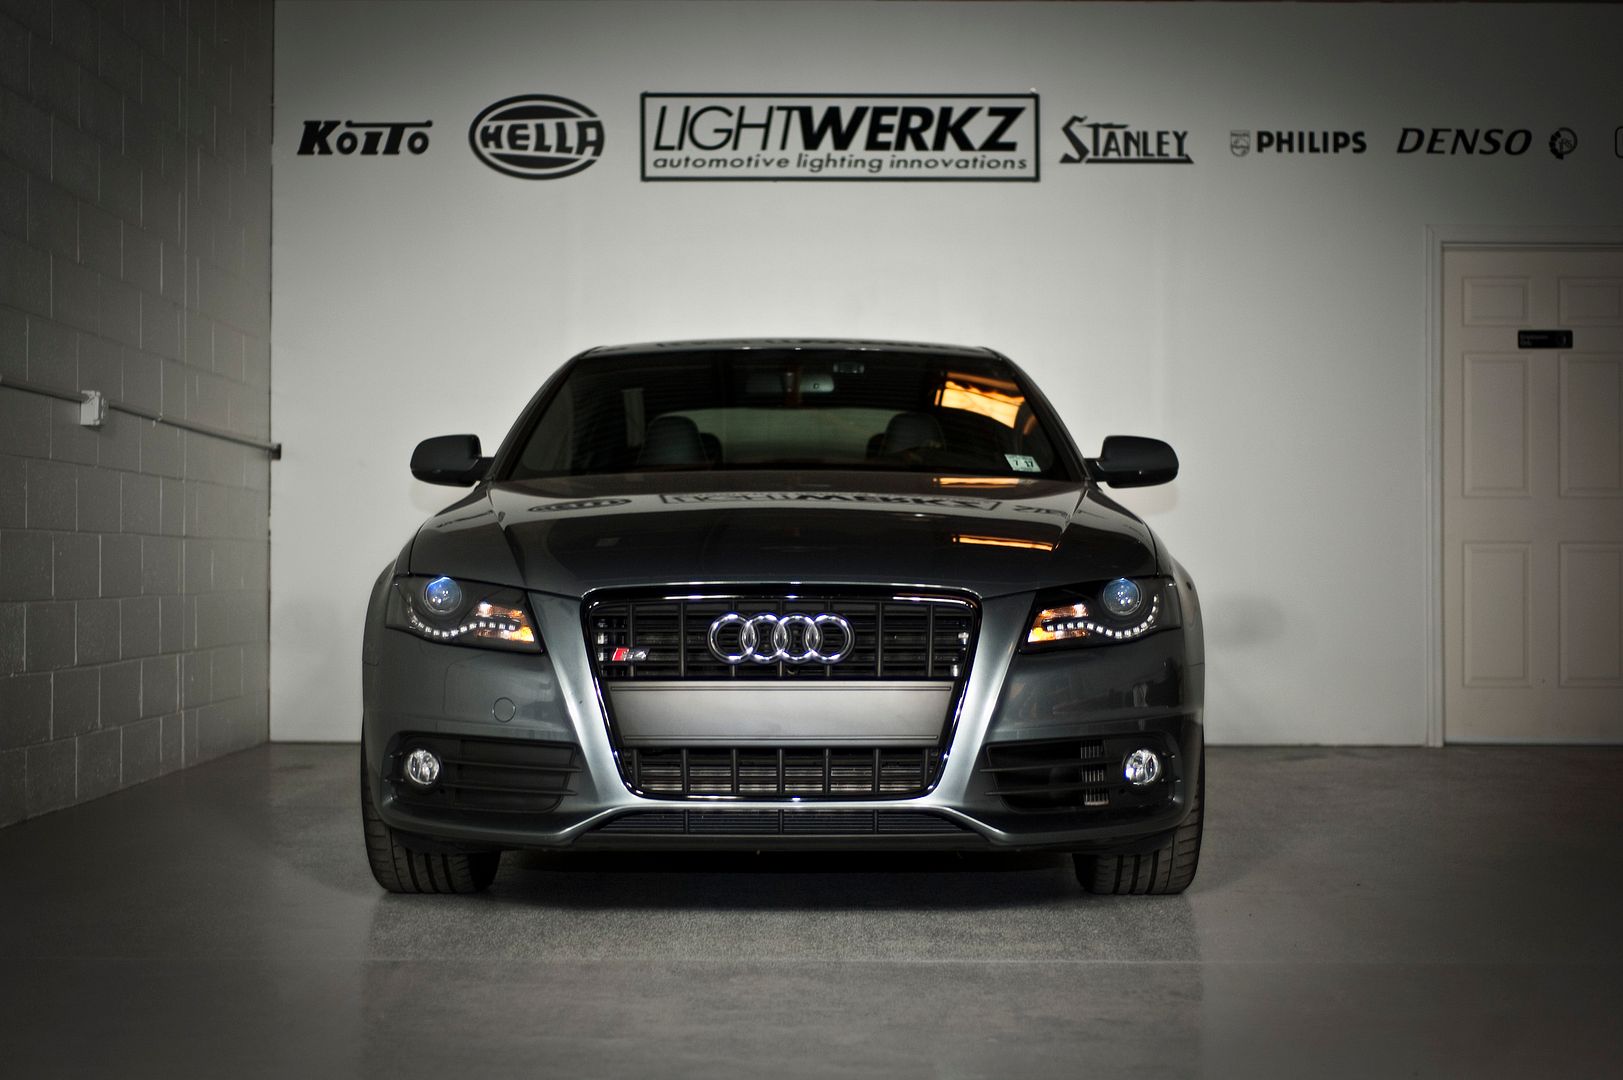
    As for JRunior, I believe he got his done at Lightwerkz in New Jersey.
    SOLD 2015 Daytona Gray S4
    6MT / Sport Diff / B&O / Tech Pkg / Carbon Atlas / Black Alcantara
    Mods: Xpel Ultimate, 3M Color Stable Tint 35%, Bilstein PSS10, Euro Code Alu Kreuz, Eurocode Sway Bars, Moog Endlinks, CR-15, Eurocode Meisterwerk ASTS, AWE Resonated Touring Exhaust, 034 Transmission Mount, HCX LED 3000k Fog Lights, Apikol Rear Diff Mount

  16. #16
    Veteran Member Four Rings Akrion's Avatar
    Join Date
    Dec 24 2010
    AZ Member #
    68622
    Location
    ...

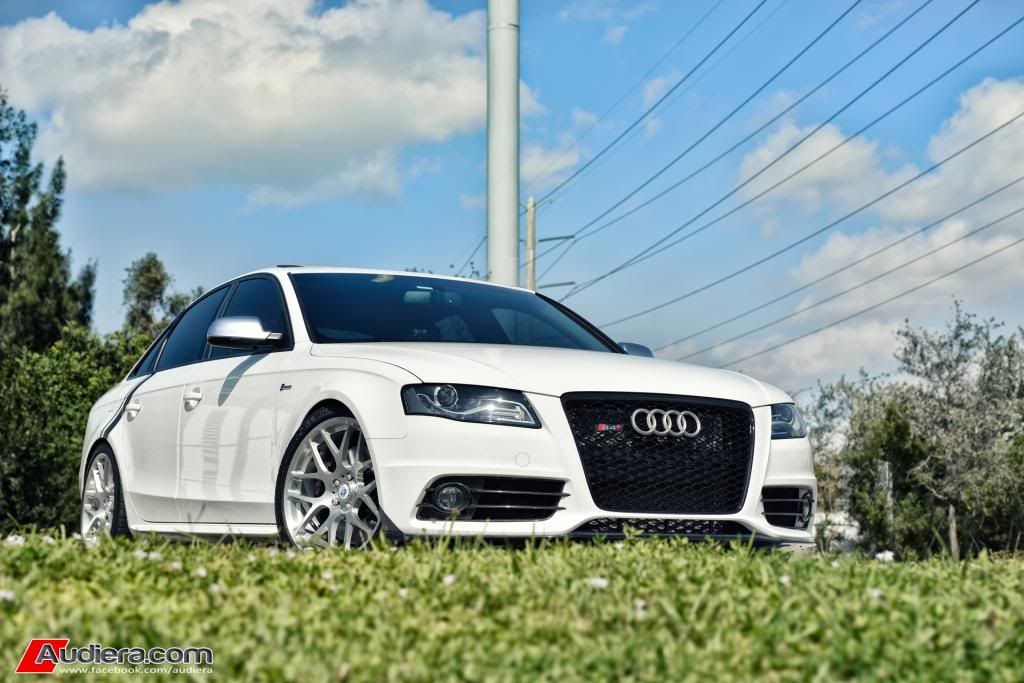
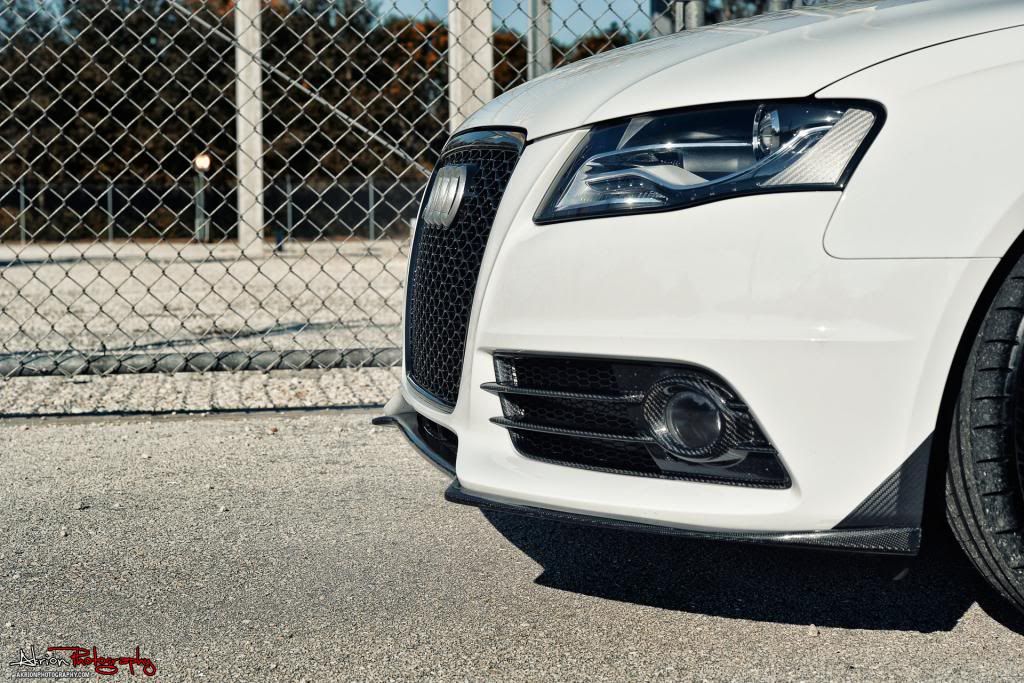
    You can do what I call ti-code :) like this:


  17. #17
    Veteran Member Four Rings
    Join Date
    Oct 14 2012
    AZ Member #
    102231
    My Garage
    Empty...for now...
    Location
    SE PA

    Looks great ^

    BTW which wheels are they, size, offset, etc.

    Wish I had bought a white one haha
    SOLD 2015 Daytona Gray S4
    6MT / Sport Diff / B&O / Tech Pkg / Carbon Atlas / Black Alcantara
    Mods: Xpel Ultimate, 3M Color Stable Tint 35%, Bilstein PSS10, Euro Code Alu Kreuz, Eurocode Sway Bars, Moog Endlinks, CR-15, Eurocode Meisterwerk ASTS, AWE Resonated Touring Exhaust, 034 Transmission Mount, HCX LED 3000k Fog Lights, Apikol Rear Diff Mount

  18. #18
    Veteran Member Four Rings Akrion's Avatar
    Join Date
    Dec 24 2010
    AZ Member #
    68622
    Location
    ...

    Quote Originally Posted by steveyem View Post
    looks great ^

    btw which wheels are they, size, offset, etc.

    Wish i had bought a white one haha
    morr vs8.2 19" +35

  19. #19
    Veteran Member Four Rings dropshadow's Avatar
    Join Date
    Mar 28 2009
    AZ Member #
    40470
    Location
    Minneapolis, MN

    Quote Originally Posted by FatalBert View Post
    What adhesive did you use to reseal?
    Same stuff the factory uses.
    | 18 Q7 | PAST: 13 allroad | 18 allroad | 12 Q7 TDI | 13 allroad | 13 allroad | 13 S4 | 11 A4 Avant | 11 S4 | 05.5 A4 Avant | 03 A4 |

  20. #20
    Veteran Member Four Rings Akrion's Avatar
    Join Date
    Dec 24 2010
    AZ Member #
    68622
    Location
    ...

    Quote Originally Posted by dropshadow View Post
    Same stuff the factory uses.
    Let me make this little more helpful for Fatal ...

    http://www.amazon.com/gp/product/B00...ls_o06_s00_i00

  21. #21
    Veteran Member Four Rings dropshadow's Avatar
    Join Date
    Mar 28 2009
    AZ Member #
    40470
    Location
    Minneapolis, MN

    Quote Originally Posted by Akrion View Post
    You can do what I call ti-code :) like this:


    Is that carbon fiber or silver cf or what? In the first pic it looks like cf wrap, but the lighting in the second makes it look like silver cf. Looks good either way. Not many colors could pull that off so well.
    | 18 Q7 | PAST: 13 allroad | 18 allroad | 12 Q7 TDI | 13 allroad | 13 allroad | 13 S4 | 11 A4 Avant | 11 S4 | 05.5 A4 Avant | 03 A4 |

  22. #22
    Veteran Member Four Rings Akrion's Avatar
    Join Date
    Dec 24 2010
    AZ Member #
    68622
    Location
    ...

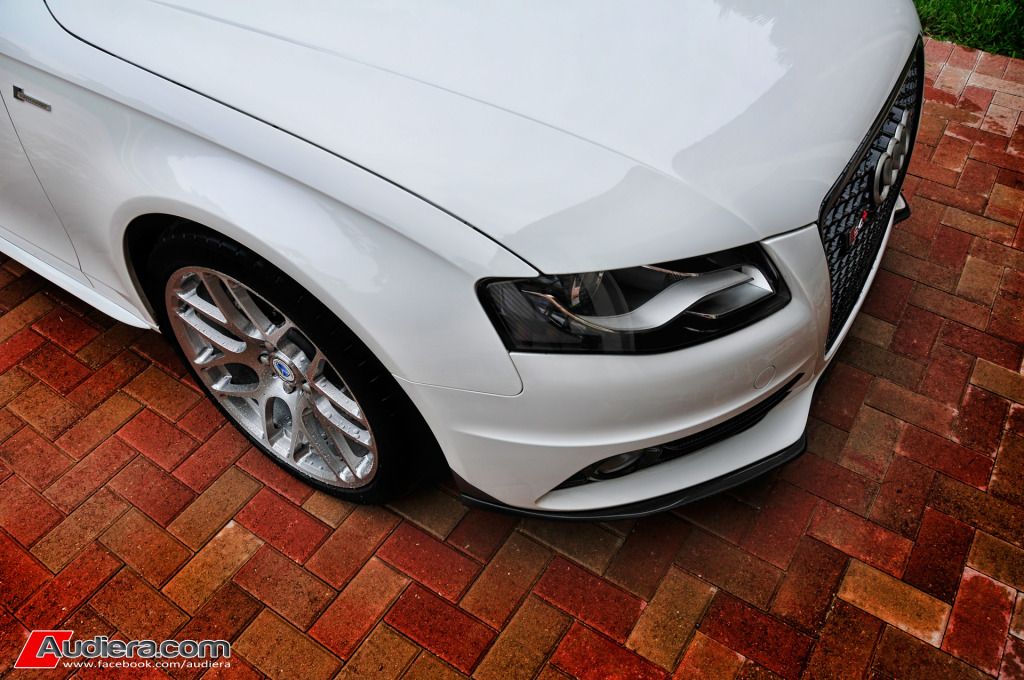
    Its a 3M carbon fiber wrap ... in real world it looks almost like the TI package wheels (the grey part of them)

    You can see it better here (I think)


  23. #23
    Established Member Two Rings JRunior's Avatar
    Join Date
    Aug 03 2012
    AZ Member #
    98041
    Location
    New Jersey

    Quote Originally Posted by SteveYem View Post
    When you separate the lens from the housing, most of the original black sealant stays in the "groove" where the lens fits into the housing. Some of it will stick to the lens, which you should peel/roll off and jam back into the groove in the housing (wherever you see sealant missing). When you're finished your modification and ready to put the lens back on, press the lens back into its mating groove and use your heat gun to re-melt the sealant, and keep pressing the lens back onto the housing. If you do a good job heating up the sealant all around, you should create a good seal. To be safe, after it cooled I also ran a healthy bead of silicone RTV sealant (auto / marine grade stuff purchased from Home Depot....nothing special) around the joint between the lens and the housing. It doesn't look pretty, but none of that is visible until you pop the hood and can see the top side of the headlight housings. One month and many 100% humidity days later, I have no signs of moisture inside my housings.

    As for JRunior, I believe he got his done at Lightwerkz in New Jersey.
    LightWerkz, reseals with additional OEM Koito sealant. Here is a direct link

    http://shop.lightwerkz.net/Koito-Butyl-Rubber-Sealer

    They carry both gray and black sealant
    2012 S4 Monsoon Gray | 6MT | Prestige | Sports Differential | Titanium package | Black Silk Nappa Leather | Stainless Steel Mesh Inlays

Bookmarks

Posting Permissions

  • You may not post new threads
  • You may not post replies
  • You may not post attachments
  • You may not edit your posts
  •  


    © 2001-2025 Audizine, Audizine.com, and Driverzines.com
    Audizine is an independently owned and operated automotive enthusiast community and news website.
    Audi and the Audi logo(s) are copyright/trademark Audi AG. Audizine is not endorsed by or affiliated with Audi AG.