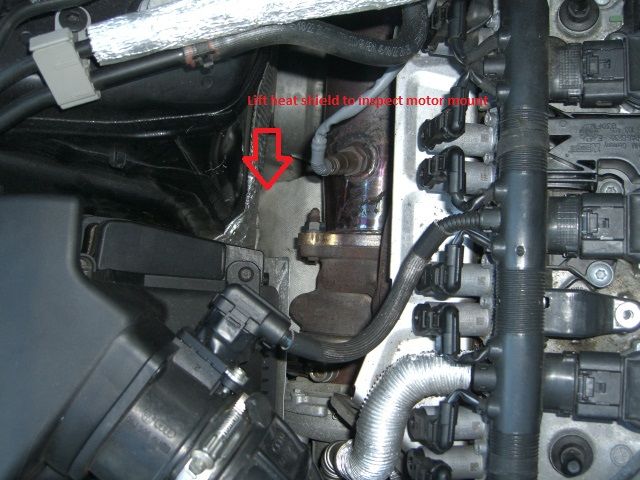
Inspection- With the lower engine belly pan removed look below the mounts for a puple/black fluid that will usually stain the cross member. My actual mount didn't feel oily at all. (Used car that likely had the mount break some time ago.) From the top side, just below the turbo/cat area is a fabric heat shield. Lift and inspect; mine was visibly torn.
Tools-
T15 torx
8mm triple square
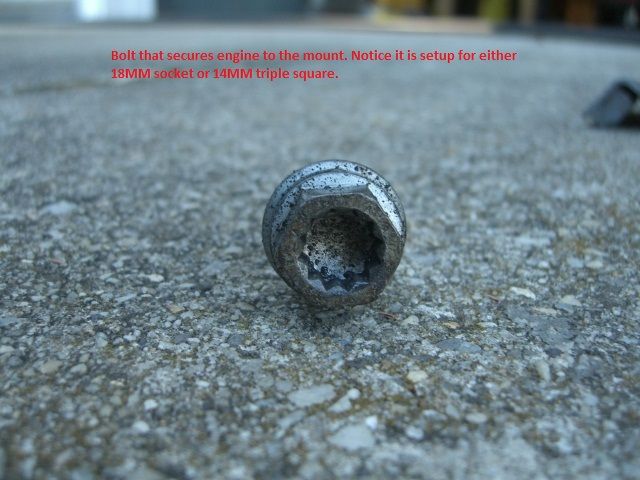
14mm triple square or 18mm socket for the engine mounting bolt
16mm socket for frame mount bolts
17mm for wheel lugs
breaker bar with assorted extentions
Parts
08r198381b, this is a set that includes 2 identical mounts as well as stamped metal support brackets. (I only replaced the right side mount) If someone has the part number for a single mount PM me and I will include it as well.
Lemforder (likely the OEM supplier) pn 347501 right and 3474401 left I do not know the difference. The Audi set I bought the mounts had the same pn stamped on them and only the support bracket was different.
This is the fabric heat shield that you can lift to inspect mount.
Moved available photos to google drive, some may be left out.

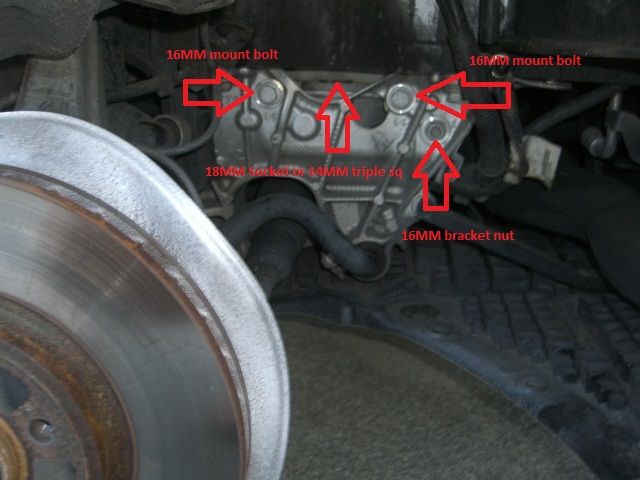
Only my right side mount was broken. I was able to replace the mount just putting the one side up on a jack stand. Once lifted remove wheel and remove or the fender liner. I left the top most mounting clips in place and just folded the fender liner above the brake caliper. Disconnect the orange connector that goes to the motor mount. Support the engine with a jack and remove the bolts shown. The bracket nut will allow a wire harness support bracket to be removed to help in removing the mount later. My engine bolt was really tight, impact gun did nothing to it. I ended up using a breaker bar with a cheater pipe on it. I was very impressed by how well the triple square bits fit the hardware.

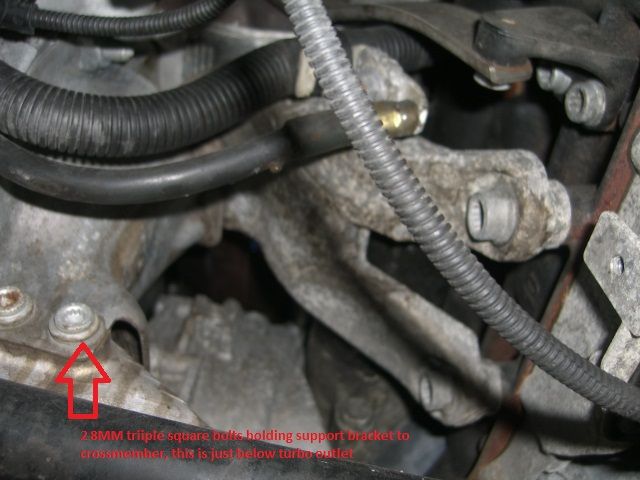
On the bottom side the motor mount is secured to the frame and cross member using a stamped steel bracket. These 2 8mm triple square bolts are the last remaining hardware secure both the motor mount and support. After all the hardware was removed I jacked the motor up 1 to 2 inches. Slide the stamped steel bracket toward the motor and it comes out rather easily. The motor mount comes out from the bottom and sliding it forward.

Engine bolt showing it has provisions for an 18mm socket or a 14mm triple square

Instillation is the reverse. I used a crowbar from the wheelwell to help lift the mount so that I could get the hardware aligned. I slid in 2 long bolts securing the mount to the frame. I then slipped the stamped metal support in place; then installed the 2 shorter 8mm triple sq bolts. Tighten the 2 long bolts I slid in earlier. Lowered the jack supporting the motor and installed the engine mount bolt. Installed harness support bracket, secured harnesses and reconnected the electrical connection on the mount.
The bolt through the engine mount to the engine mount bracket is torqued to 90 Nm. The bolts through the subframe into the engine mounts are torqued to 55 Nm.
I'm sure the left side is similar.


 Reply With Quote


Bookmarks