


Note: This DIY will come in handy for people who have stock suspension, which is longer and more difficult to remove than aftermarket suspension.
Note 2: Photos are compiled from both right and left sides of the car in no particular order.
Tools needed:
-Jack and 2 jack stands
-17mm socket (or stock wheel lug wrench)
-16mm socket and extender, at least 5"
-13mm box wrench, preferably ratcheting
-16mm box wrench, preferably ratcheting
-18mm box wrench, preferably ratcheting
-Adjustable wrench (or a duplicate of the 16mm and 18mm box wrenches)
-Straight edge
-Metric ruler or tape measure
-Philips head screwdriver
-Pliers
-Hammer and punch
-WD-40
-Latex gloves
-Motorcycle (or other type of second vehicle for making trips to the hardware store for unexpected necessities)
NOT needed: Spring compressor
Procedure
Start by jacking up the car and removing both front wheels. The upper suspension links on both sides will have to be removed at the same time to allow the suspension full droop. More on that later.
Remove the battery compartment cover.
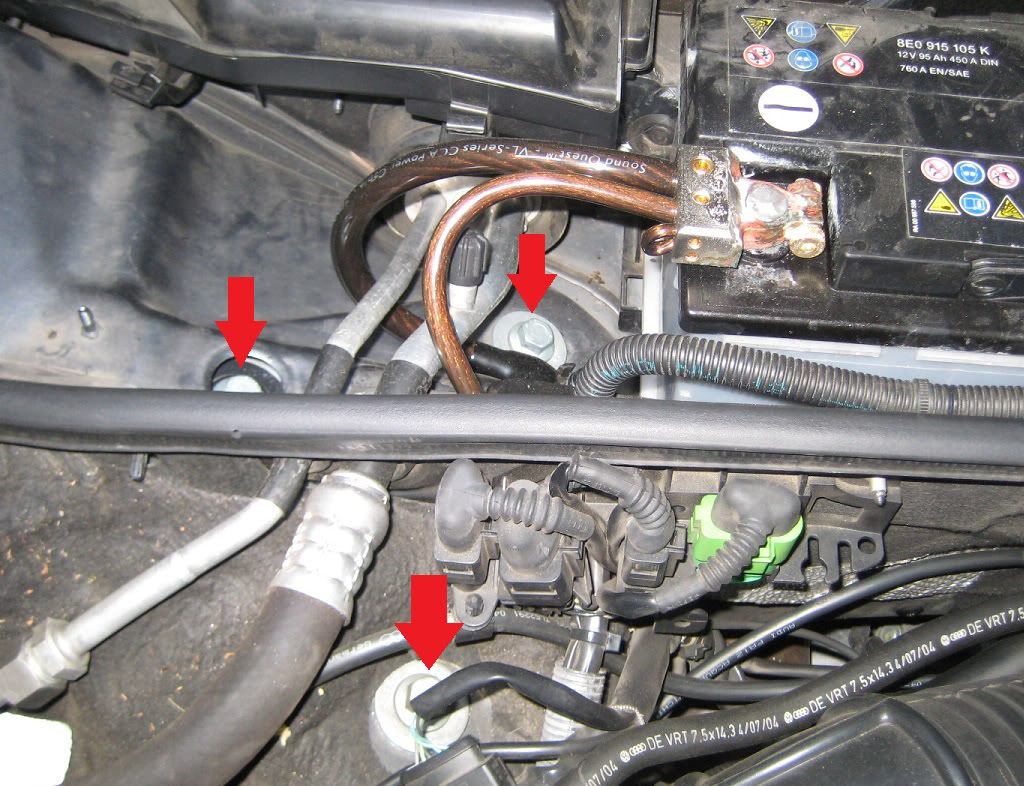
The whole suspension assembly has to be removed. It is connected to the chassis by three 16mm bolts in the engine bay. Bolt locations are marked by red arrows. To get to one of the driver's side bolts, you have to move the coolant reservoir to the side. This can be done without removing any hoses. Two of the three bolts on each side have washers. Be mindful of these washers and don't let them fall into the engine bay. Remove them and put them aside.

The passenger side bolts are easy to get to.
Side note: I have a subscription to alldatadiy.com, which is mildly useful but doesn't appear to have the torque specs for these bolts. Rather than breaking them with a torque wrench, I noted the torque angle of each bolt. It ranged from 45 to about 80 degrees. In short, torque angle is the amount of rotation it takes from the bolt head hitting the surface to reach the desired torque. If you know the torque angle, it is actually more accurate than a torque wrench because it isn't affected by friction in the threads. You can accurately gauge torque angle using a torque angle meter.

Remember, torque angle can only be reverse-engineered when the bolt is being removed, which is why I'm posting this at the beginning of the DIY. Once the bolt is out it's too late. However, if someone has the actual torque specs for these bolts, please post them.
Edit: The torque is 25 Nm. Thanks Slobo7x.
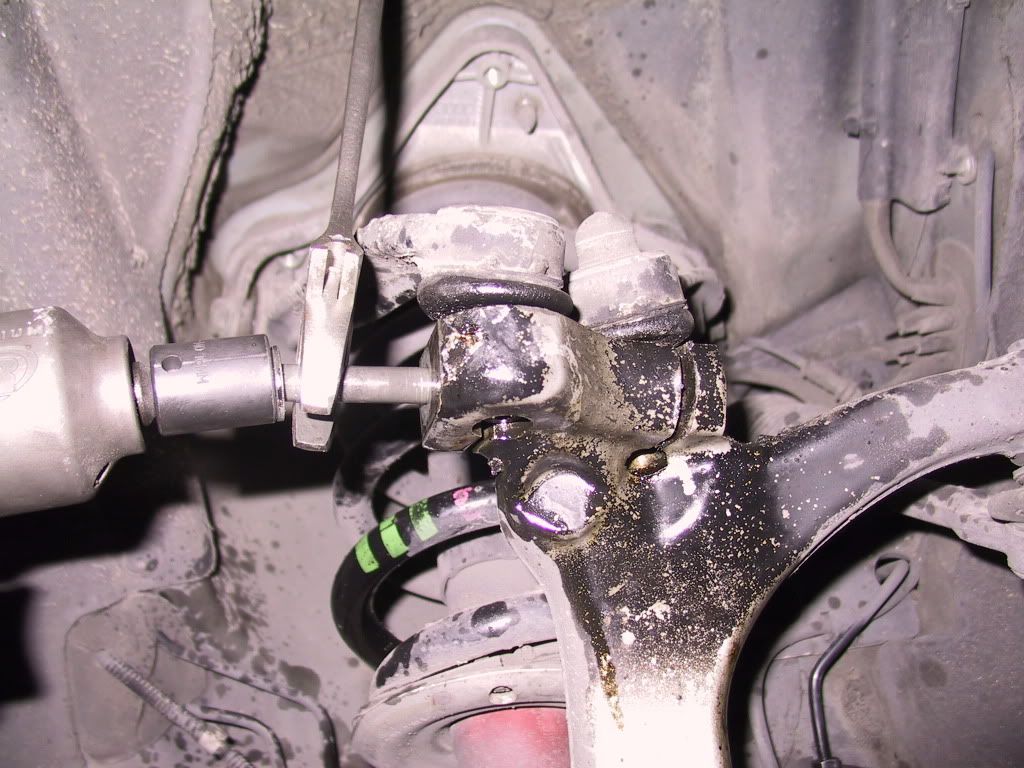
Disconnect the bolt securing the outer ends of the old control arms, as well as the steering link, using 16mm and 13mm wrenches. The bolts are interference bolts and need to be removed completely, not just loosened. To get the control arms out of the steering knuckle, put your punch underneath through the holes and hammer them upward.
This will cause the steering knuckle and brake assembly to fall outward.

Have something ready to put under the brake caliper for support. I used wooden boxes. The brake and steering knuckle falling freely will extend the axle, which extends the inner CV boot. Be careful not to overextend the inner CV boot.

Now it's back to the suspension top hat, but from underneath. Notice that the control arm bolts cannot be removed while the suspension is in place. It has to be taken completely out.

There is an alignment stud with a clip that is installed from the factory, for what reason I do not know, but it is really hard to remove. To get it out, I pulled and pried down on the top plate to bend the clip downward, pushed the suspension back up to create enough of a gap to grab the clip. and then destroyed the clip with various types of pliers, and even the help of a Dremel. Fortunately, according to alldatadiy.com, this clip does not need to be replaced. I would curse the name of the person who included this in the suspension design in his native language if I knew his name and his language. But, now that it's gone, I will never have to deal with it again.

Remove the lower suspension bolt from the lower control arm (18mm). Be careful not to damage the outer CV boot with the end of the shock. Finnagle the shock free. This is where it is necessary to have both sides of the suspension disassembled at the same time. When you push down on the lower control arm, you are also pushing down on the sway bar, which is connected to the suspension on the other side. If the other side isn't hanging free, it will limit the movement of your side, because that is what sway bars do. You could also disconnect the sway bar, but those bolts are extremely difficult to break, and I think this way is easier.
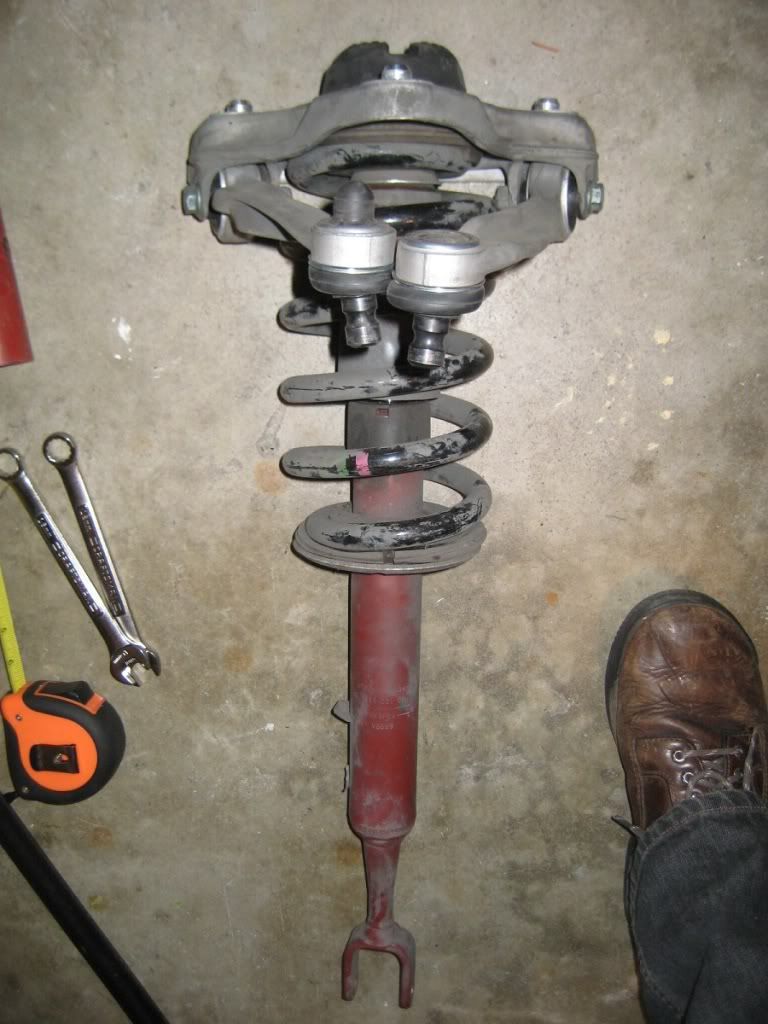
Fold the steering knuckle out and remove the entire suspension assembly. It's tricky but it can be done.
Replace the upper control arms. Do not tighten the bolts just yet.


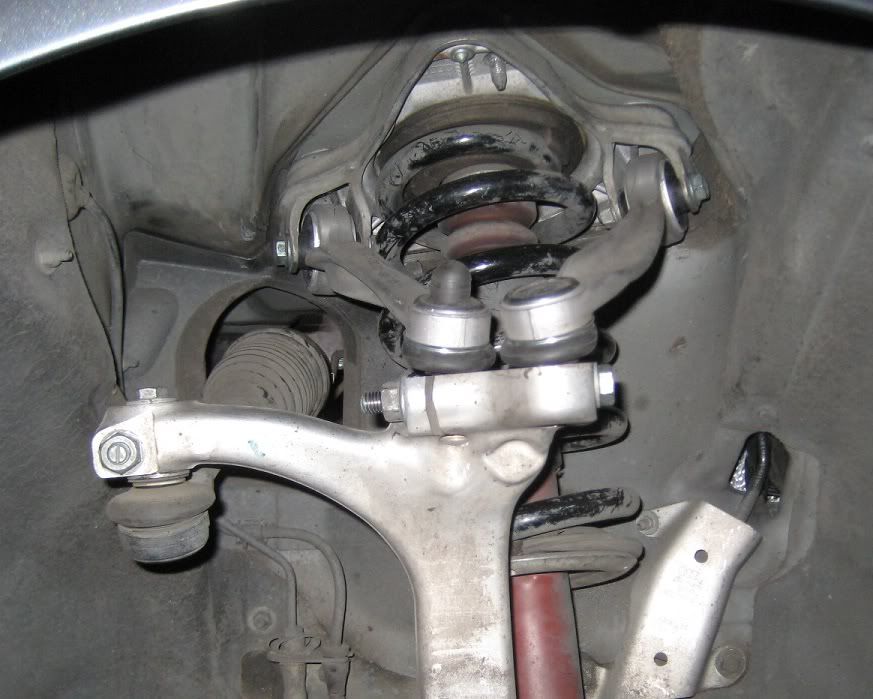
Here is why the bushings fail, and why it's critical to install the new ones at the right angle to prevent premature failure. The inner eyelet is tightened by the bolt to the suspension top hat, and fixed in place. The arm rotates around it. Thus, the rubber bushing gets twisted in normal use and eventually breaks.

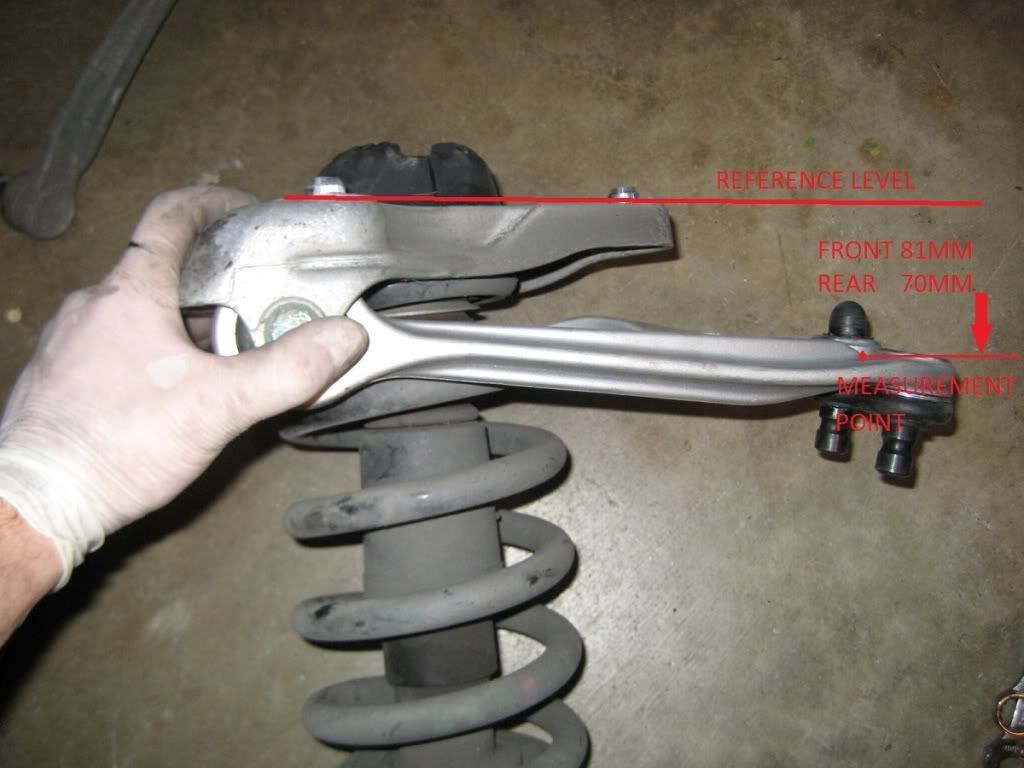
The new arms have to be installed and tightened at the angle of normal ride height, or the angle they would be with the car resting on the ground! This is impossible to do with the car on jack stands (you would have to compress the springs from below with pressure equal to the weight of the car). Fortunately, alldatadiy.com gives you that angle from the plane of the top hat. Set your straight edge across the top hat and measure 81mm down to the front arm, and 70mm down to the rear arm, both +/-2mm, measured to the flat surface at the end. Re-measure as you tighten to make sure it doesn't change.
Tighten them down good.
The suspension/control arm assembly is harder to get back in than it was to get out, now that the control arms are fixed in place pointing outward, but it can be done with some wiggling and finnagling. Put the 18mm bolt back in the bottom of the shock. Replace the control arms and put the suspension assembly back in on both sides before going any further, due to the aforementioned sway bar effect.
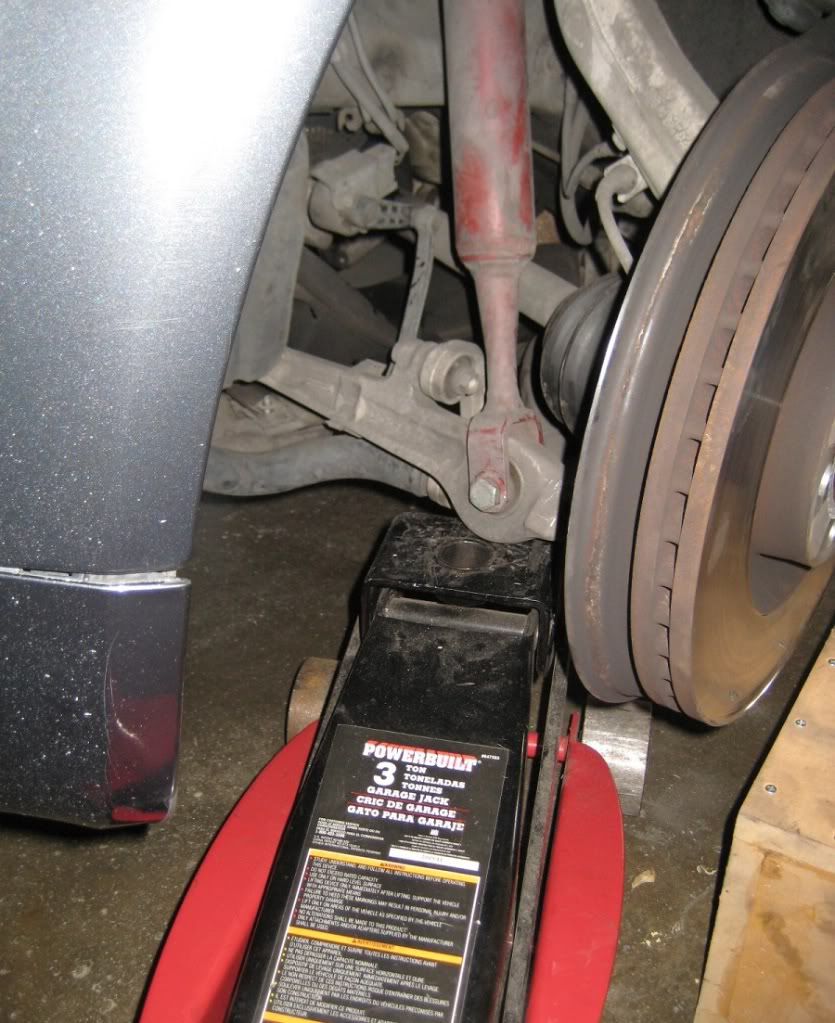
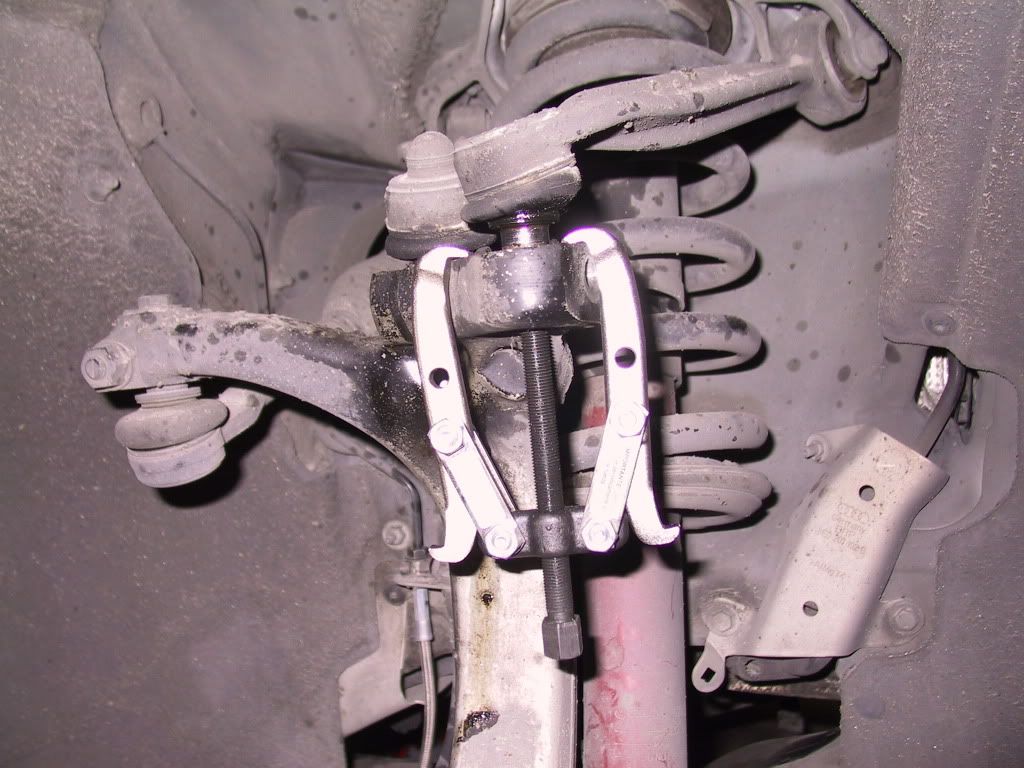
To lift the suspension back up to the chassis, I put my jack under the lower control arm. This will bring the suspension up most of the way (but not all the way) to the chassis before it starts to lift the car off the jack stand.
Grab the spring and lift it the rest of the way with your own strength while you thread the first bolt in from the top. The rest of the bolts will be easy. Don't forget the washers!
Reconnect all the arms to the top of the steering knuckle, in order of front to back. The control arm posts can be installed with just your hand strength, if you angle and massage them right. WD-40 helps with this. I only had to use a hammer on 1 out of 4. There is a special VAG tool for this but it's not necessary. On the steering links, remember to rotate the notch so the bolt will go through, and tighten the 13mm bolt before you tighten the 16mm bolt.
All back together.
Why Audi used rubber bushings instead of ball joints or needle bearings, I may never know, but they are a wear item. But now that I've replaced them once, the next time won't be so bad!
Dan

 Reply With Quote
 "Amy"
"Amy" 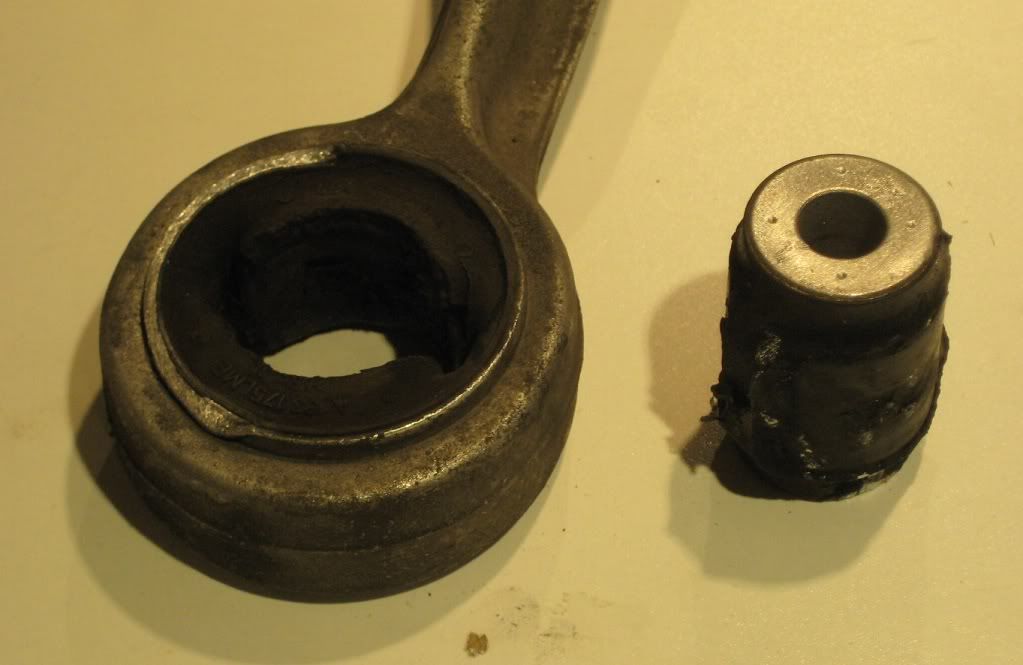


Bookmarks