


Valentine 1 Radar Unit
Valentine 1 Concealed Display
Valentine 1 Remote Audio unit
Valentine 1 Hardwire kit
Extra Phone cord
So, with the car being down for a while I was getting restless not being able to drive it, enjoy it, or mod it. So I decided to change that in the only way I could. I've always loved the V1 Radar displays in the mirrors, but they're usually 400 up to 1000 depending if you have it custom done or buy one off of ebay. Well I started looking around on the web some, and while I never had seen it done for the B6/B7 model, I figure I'd try to crack the mirror open and see what it looked like.
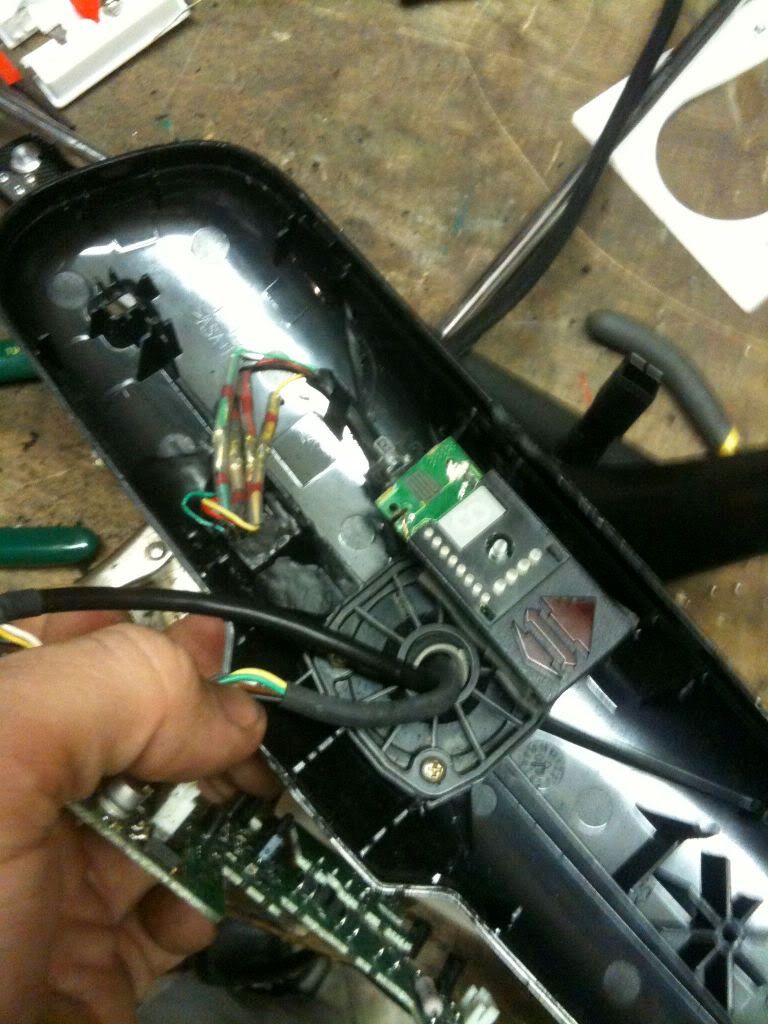
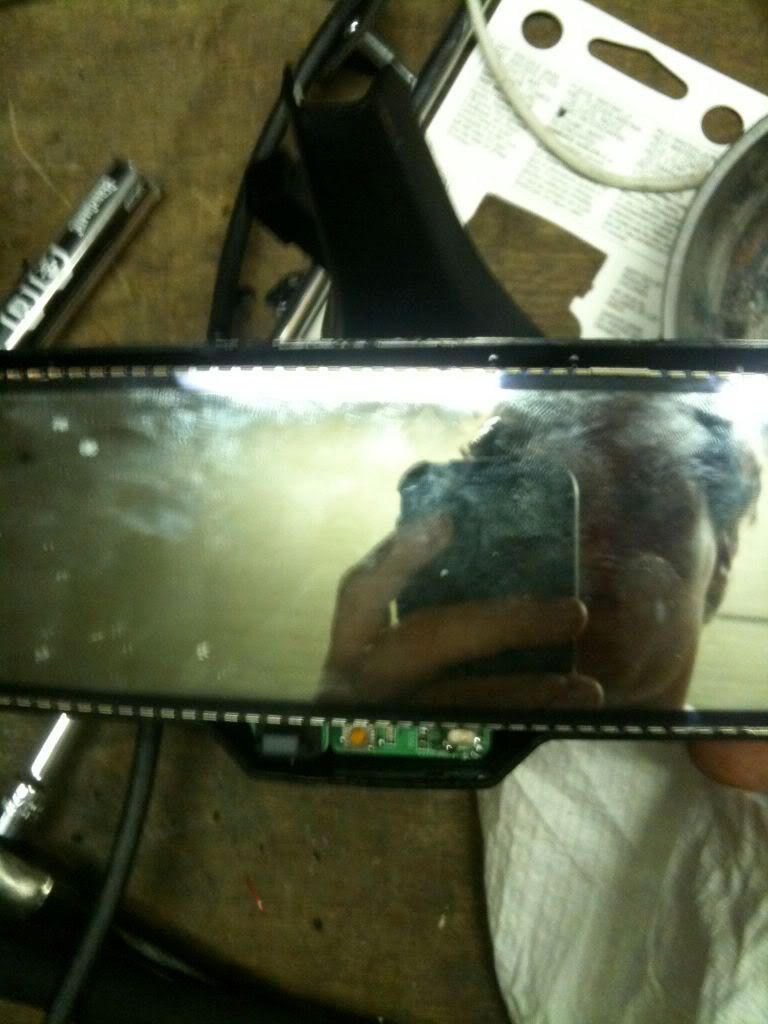
Lets get started. First off pulling the mirror off and cracking open was almost the most difficult/frustrating part. With having no instructions or knowledge of attachment point it was a lot of twisting and grunting.
-I don't have a great way to describe how to remove it from the mirror, but I believe it twists slightly counter clockwise and requires a good bit of force to pull off. Once detached I used a pick to detach the electrical connectors and it was one of the more difficult german plugs I've come across.
-From here you'll have the whole mirror assembly on your work desk to begin disassembling. A heat gun and a 90 degree pick are gonna be your best friends. This plastic is very strong and rigid so it'll take some force. The heat gun will help let this plastic bend some and get to the connectors. I found it easiest to work the bottom, then top, then sides. Using the pick work from the middle out just prying and working across to pop the front case from the back body. Again, it's pretty strong and very rigid, even if one or two connectors break you'll be fine.
-Once you have it apart you'll see there is a row of metal clamp connectors that clip to the front glass and a row of metal clamp connectors that clip to the black glass. This sends an electrical signal through it to create the dimming effect based on the light sensor facing the front of the car from the back of the rvm. Just note which goes on which ( I think positive goes to front and negative to back, probably doesn't matter, you'd just need to make sure they are on opposite pieces of glass). You can go ahead and pry these off so the glass is completely free.
-From here you see some plastic pressure clips that stick up from the back of the mirror casing and hold the circuit board in place. This is pretty easy so go ahead and free the circuit board from the mirror casing.
-Ok, now we start the no return point. You're going to need to get pretty personal with your dremel and start creating a cavity for the concealed display for the V1 to sit in.
You can see I removed a fair bit of material, and sorry I don't have a before picture and a picture without the display in place.
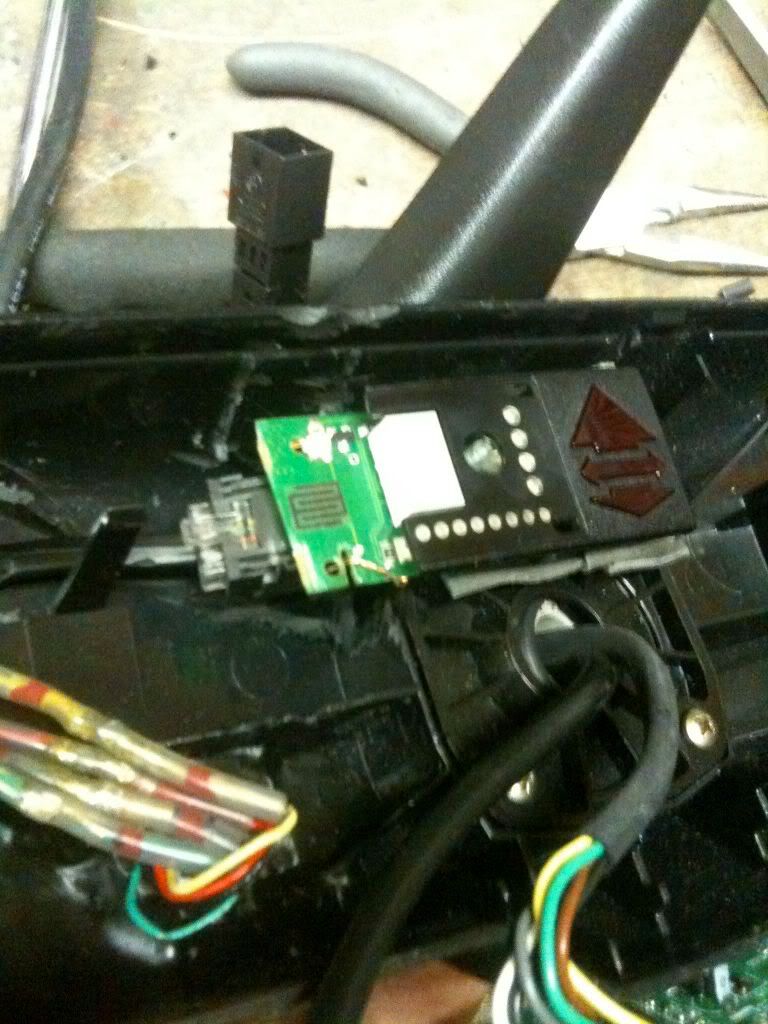
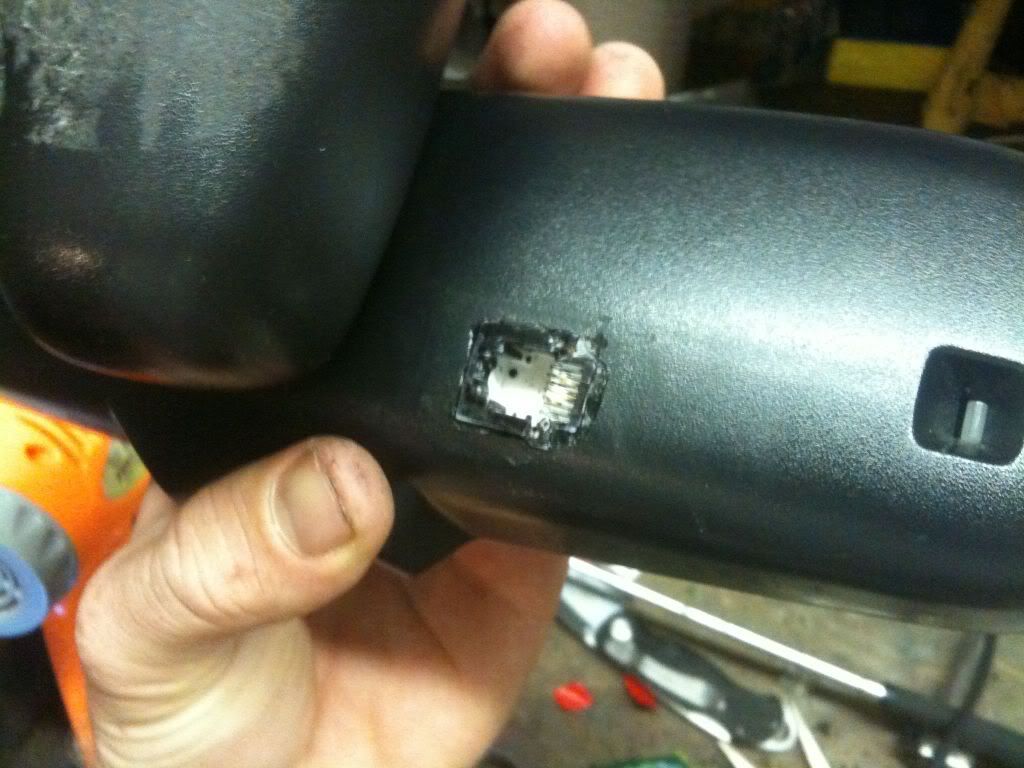
-I opted to have a phone jack (power source for the conceal display) on the back of the mirror rather than just run the wire to the power source. Dunno why, just thought it'd be neat to do so I got a phone jack hub, disassembled, and then dremeled a hole for it to set it. I kept the hole pretty tight, and then used some liquid electrical tape to fill in the gap and secure it to the rvm body. I then used some self soldering heat shrink to connect the phone hub to a small phone wire and twisted the wires together, then heat gunned em to get a solid connection. (heat shrink with solder inside new favorite toy btw!)
back of rvm case:
-Next step is to get the mirror ready. There is a piece of stiff foam to press the mirror tight in the frame right where I put the V1. Simply get a razor blade and cut this away. Next you will want to begin test fitting the mirror over where the V1 display is and figure the dimensions that you need to show through. Some of the aftermarket ones apparently sand-blast or chemically etch the exact area that the display needs to shine through. Well after examining the compass display I decided I didn't need to go with either of these methods even though their technique isn't too difficult.
-So after the foam is off and you've figured out your base dimensions you can simply use a razor blade to cut out a rectangle, just be careful not to cut all the way to the glass. You simply need to get the plastic backing scored. From here you can angle the blade so that you can shave off this backing without scratching the glass. Just keep a good angle and work slowly. It really isn't very difficult once you get it going. After it's off just use some goo-gone and then glass cleaner and it's now the same as the compass side.
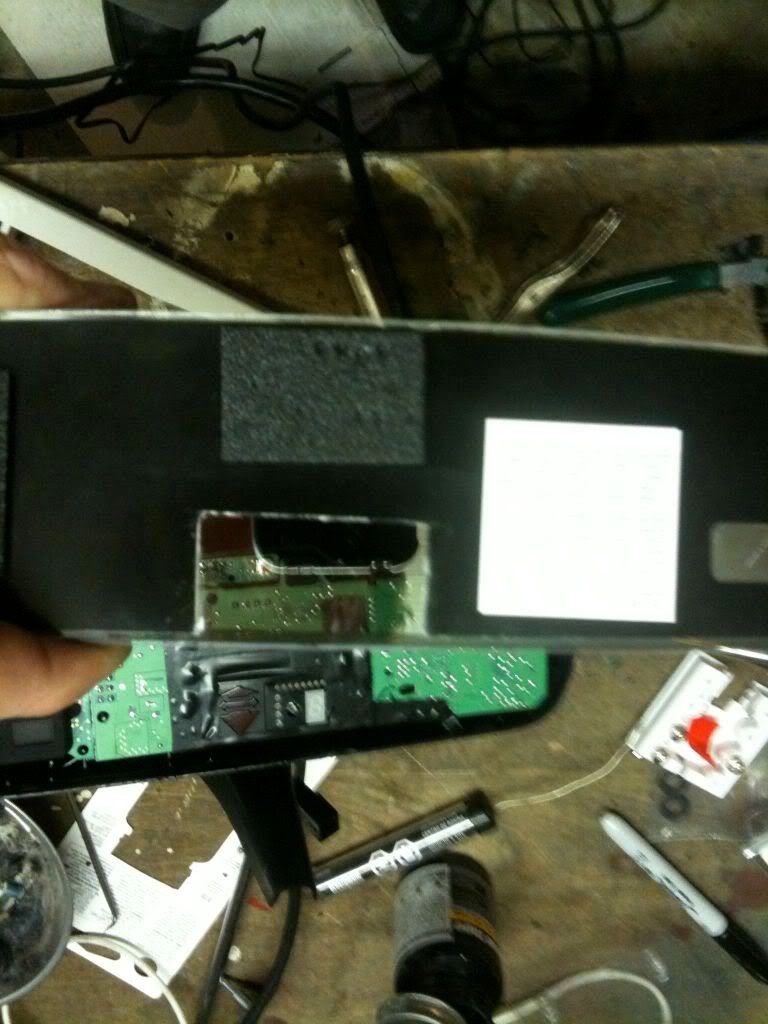
Front Side:
Now that it's see though when light is shining from the rear you can test fit the mirror over the display more and figure out if you need to cut a bigger section out. It's easy to cut more but tough to go back.
-At this point I began figuring out the final mounting of the concealed display and noting that due to the concave nature the right side need to be propped up slightly more than the left. I simply used double sided tape and just layered it until I got to my desired placement. At this point it's pretty much even with the circuit board and the arrows being slightly raised.
-Here you can see how the concealed display was taken apart, trimmed, and reinstalled. I also used some electrical tape to help prevent light wash to keep the signals crisp.

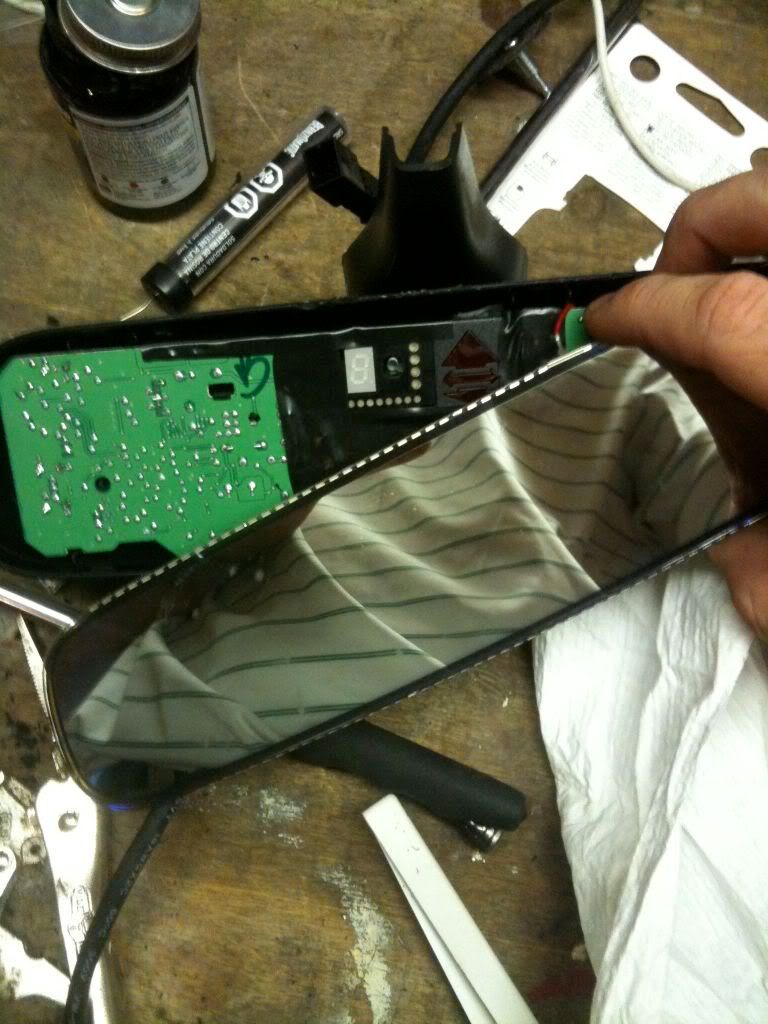
-So quick recap, at this point you've got the mirror etched to appropriate size, display is wired to case, concealed display has been disassembled and trimmed down, circuit board can now fit back over the display as well as mirror over both.
So if you're happy you can begin reassembling everything, but I'd recommend continuing to power the unit on with the mirror in place before you snap the front case back on, b/c once it's back on it's a pain to get it back off.
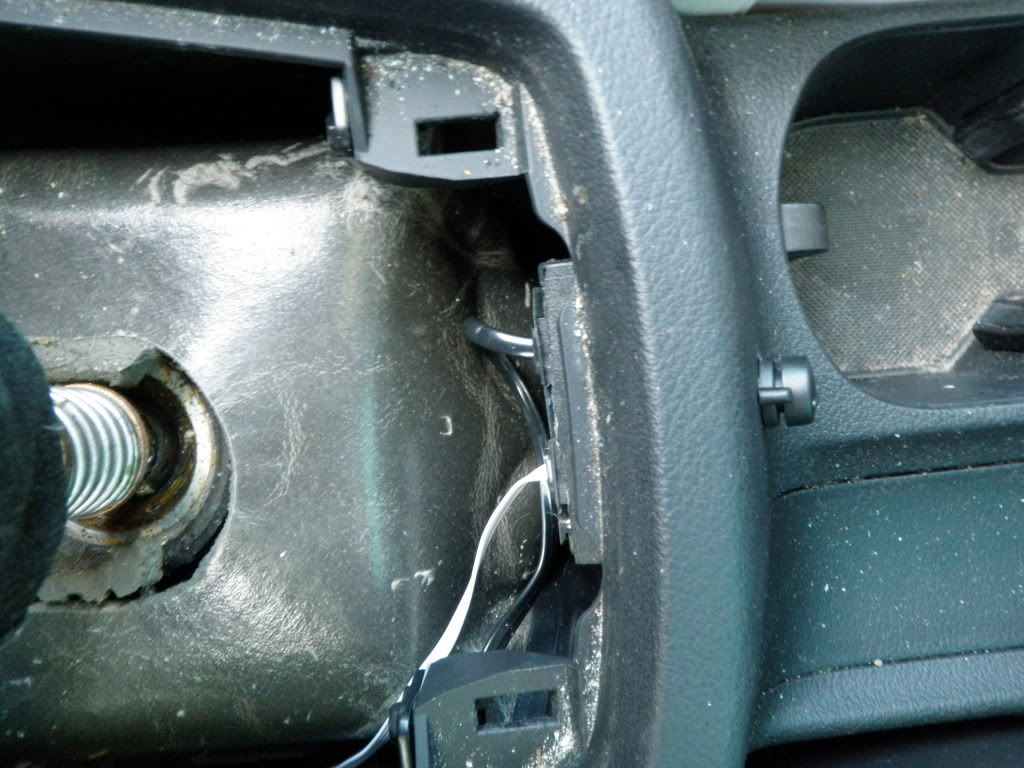
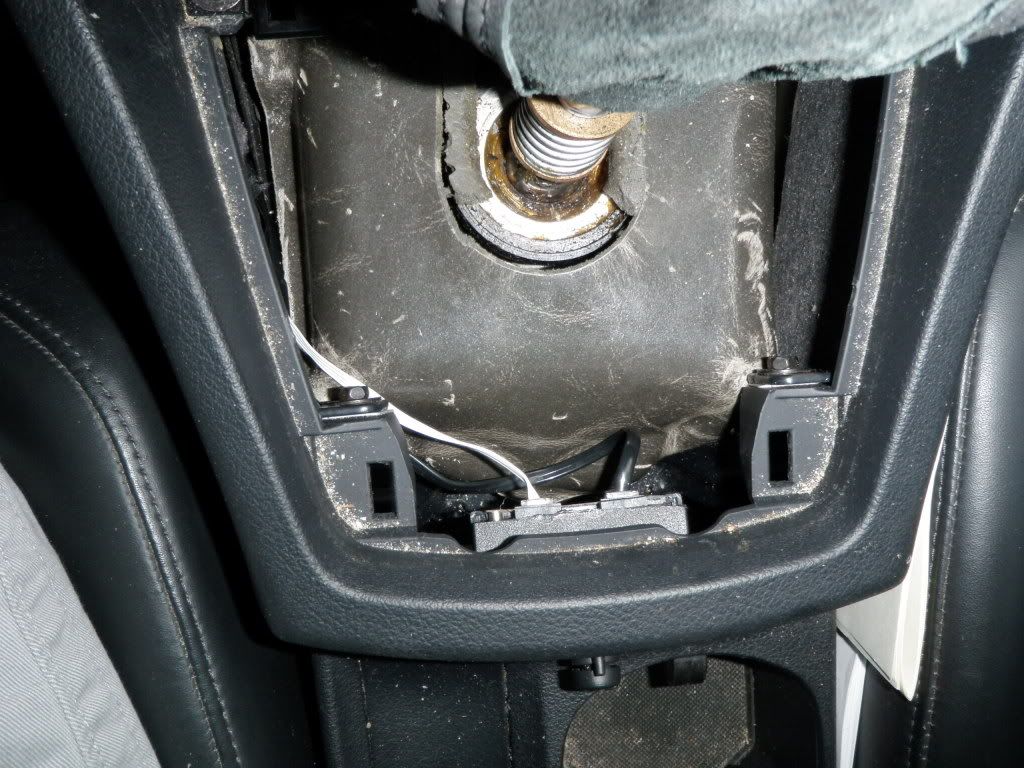
From here I began reassembling in the car. I did however notch the secondary cover above the mirror to allow the phone cord to go from the back of the mirror into this covering and then up to the roof valence.
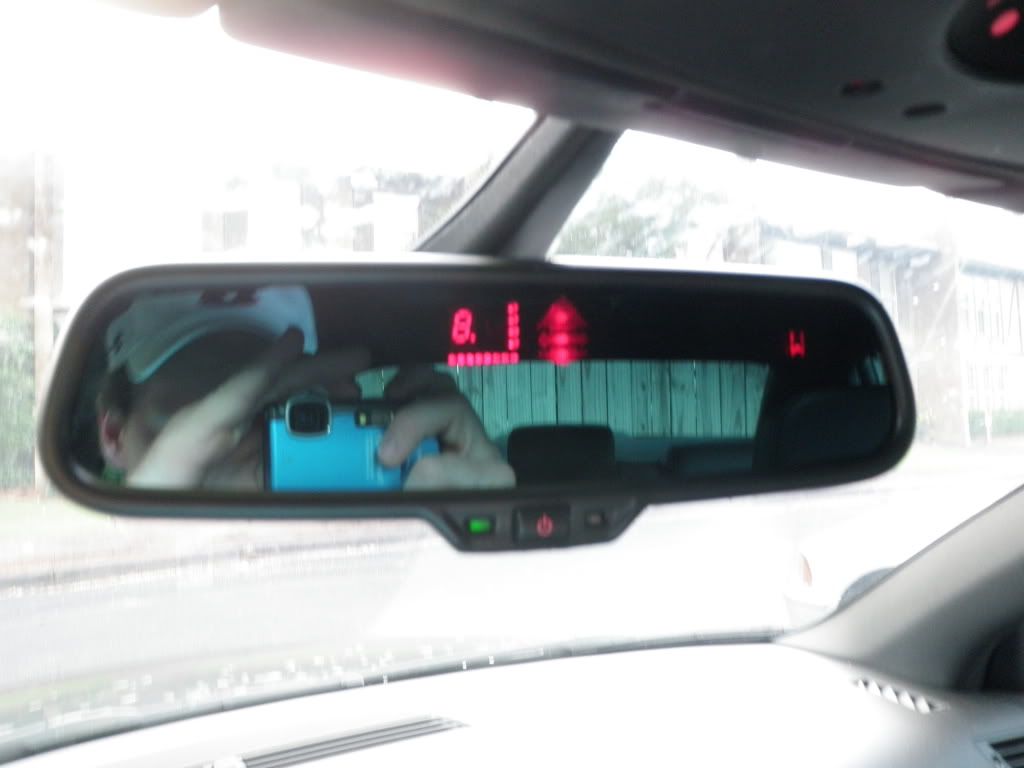
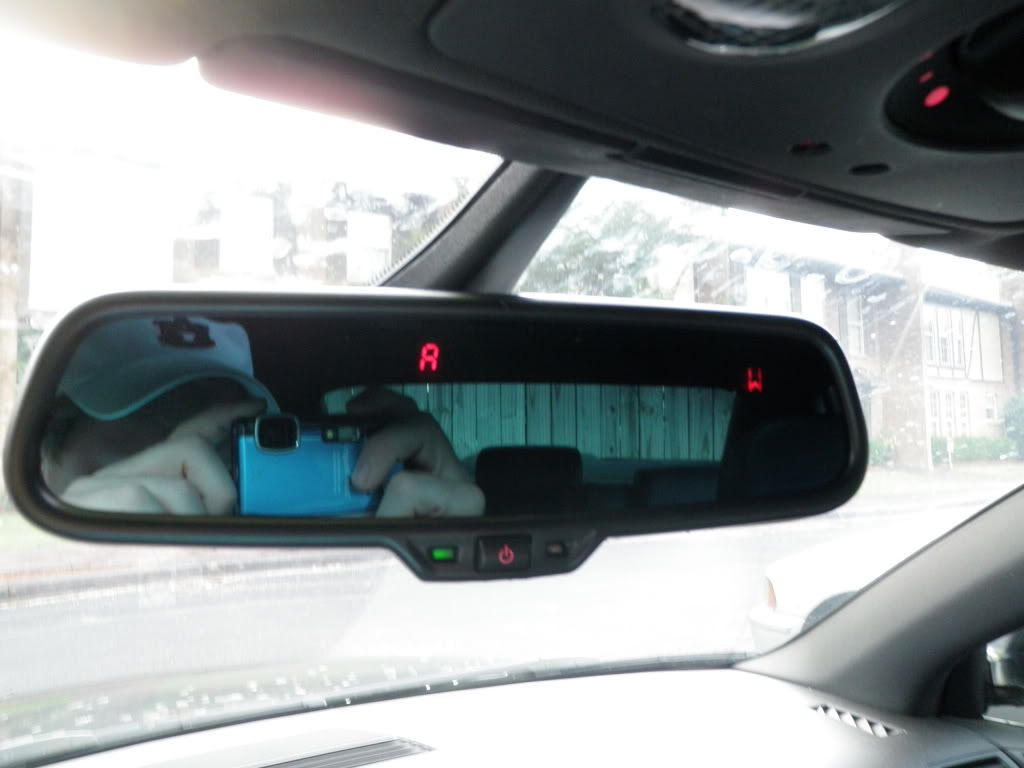
Here's some shots of it in place and working:
VIDEO IN ACTION
[IMG]
http://i278.photobucket.com/albums/kk89/mbgt72/My%20Audi%20S4/Valentine%20One%20Install/th_P7100444.jpg[/IMG]
Next, lets move on to the Remote Audio Control:
-Lets make this a bit shorter. I saw someone had it installed here so gave it a shot and so far so good.
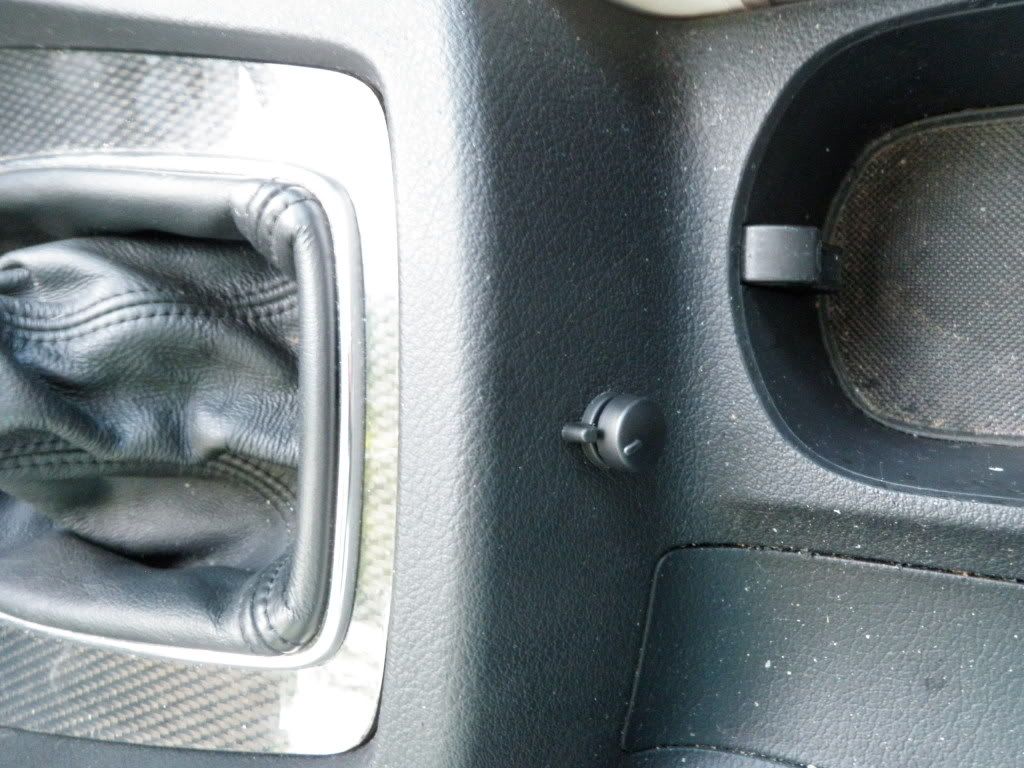
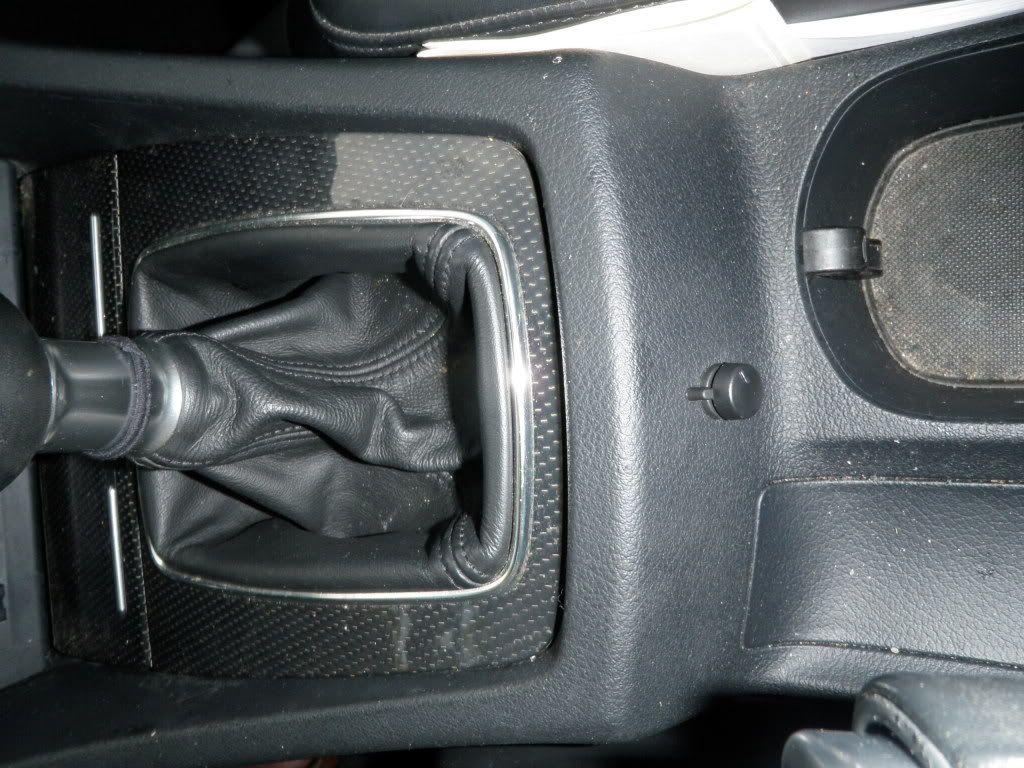
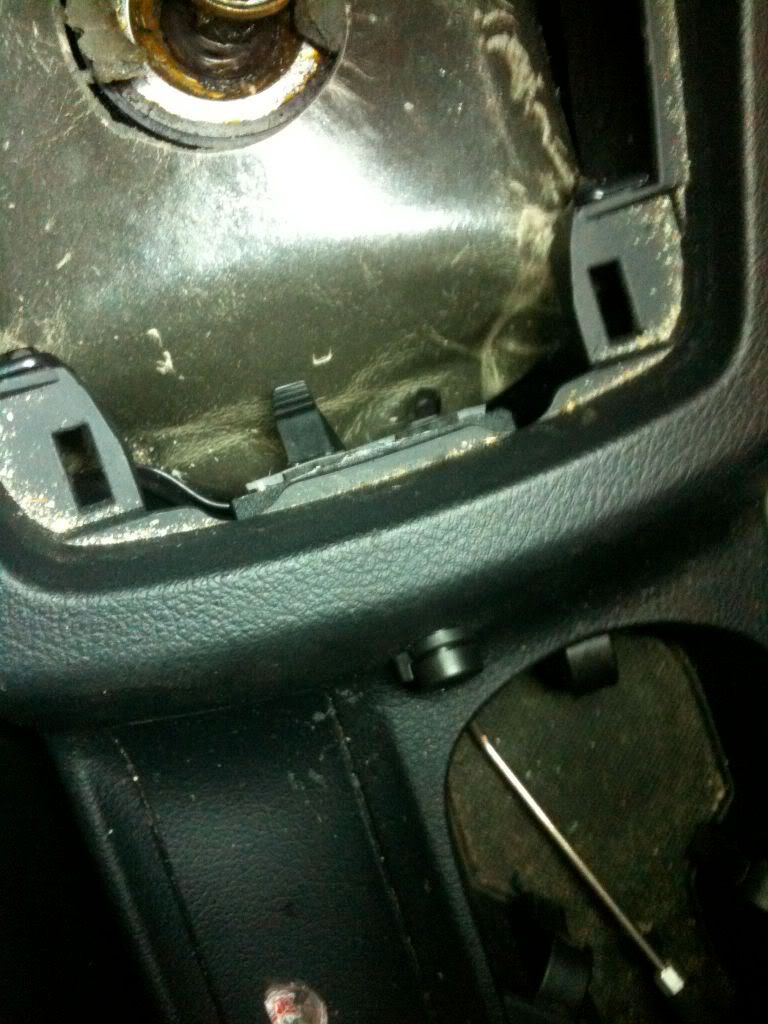
-For this we also need to modify the unit. I used the dremel again to cut the front part back to the least needed material and reinstalled the case. The front knobs simply pull off one at time. Next was the really scary part. I had to take a 1/2" drill to the center console for the knobs to fit through, yea talk about a moment I sat there and went, uhhh, shit do I really want to do this, especially not being certain the knobs would be functional due to the thickness of the center console. Well it worked out thankfully. I used a good super glue gel to attach what remained of the front of the remote audio control to the inside of the shifter area as seen. Then I used a small dab of glue to attach the mute knob to the audio console to help ensure it could hold from both sides, but it's important not to let the glue connect the mute and main volume knobs together.
After a couple minutes I was quite surprised everything was holding strong and both knobs moving freely.
Hopefully some of this info will be useful to someone out there or maybe inspire someone to one-up me and think of an even greater setup. While it wasn't quite as impressive as I had first hoped for, I'm still very very happy with it and it definitely impresses people it to see the display and control.
(Sorry if the post seemed to drag on but a lot of info to share)
Thanks guys and comments/ideas are appreciated!
Oh, and a great writeup I found when I was about 80% done of a guy in a R8 doing similar along with some others:
http://www.r8talk.com/forums/showthr...2652#post52652
http://g35driver.com/forums/audio-vi...ew-mirror.html
http://www.mp3car.com/vbulletin/fabr...-mirror-3.html
Edit:
Photo Links Fixed
Also I have decided to move the unit itself back up to the front. Right now it is placed on the passenger side behind the rearview mirror. From the driver's seat you can not see the V1 at all. However when I get time I am thinking of making a mounting plate that attaches to the passenger side sun shade that will mount the V1 all the way up in the top right corner of the windshield. We'll see if I actually get around to it, but I've seen such a kit for the corvette guys that just mounts under the sunshade mounting plate so it stay securely in place. I just didn't feel completely comfortable that I was getting full range with it being in the back (mostly due to the angle to avoid the laser warning due to nav screen) and I couldn't rest well with that

 Reply With Quote


Bookmarks