


I spent a fair amount of time figuring out how to get this job done properly and figured I'd write up how I did it, its not too difficult just time consuming your first time around.
You DO NOT need to remove the whole axle in order to replace the seals. When I went to do this I noticed my right passenger side axle was making a mess so I will include how to remove that in the write up.
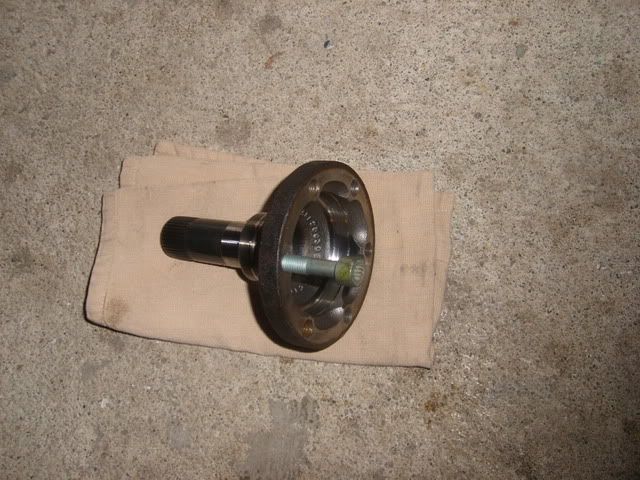
After noticing that I had a look at my other axles and the front right was shot too, I replaced it with a DSS axle from FCP
http://www.fcpgroton.com/product-exe...2004+%28DSS%29
Quality looks excellent compared to other aftermarket axles I've seen on the market, I haven't driven it yet though
Tools required:
- 6mm Allen socket for axle heat shields + Flange bolt
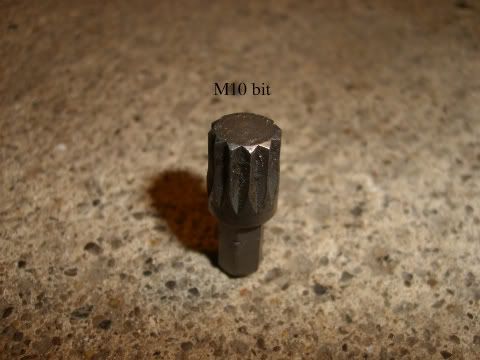
- M10 socket for axle bolts (12 point, similar to torx bit - same one used to remove front seats)
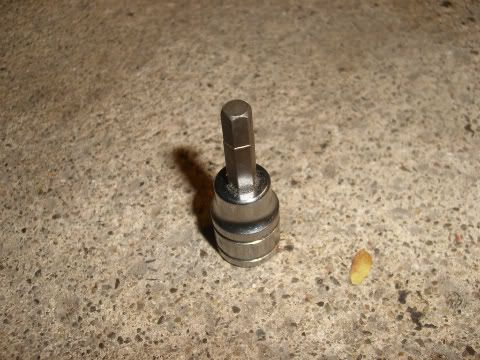
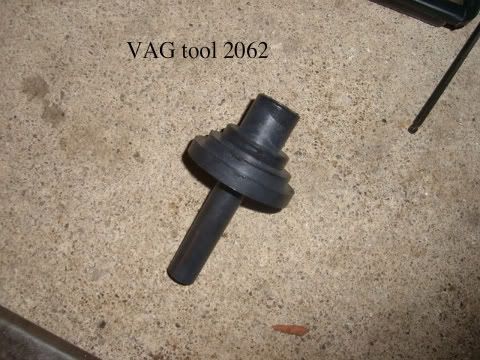
- 2062 seal driver to properly position new seal
- Basic hand tools (sockets, wrenches, pry bar, swivel sockets, pb blaster etc)
- Seal puller
- Spring compressors to remove rear springs only for removing axle
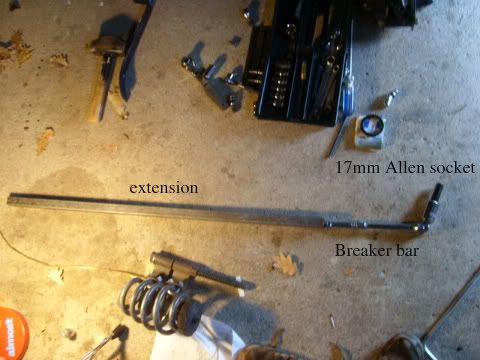
- 17mm Allen socket for large axle bolt at wheel hub only for removing axle
- Breaker bar + extension to remove axle bolt only for removing axle
Parts required:
- 2 new seals
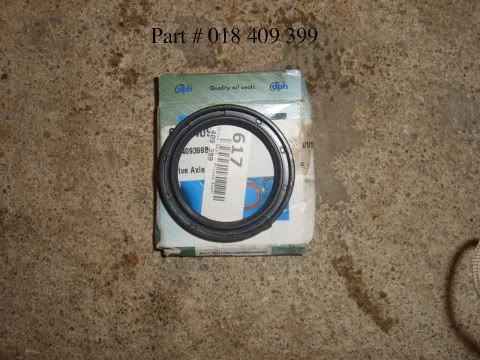
- Large axle bolt at hub part # 4B0 407 643
- Axle bolts at diff don't have the part #, got mine from the dealer
Now onto the fun stuff...
If you are only replacing the seals skip to Step 3
Step 1
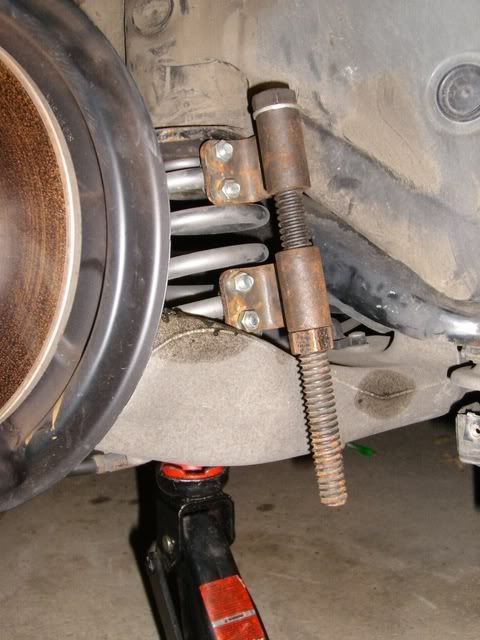
First thing you want to do is loosen the 17mm axle bolt. This is only necessary if you are removing the axle, otherwise you can leave it alone.
Keep in mind you get a lot more room to work around when the axle is removed, but I did the other side just fine sliding one end of of the way.
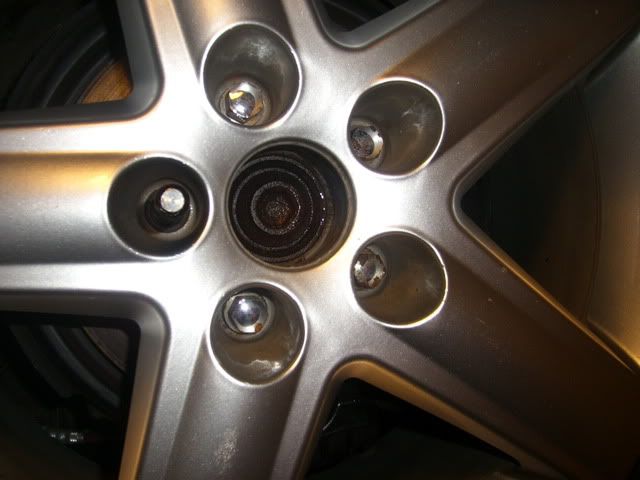
To loosen the bolt you'll need the 17mm allen socket and breaker bar with an extension. The wheel must be on the ground with center cap removed
These bolts are nice and snug.. You'll need some PB Blaster/ penetrating oil to get them loose. The extension bar also made it much easier
Step 2
In order to remove the axles, you need to get the rear springs out to get enough room.
Again, this step is only necessary if you are removing the whole axle.
This is the easiest way to remove the rear springs and struts for any reason (coilover install, maintenance etc)
- Jack rear suspension underneath the spring (compress the spring as much as you can)
Install your spring compressor
- Loosen rear subframe bolts (I dropped mine as much as possible)
- Unbolt strut mount and compress the strut
- Now lower your jack and use a pry bar to remove the spring

Simple as that! Now get your suspension supported again with the jack
Step 3
- Next you need to get under the car and remove the axle heat shield. Theyre held on by three 6mm bolts
If you're only replacing the seals, This is where you should start.
Lug bolts must be installed at this point (with wheel removed). This stops the axle from spinning
Step 4
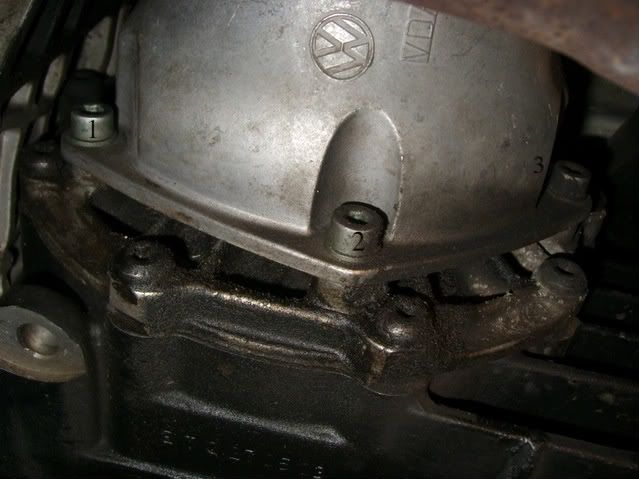
- With the heat shield removed, you can get to the six M-10 socket bolts holding the axle to the rear diff.
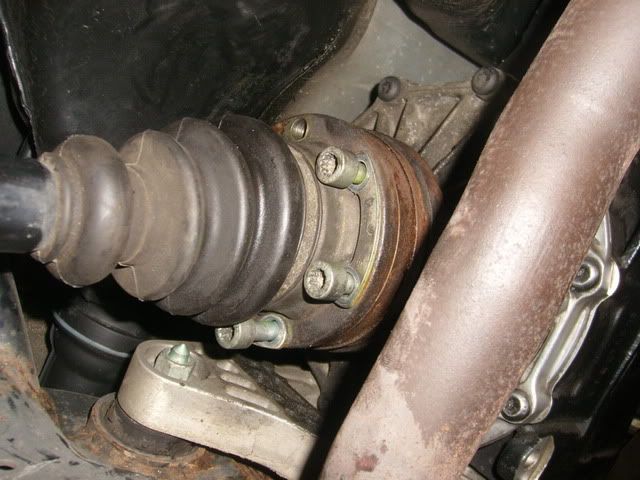
- After all the bolts are removed, compress the axle and slide it out of the way.
NOTE- this is all the room I could get to work with on PASSENGER SIDE without removing the whole axle
- This much room on Drivers side
Step 5
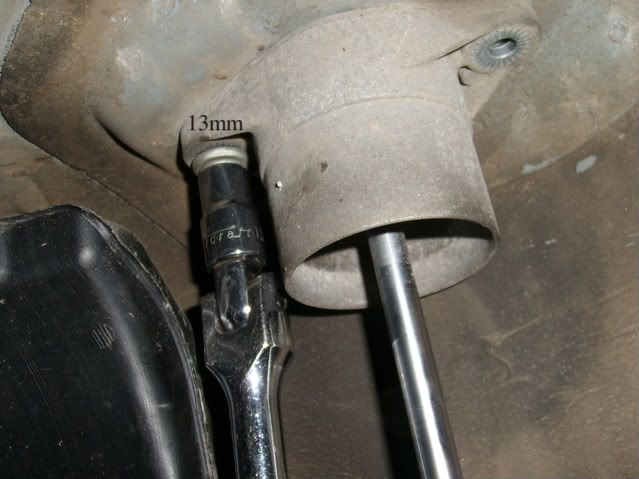
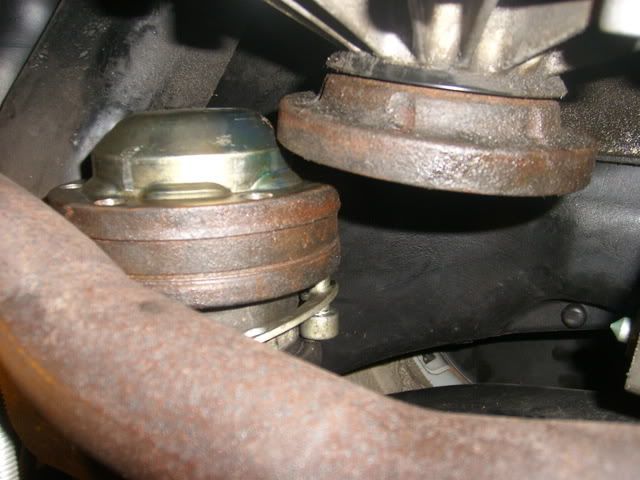
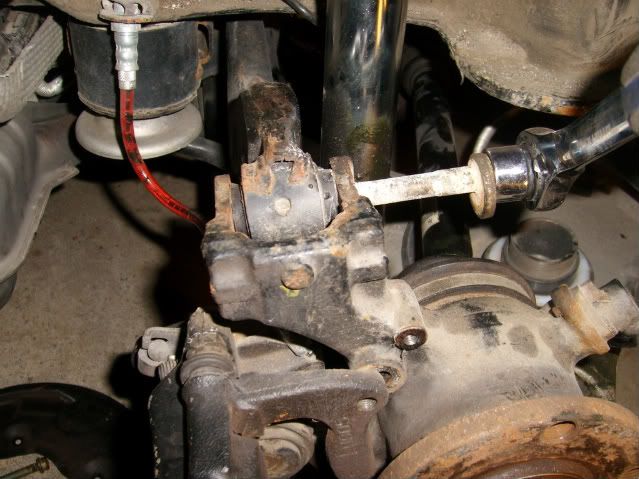
- With the axle out of the way you can now remove the 6mm allen bolt holding the flange to the diff. A swivel socket will help
Its a bit tricky getting this loose, you need to stop the whole flange from spinning by holding it with something. I put two of the M10 bolts back in and put a wrench in between to hold the flange in place so I could break the bolt loose)
- With that bolt out, you can now remove the flange from the diff
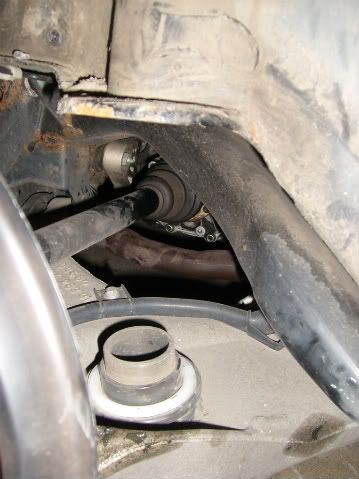
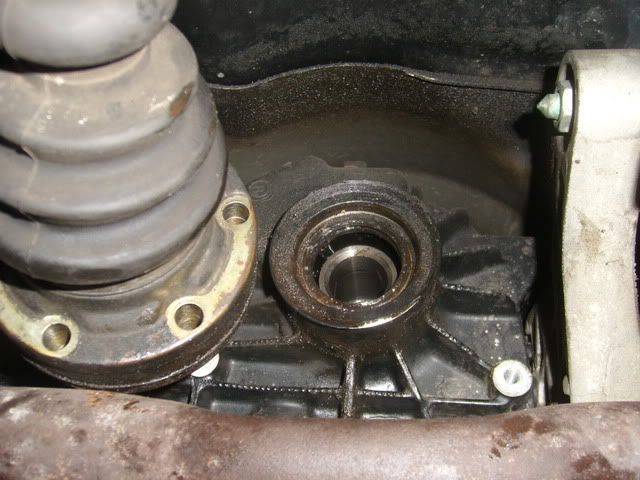
Step 6
- With the flange removed, you're now at the old leaking seal

NOTE- Remember where the seal is positioned so you can install the new one correctly
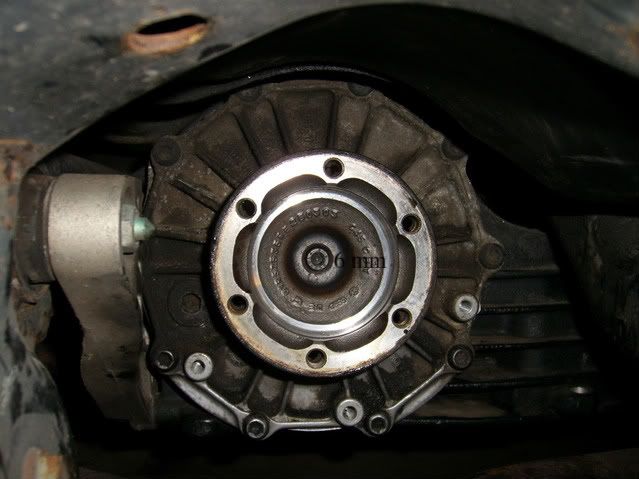
- To get the old seal out, I tried numerous methods. I will explain the method I found most effective (Sorry- no pictures of this step)
First I tried using the seal puller alone, which was a waste of time. What I ended up doing was hammering a large flathead into the seal to try and bend it out of shape. Make sure to stay away from the edges around the seal (You don't want to damage any areas inside the diff). Hammer into the middle of the seal (refer to the yellow line in the above pic) The seal is actually made of some sort of metal on the inside (not fully plastic). Once you hammer the flathead far enough into the seal, use it to bend the seal as much as possible. Repeat this step a few times if needed until you get the seal deformed and out of place, which than makes using the seal puller much easier.
Step 7
- Once you get the old seal out, rub some grease or trans. oil on the new one and use the correct tool to push it into place.
Its possible you can get it seated properly without the tool but it makes the job easier and you wont have to worry about doing it again.
- With the new seal installed do the steps in reverse to get the axle and everything back together, and then move onto the next side. After you get one side finished the other takes about half the time.
Torque specs will be added soon
For those interested in removing the whole axle..... here you go:
To remove the axle is not a whole lot more work. On top of the work above, all I did was the following:
- Remove 17mm axle bolt
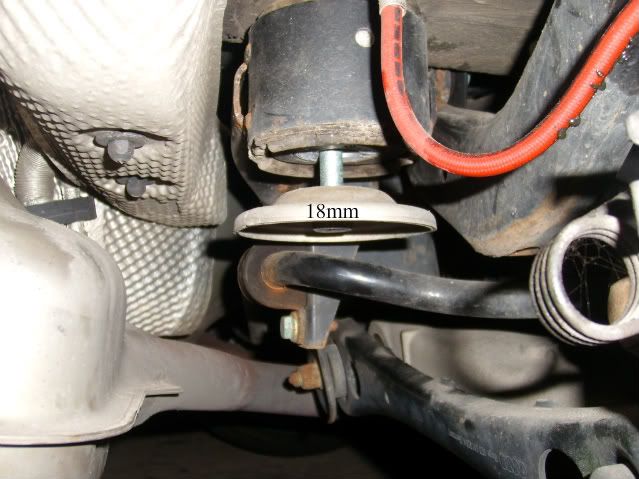
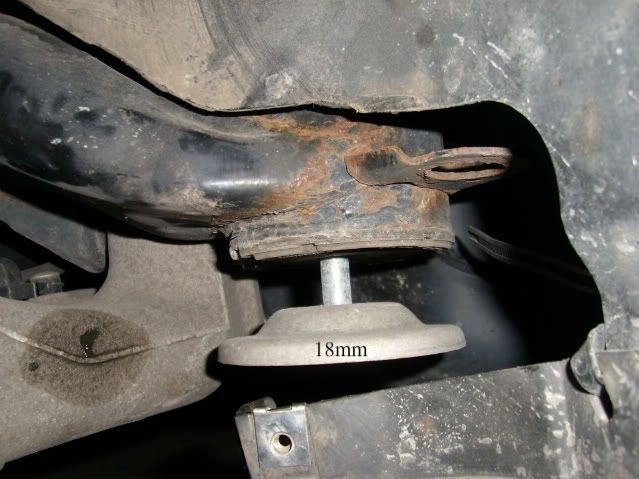
- Remove transverse link (?) bolt (18mm on either side)
- Remove two other bolts holding the wheel hub to rear subframe, both 18mm
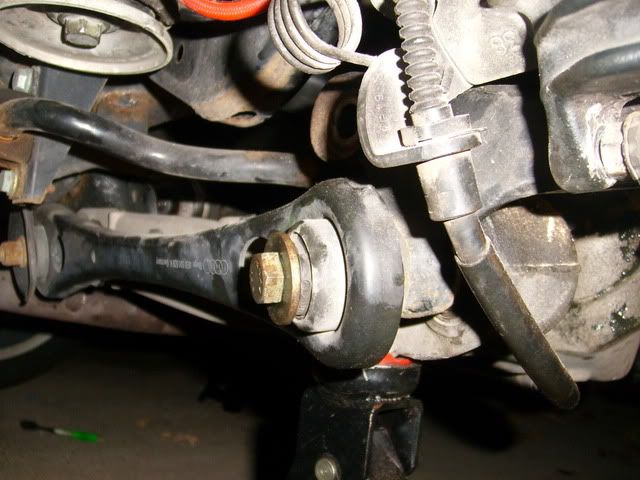
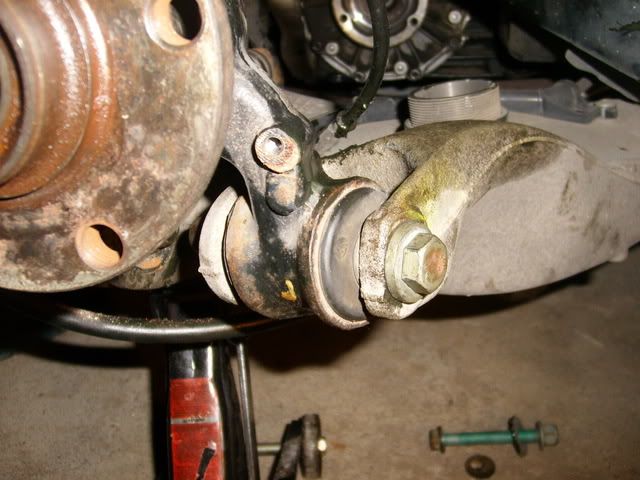
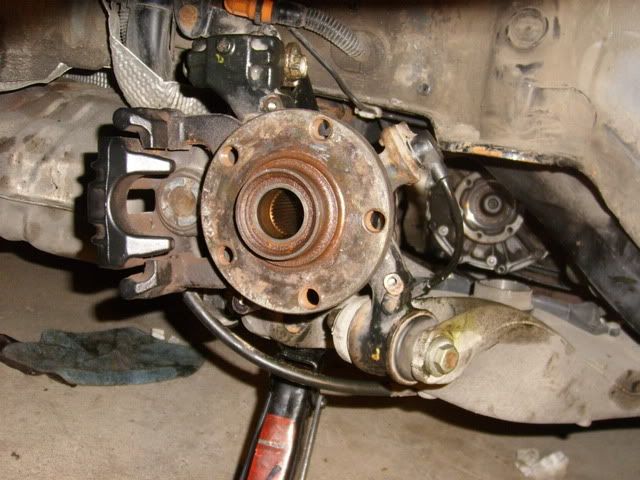
With these 4 bolts removed, You will have enough room to bend the wheel hub forward and pull the axle out towards yourself
- Axle removed and off to be rebuilt, much more room to work with under there
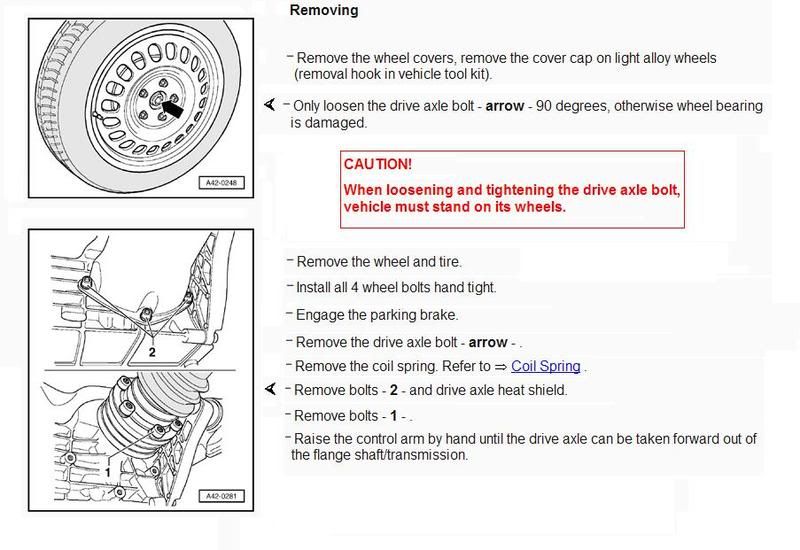
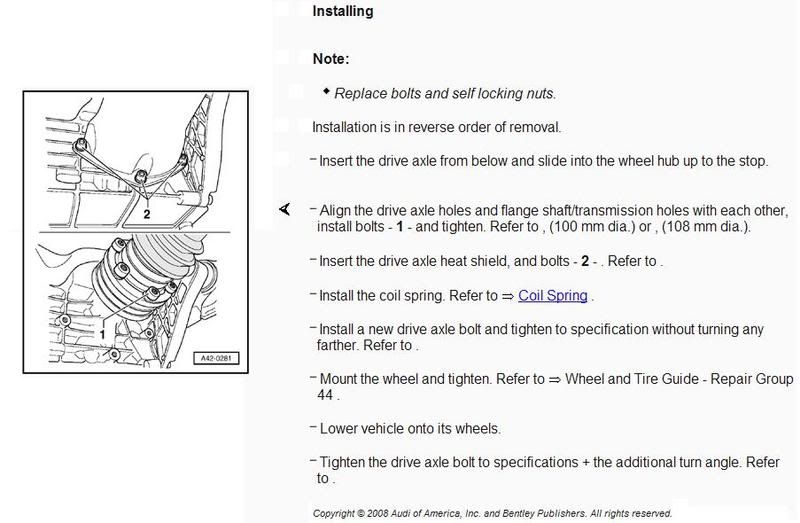
- Bentley instructions for loosening bolt and removing/installing rear axle:

 Reply With Quote


Bookmarks