


There has been some questions about this now and again, so I thought I'd finally post a little writeup of my oil pressure sender installation. The gauge I bought was a Marshall Pro Street II, full sweep electric stepper motor gauge. I got in on ebay for about $60 as I recall.
First a little explanation of what I did. There are 2 normal places to connect an oil pressure gauge on the 1.8T AWM and AMB (2001-2005). The most common is the oil pressure switch port on the rear of the oil filter housing. The other is the test port on the top. You can see both in this diagram - the test port plug is highlighted in red, and the red box shows the pressure switch:

When using the switch location, you use some sort of splitter to make it work. I didn't want a big "T" fitting hanging off the back. You could also use a relocation type splitter like 42 draft designs sells (http://store.42draftdesigns.com/VW-O...Kit_p_314.html). That is a great product, but I didn't want to find a place to mount the glob of sender/switch/fitting block in the engine bay. It just seemed a bit messy to me. So I decided I would use the test port.
*NOTE* The oil filter housing is different for the earlier AEB and ATW engines. It is angled more and the port locations are different. Here is a diagram:

For the AEB (1997-1999.5): There is no check port. You will need to use a "T" fitting, either on the oil temp sender (#11) or oil pressure switch(#10) ports. I would recommend the pressure switch, as putting the temp sender after a "T" will reduce it's accuracy.
For the ATW (2000): It has the test port in the location of the oil temp sensor (#11). For the ATW, the oil temp sensor was moved to the oil pan, so they put a plug there instead. That port is quite easy to get to, although a 45 degree adapter or extension fitting would probably still be necessary for a bulky sender.
It became apparent that the space is pretty tight there and my bulky sender wouldn't just fit in there straight. So I eyeballed it a bit and decided a 45 degree angle fitting on top of the required metric adapter would probably do it. So off to ebay I went to by me some fittings. Now on to the fun stuff:
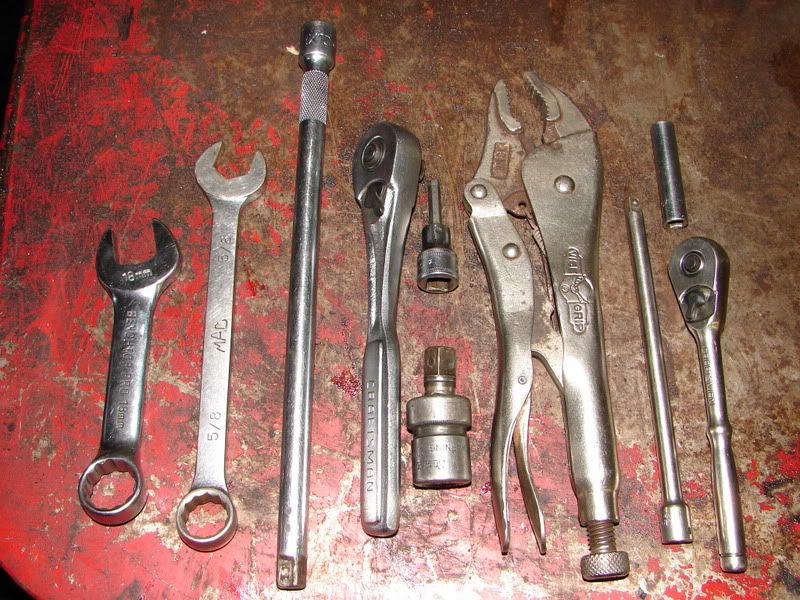
Tools Needed:
18mm stubby wrench
5/8" wrench
3/8" drive extension, 1 foot
3/8" drive ratchet
3/8" drive universal joint
3/8" drive 5mm allen socket
1/4" drive ratchet and extension
1/4" drive 7mm socket
Philips screwdriver (not pictured)
Parts:
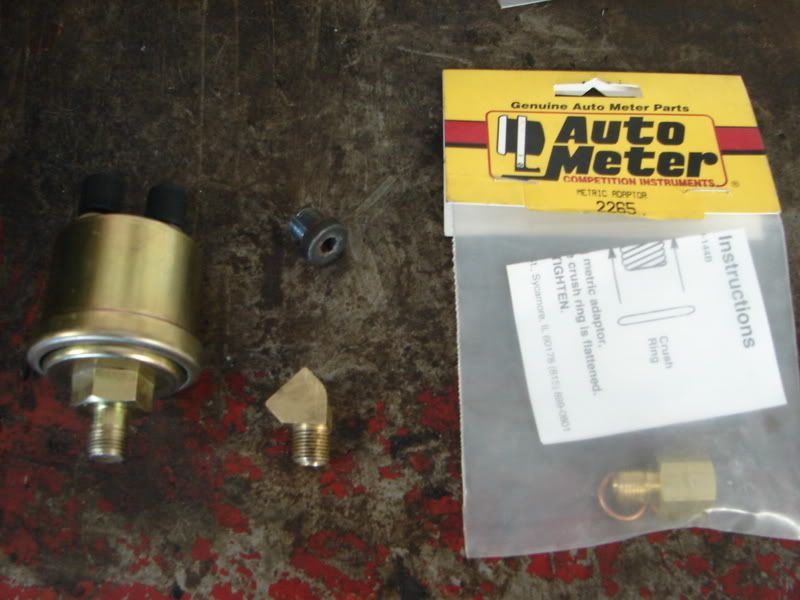
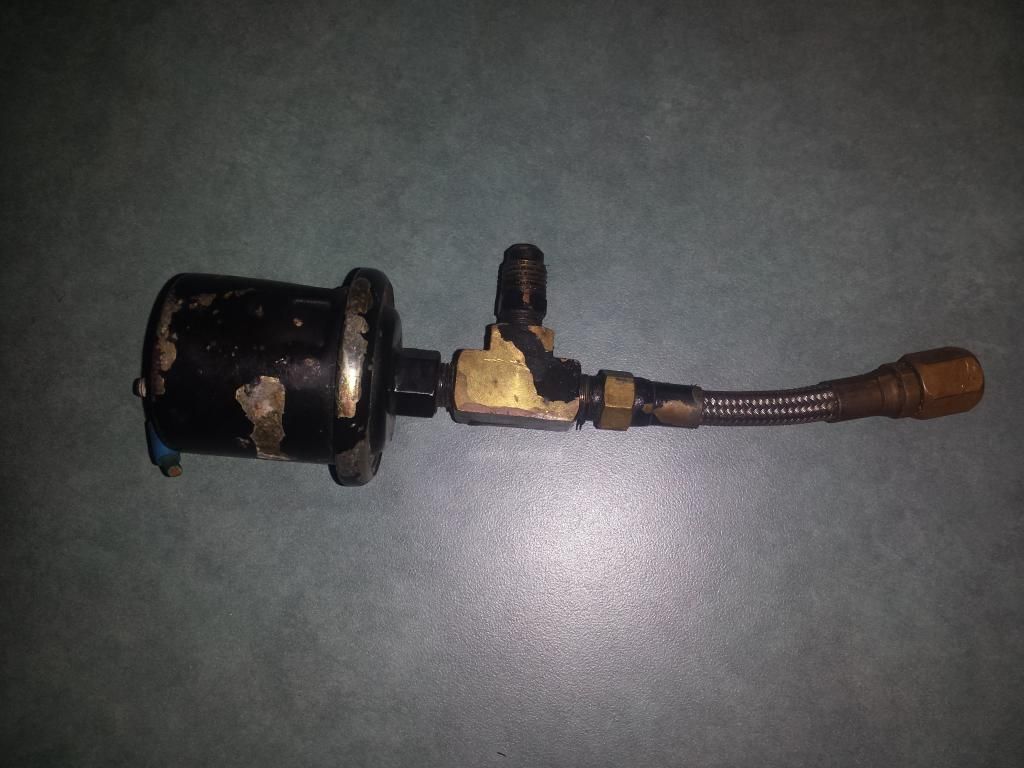
Oil sender that comes with the gauge
M10x1.0 to 1/8" NPT adapter (Autometer #2265)
1/8" NPT 45 degree "street elbow" ("street" means it is male on one end and female on the other, in plumbing lingo)
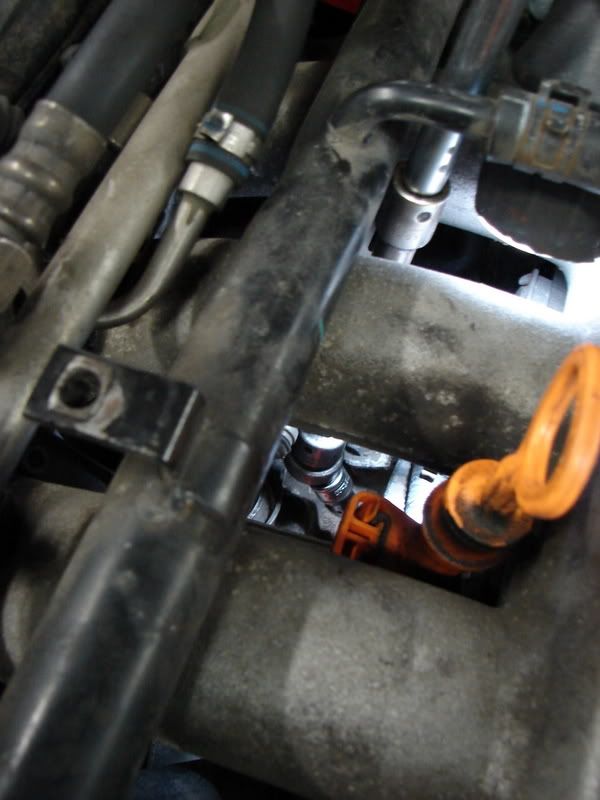
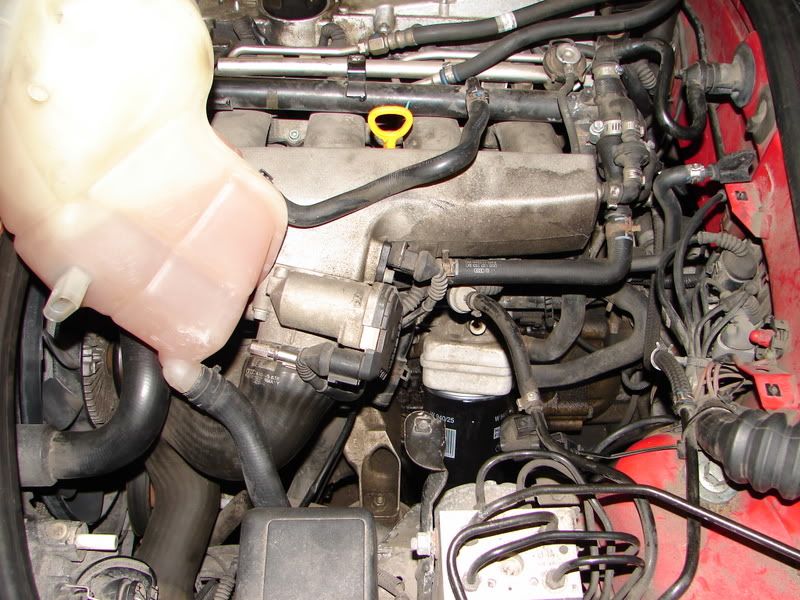
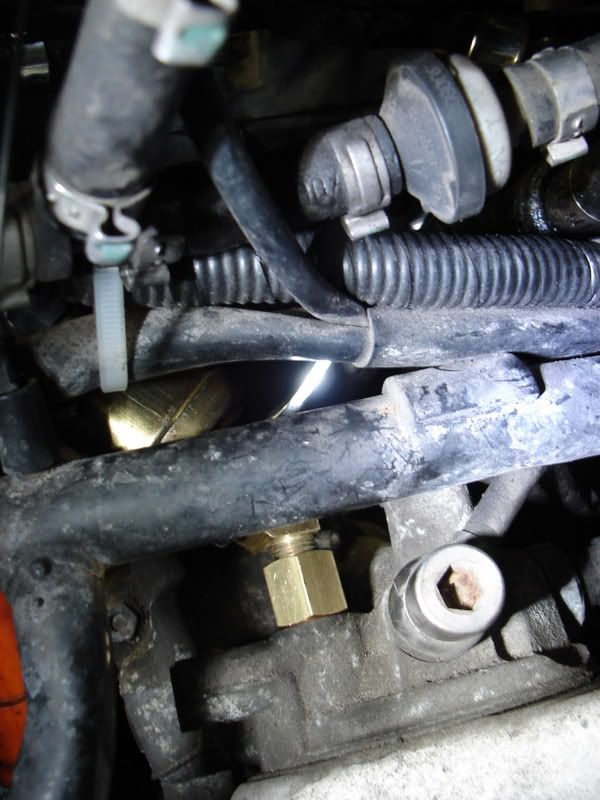
First step was to remove the plug on the top of the oil filter housing. You can see it pretty well through the manifold runners.

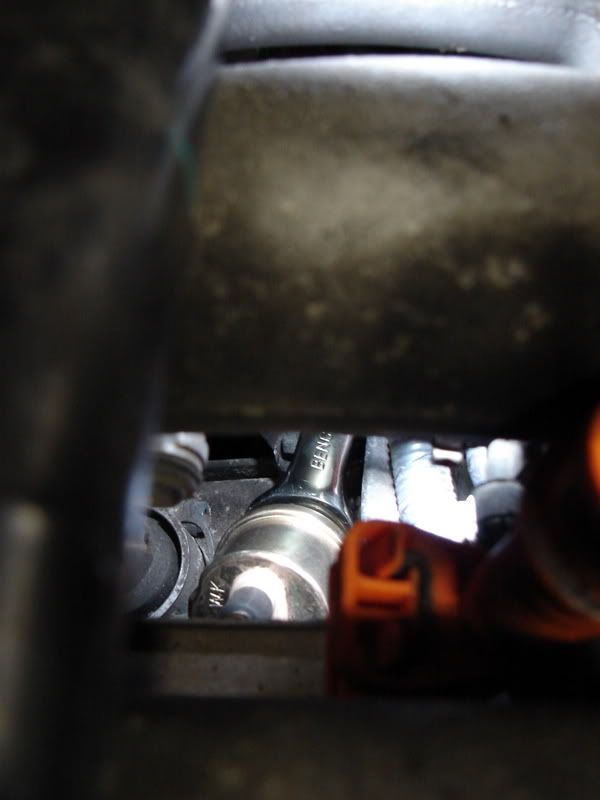
It comes out pretty easy with a 5mm socket, universal and a long extension.
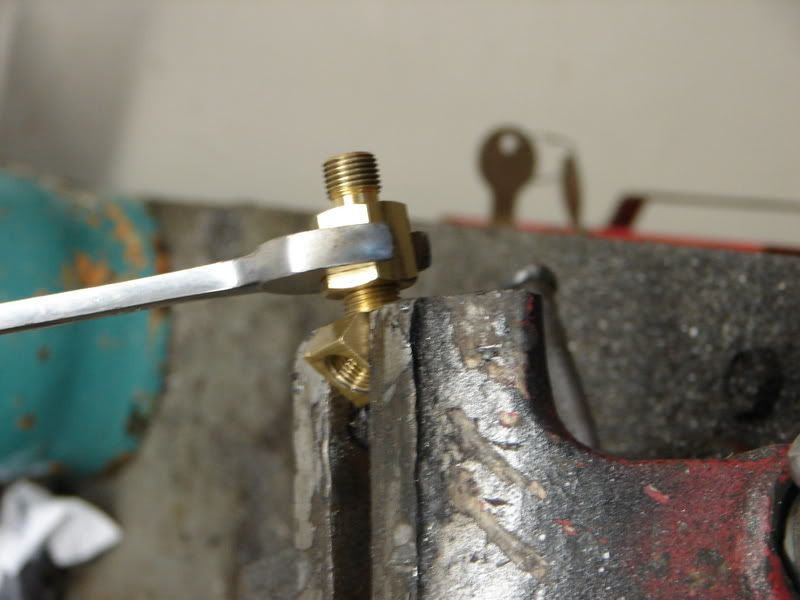
Then I fitted the 45 degree elbow to the m10x1 adapter. I put in a vise to make it easier to work with. Some teflon tape is required here. I made sure not to get it on the very first thread, so teflon doesn't make it into the oil. It is pipe thread so I just tightened enough to seal. I left at least a full turn to go if needed, so I could adjust the angle (clock position) for the sender.
Installed as a unit with the crush washer and tightened with a wrench from the side. At this point I had to remove the coolant reservoir and flip it to the side to get some more room (3 philips screws). I also removed the throttle body hose (two 7mm screw clamps) for better access. My m10x1 adapter used a 5/8" wrench. Tightened enough to crush the washer, but left a little to go if needed.
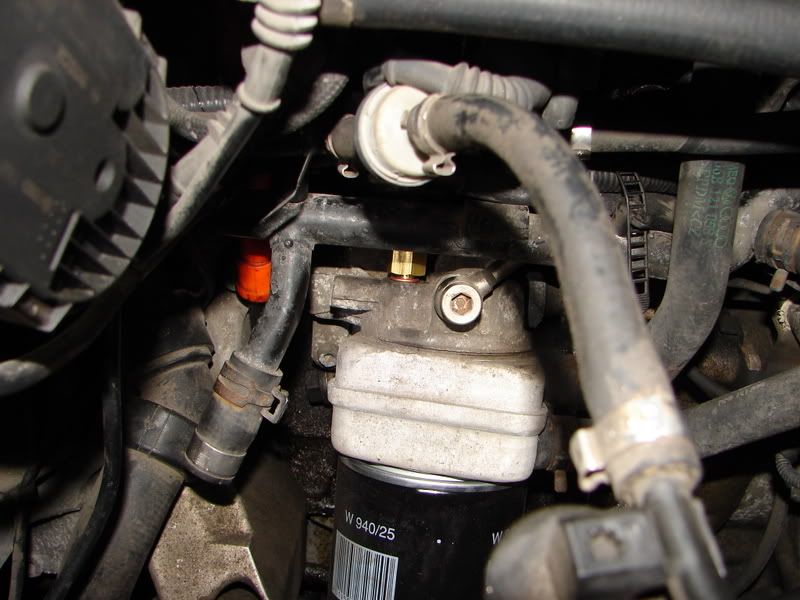
Now is when the clock position matters. It ended up exactly in the opposite direction, so I tightened both fittings equally to arrive at the final position. I had to mock up the sender a few times to check
Then a little teflon tape on the sender and install. I needed an 18mm wrench to tighten the sender. It had to be a "stubby" wrench as there isn't much room at that angle. To work the wrench I had to put my hand in through the back. A tight squeeze, but workable. Then I remounted the coolant reservoir and reattached the throttle body hose.
At this point the car is now driveable again so I took a break and decided to the interior guage mounting business the next weekend. The only other under-the-hood item would be the wire that runs to the pressure sender, which is pretty simple. Although my placement of the sender did require some dexterity to connect the wire to the post.
As far as oil pressure measured, they are a little higher than I expected, which is good for a 1.8T I suppose.
Cold Idle: ~80 psi
Cold 2k rpms: ~90 psi
Cold 3k rpms: ~100psi (pegs the gauge)
Hot Idle: ~24 psi
Hot 2k rpms: ~50 psi
Hot 3k rpms: ~70 psi
Hot at redline can still peg the gauge (100 psi).
Hope somebody finds this useful, or at least interesting, or something...lol.
EDIT: For content concerning fitment to AEB and ATW.

 Reply With Quote


 Just dump it on the ground!


Bookmarks