


Disclaimer: The airbag system is a VERY important safety item, and you should be very careful in tampering with it. I am not responsible for any damages you may occur and highly recommend you do this at your own risk. In other words, don't sue me. But if done carefully, this should be DIY-able by most people with a decent grasp of wiring and such.
I originally wrote this up on my blog, but I'm reposting here for those who are interested. The original version can be found here: http://nickscarblog.com/diy/how-to-i...-warning-light
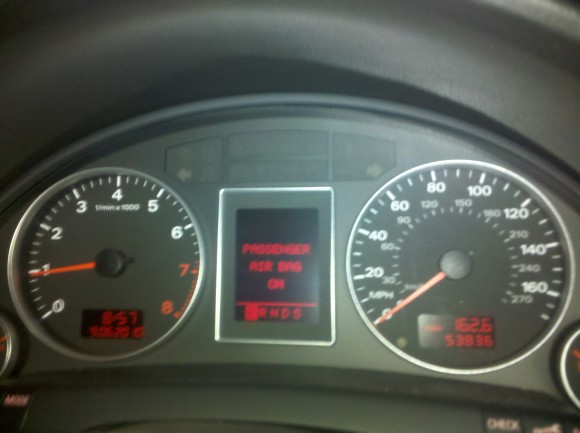
Purpose of Mod: Although the B6 S4 Recaro seat will bolt right up at the factory mounting spots, and the wiring harnesses will plug in to the car fine, you will get an Airbag warning light when you initially install B6 seats. The difficulty in installing B6 seats into a B7 is that B6 A4 & S4s do not have a pressure control module in the front passenger seat (this part is often referred to as pressure plate, or even a bladder, although it is really a hydraulic system). This module is essential to the functionality of the B7 Airbag system, as it determines if someone is sitting in the passenger seat and will activate/deactivate the airbag system for the passenger side accordingly. If this sensor isn’t found, a warning light is triggered which disables all airbags in the car – not good.
To fix this, you’ll need to swap the pressure control module from your original B7 A4 seats into the B6 seats. You must also swap the seat buckle from your B7 seats, since the pressure control module plugs into the seat belt buckle and the airbag system checks for both a seat belt & the pressure control module to enable the passenger airbag.
I strongly recommend reading this DIY all the way through before starting so you fully understand what is involved and why everything needs to be done and how it all works! Also, I recommend not cutting any corners when doing this – the system is VERY sensitive. If the wiring has any kinks in it, the pressure control module isn’t secured and lying flat in the factory location, or anything else is even slightly off, you’ll still have an airbag light out. It took me several attempts before I finally got the airbag light to go away because I cut corners and did not mount the ballasts & pressure control plate securely and left the old wiring in too – cutting corners does NOT save you time with this mod…be thorough and meticulous!
Step 1: Remove your B7 A4 Seats
Removing your seats is quite simple. There are four bolts that hold it in place along the sliding rails on the bottom of the seat. Two are in front, and two are behind the seat. Move the seat all the way forward to get to the back ones, and all the way back to get to the front ones. Use a triple square to remove the four bolts holding the seat in. If you don’t have a triple square, a T50 Torx Bit and a socket wrench will work too if you don’t have a triple square – just be careful not to strip the bolts (some stripping is probably inevitable, so just be careful). Remove the bolts all of the way and then raise the seat as high as it will go, center the seat in the middle of the tracks, and adjust the incline of the seat so that it is fully upright or even slightly inclined making an acute angle – this will make it easier to get in and out of the doorway as well as easier to work on once out of the car.
Once the seat is totally unbolted, tilt it back and disconnect the wiring harnesses. There are three or four plugs to pull out, depending on if you have heated seats or not. Be careful and do not tug the wires directly as you don’t want to pull anything out of the harness.
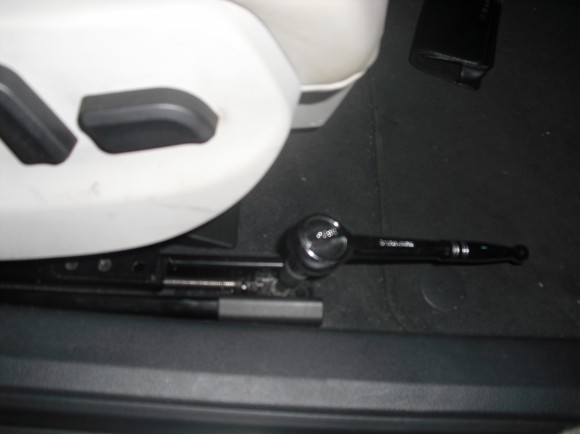
Lastly, you’ll have to detach the base of the seatbelt from its anchor point on the seat itself. Remove the plastic cover and you’ll see the seat the seat belt ends in a metal fixture which snaps over a bolt – it’s actually a simple mechanism. To remove it, simply pull the tab outward and push the metal clip downward and it will slide off the circular bolt. The picture below should help illustrate what it looks like:

Step 2: Removing the Seat Belt Buckle from your B7 A4 Seats
Now that we have the seat out of the car, it’s time to start disassembling it. Start with removing the seat belt buckle, as the more stuff you get out of the way, the easier it is to get the pressure plate out later.
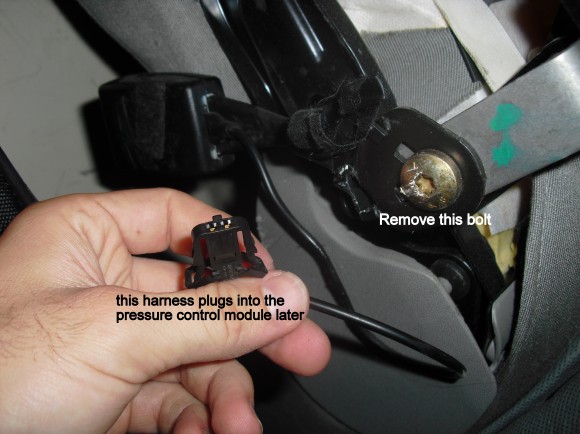
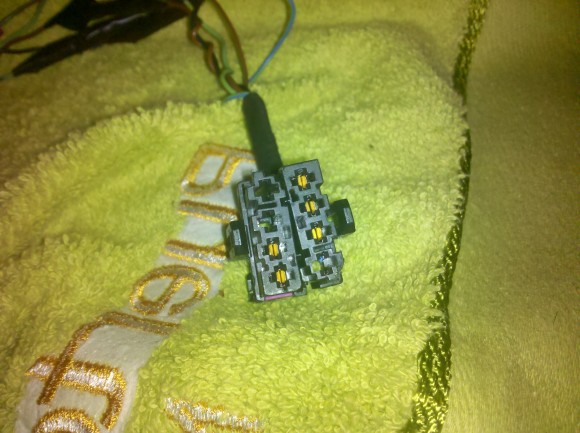
To remove the seat belt buckle, use a triple square to loosen the bolt. If you don’t have a triple square, use a set of Channel locks to loosen the bolt – this will put some small dents or bite marks into the bolt (see below), but the bolt is hidden from view once installed anyway. Once the bolt is out, also unplug the wiring harness (which plugs into the pressure control module and will be critical for later) and you can completely remove the seat belt buckle.
So far, so easy! Now on to the fun stuff!
Step 3: Removing the B7 Pressure Control Module (Pressure Plate)
This is scarier than it sounds, but you’ll be partially taking apart the bottom of your seat to get this out. Once complete, no one will be able to tell you ever touched your seats yet alone took them apart.
Start by removing the storage compartment under the seat, as it really clears up a lot of room and you’ll be thankful later. It is held on by four torx screws, I think they were approx T20 but I can’t remember at the moment. If you don’t have torx bits, a set of hex keys or allen keys should do the trick. Their mounting locations are as shown:
Now that you have that out of the way, time to (partially) remove the seat cover off of the bottom of the seat. Start with removing the two metal clips on the bottom of the seat:
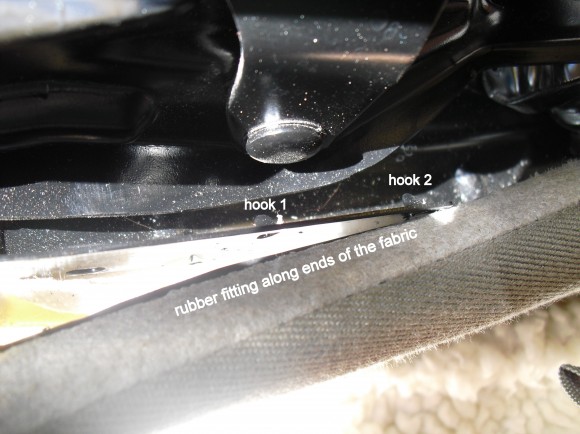
Next, you’ll see that the fabric is stretched on all four sides of the seats – you only need to remove the front edge and one of the side edges to have enough room to pull out the pressure plate. Leaving the back and other side edge attached will help you put the seat back together and save a lot of time, although you can take off more if you really want (I took off three edges before realizing I probably only needed to take off two). At the end of the fabric it is capped off with a rubber fitting that runs the length of the bottom of the seat along all four edges. That rubber fitting stretches over black metal prongs on the bottom of the seat, which holds the fabric securely over the seat cushion. To remove the fabric, you’ll have to pull the rubber fitting off of the metal prongs one by one, and it will simply come loose. This is easier to explain by a picture – I pried it off using a flat head screwdriver, although some popped off just using my hands:

After prying it off, you can see the black metal prongs that the rubber fitting at the end of the seat fabric hooks onto:
The front comes off by either snapping the rubber fitting off the black metal prongs (like above for the side edge) or by removing three torx screws that you can see when you remove the storage compartment.
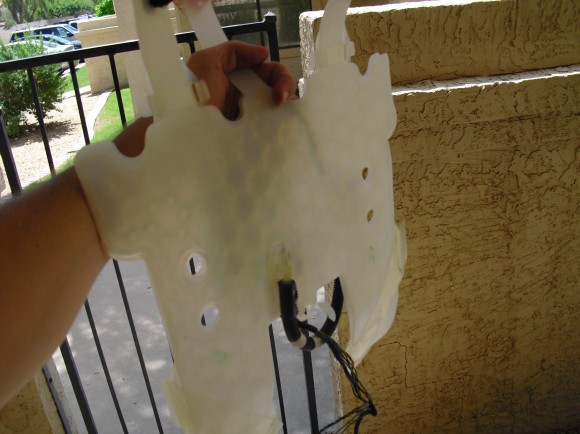
Once you have the front and side edges removed, you can pull the cushion and fabric far enough back to expose the Pressure Control module:

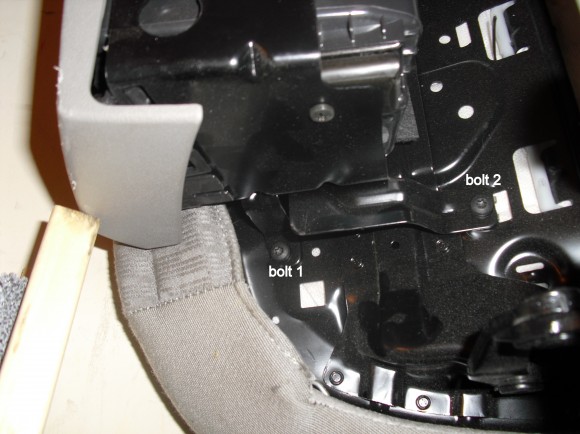
Removing the pressure control plate is pretty easy, there are three black tabs you need to pop out (two pictured above, and a third one near the back of the pressure control module), you can remove these by pushing them through from the underside of the seat. To remove the red plastic anchor into the seat cushion foam you can either rip it out, as I did, or be gentle about it and try to get it out otherwise – you won’t really be able to reuse that mounting point regardless.
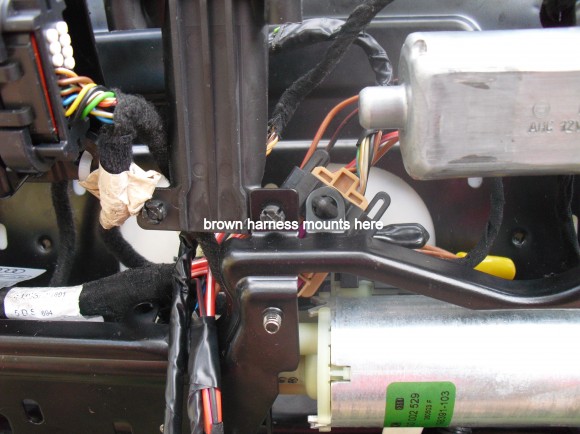
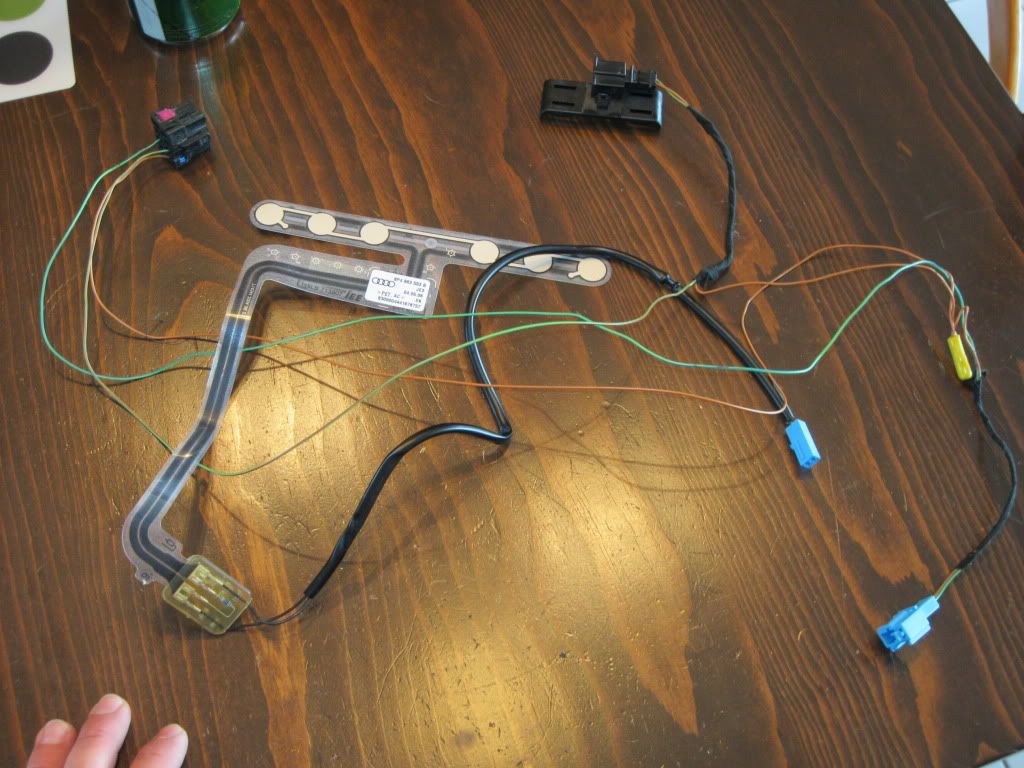
When removing the pressure plate, all you need to pull through is the hydraulic hose and the plug/sensor at the end of it. That sensor has a connector that connects to the wiring harness which has a ‘do not disconnect’ sticker on it. Go ahead and disconnect that and just pull the plate through with that hose and connector only (note: do this at your own risk. If you want to be absolutely cautious, pull all of the wiring through in tact, however you can disconnect this cable without any permanent problems or issues). From here, you can re-assemble the top portion of the donor B7 seat and now focus on removing the wiring from beneath your B7 seat.
An important point to remember is that the plate system is hydraulic, and filled with fluid. If you try to cut or disconnect the hose or sensor, you can permanently damage the plate/system and it may not work again. Only disconnect at the point where the factory harnesses plug in to each other!
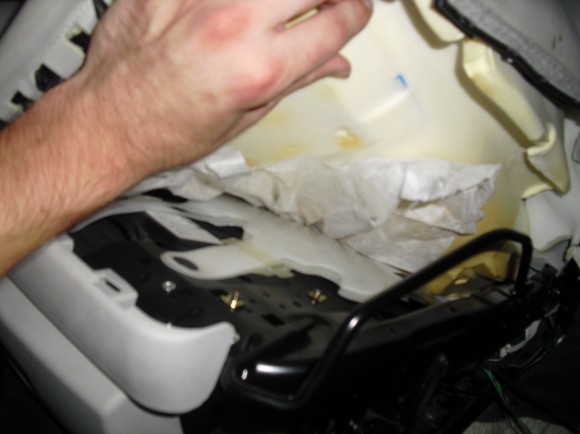
Once you pull it out (with all wiring still attached) it will look like this:
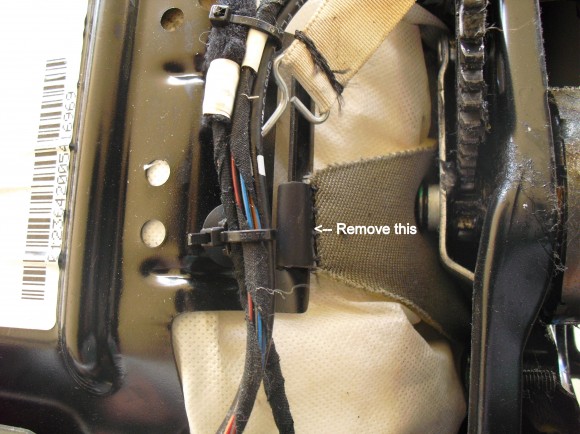
Next, you’ll want to remove the rest of the wiring for the pressure plate – from the harness you disconnected from the pressure control module’s hose, all the way down to the black harness that plugs into the ground of the car. To do this, you should unwind all the fabric tape to gain access to the wiring, although another option is slicing through the tape to ‘split’ it open. This is much more dangerous, as you run the risk of cutting the sheath. Once the wiring is free, it can be separated from the rest of the wiring pretty easily. You will also need to unscrew the control module/ballast for the pressure control plate wiring, and the two harness connector mounts can pop out as well.
A word to the wise: It is critical it is to pay close attention to the wiring on both the donor seat and transplant seat. This way you can mimic the same mounting points and route the wires the exact same way. Make mental notes (or take pictures) so you can trace every wire and where they are mounted on the bottom of the seat, what holes or passages they go through, etc. The system is VERY sensitive, so installing it as close to factory spec as possible will ensure minimal issues and allow the system to work as it should.
Step 4: Preparing the B6 Recaro
First, start by removing the old seat belt buckle and the old airbag wiring harness.
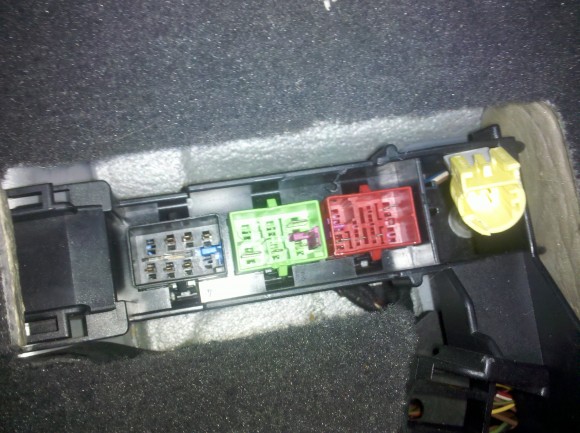
Next, remove the storage compartment for easier access to remove the old wiring and install the new wiring. It’s the same process as before, there are four bolts that can be removed using hex keys or a torx bit and then the storage compartment will come off.
Once the storage compartment is off, you can then remove all of the old wiring very easily. You’ll want to take out the wiring for the old black plug that went from the seat belt buckle to the black harness on the floor of your car. It is not necessary and best to get it out of the way to avoid any mistakes or problems down the road.
And now, we’re ready for the pressure control module transplant surgery. Take a deep breath, it’s time to take apart those lovely Recaro seats you paid a pretty penny for.
Step 5: Installing the Pressure Control Module in the B6 Recaro Seat
The leather Recaro fabric removes the same way as before – disconnect the rubber fitting at the end of the fabric from the metal prongs on the underside of the seat. You really only need to remove one side of the seat, and the front edge of the seat – you can leave the back edge and one of the side edges still firmly attached.
The side edge removes the same as before, use a flat head screw driver to pull the rubber fitting off of the metal prongs. The front edge can be removed by removing 3 torx screws behind where the storage compartment used to be. If you can’t get to those, it will pop out of place if you pull on it, although you may weaken the clips or tear the fabric if you’re not super careful.
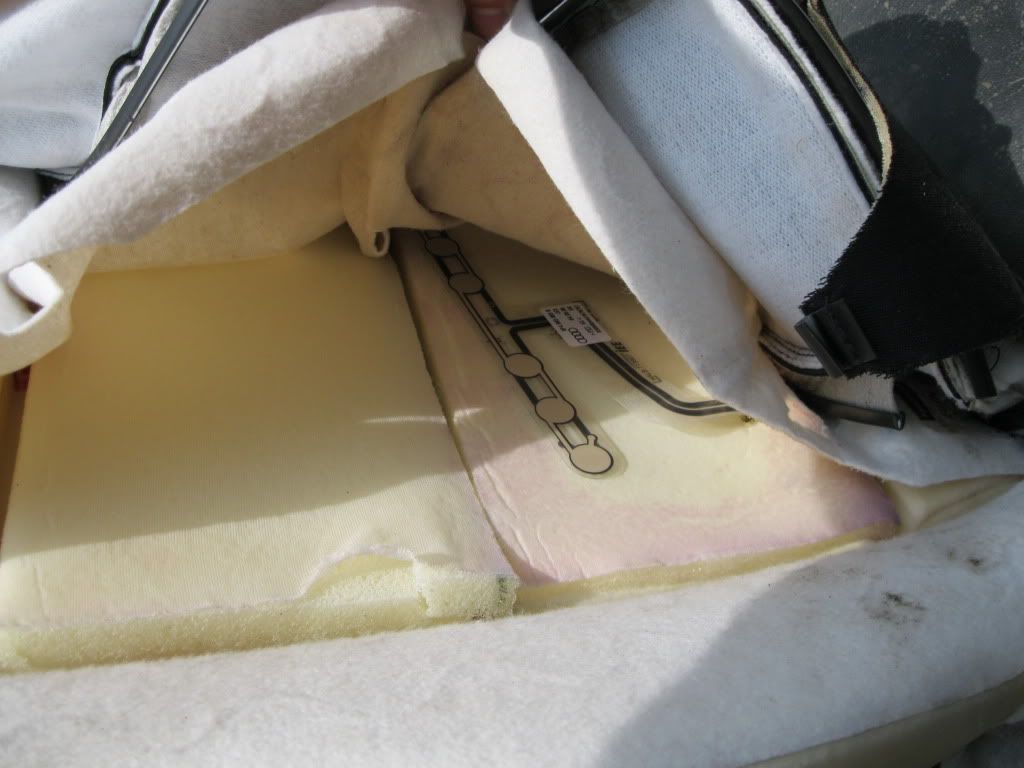
I only needed to remove the front and side to have enough room to squeeze my hands under the seat cushion to feed the wiring through the hole in the seat and place the pressure plate in, and attach it to the mounting points on the bottom of the seat. There are three mounting points, two toward the front of the seat, and one in the middle toward the back of the pressure plate. MAKE SURE IT IS SECURED AT ALL THREE POINTS! The pressure plate is VERY sensitive, and you need to make sure it is lying securely in place and will not move around!
You will also need to cut a small 1″ slit in the white cloth to pass the wiring and hose through it. Be sure to place the pressure control module ON TOP of the cloth, so the cloth will protect the pressure control module from getting snagged on the metal base of the seat. Since the pressure control module is hydraulic, a snag in the plastic could cause the liquid to leak, which would then ruin the system.
Woohoo! The hard part is done. Now let’s put your seat back together so it looks normal again. Once you’ve made sure the pressure control module is secured and lying flat without pinching any wiring or anything, simply reattach the edge of the seat to the black metal prongs, and snap back in the front of the seat…and voila, no one could probably ever tell you did anything to the seat!

 Reply With Quote
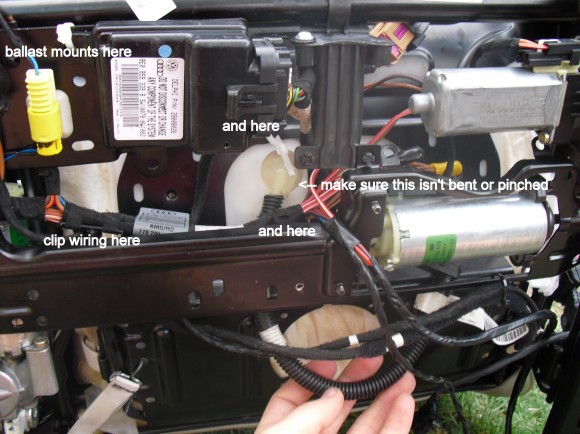


Bookmarks