


Tools you'll need:
18mm socket and wrench
21mm socket and wrench
5mm hex key
17mm hex key
1/2" wrench
15mm wrench
2-arm puller
CV boot clamp plier
A hammer or rubber mallet
A can of degreaser
Lots of rags
1) Loosen the axle bolt while the car is still on the ground. This uses a 17mm hex key. I didn't have one, but I found Sears carries a set of 4 (their website lists a 17mm by itself, but in store they didn't carry a single 17mm). All of the automotive stores I checked did not carry this piece.
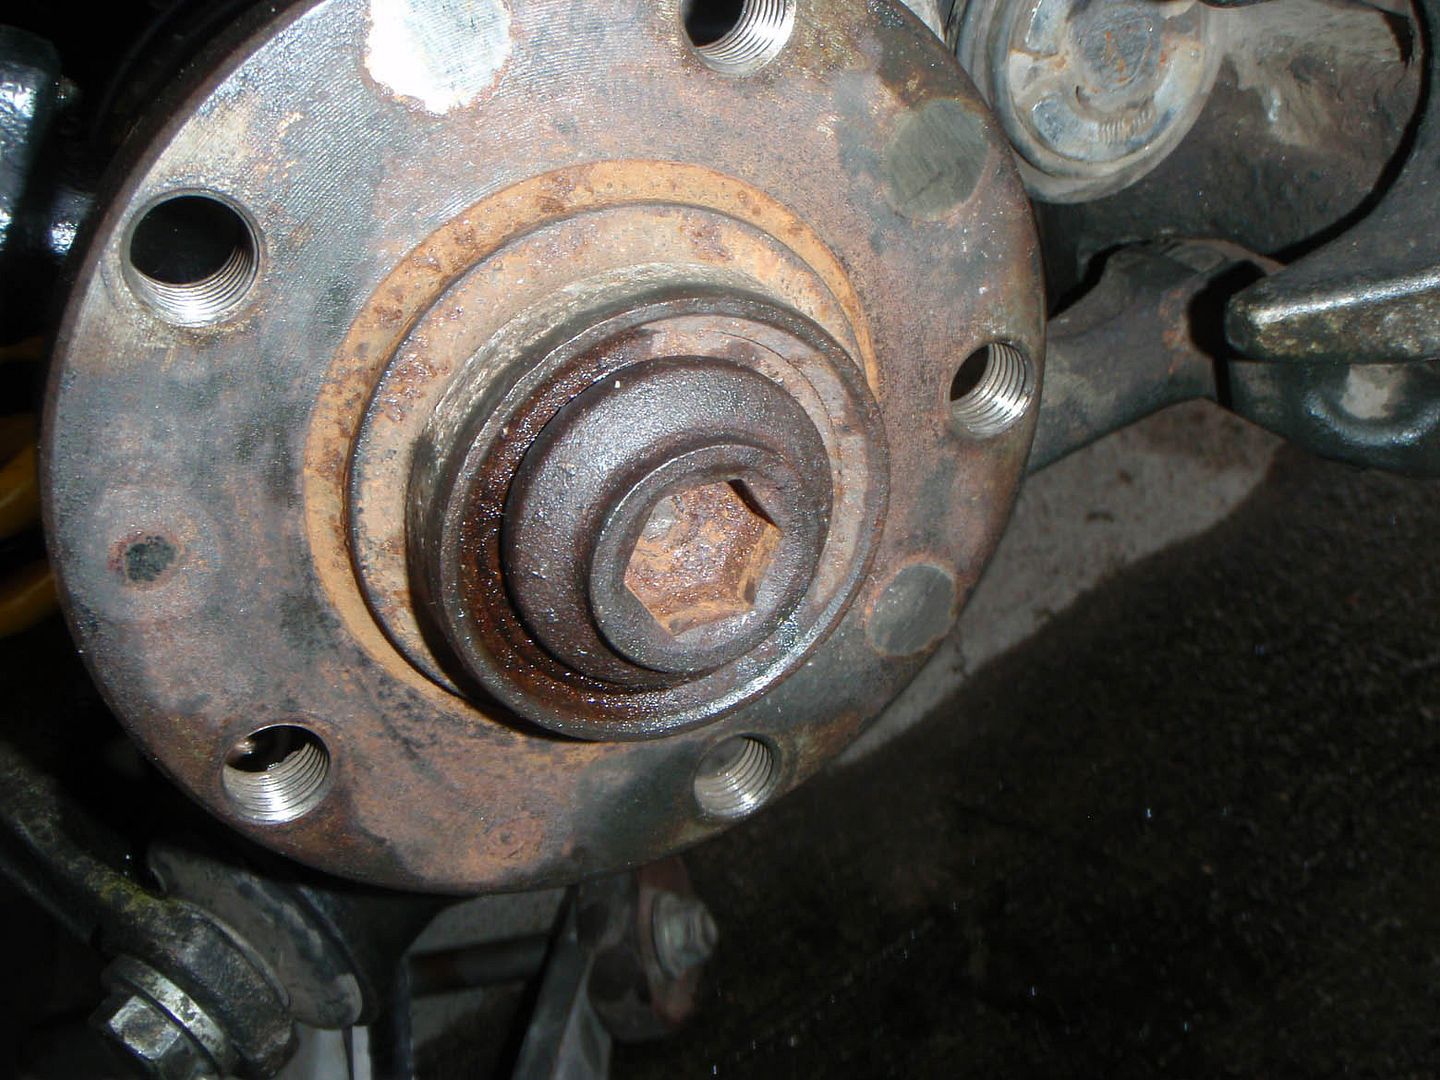
2) Jack the car up and stabilize with a jack stand. Remove the tire and then remove the axle bolt the rest of the way.
3) I then removed the brake caliper. The bolt at the end is a 1/2" and the bolt near the caliper boot is a 15mm. There is also a hex key bolt that mounts to the hub assembly; I chose to leave that alone. After you remove the caliper, remove the pads and rotor. Once you have that out you can access the dust shield. The dust shield is held on by 3 torque bits (I don't recall the size).
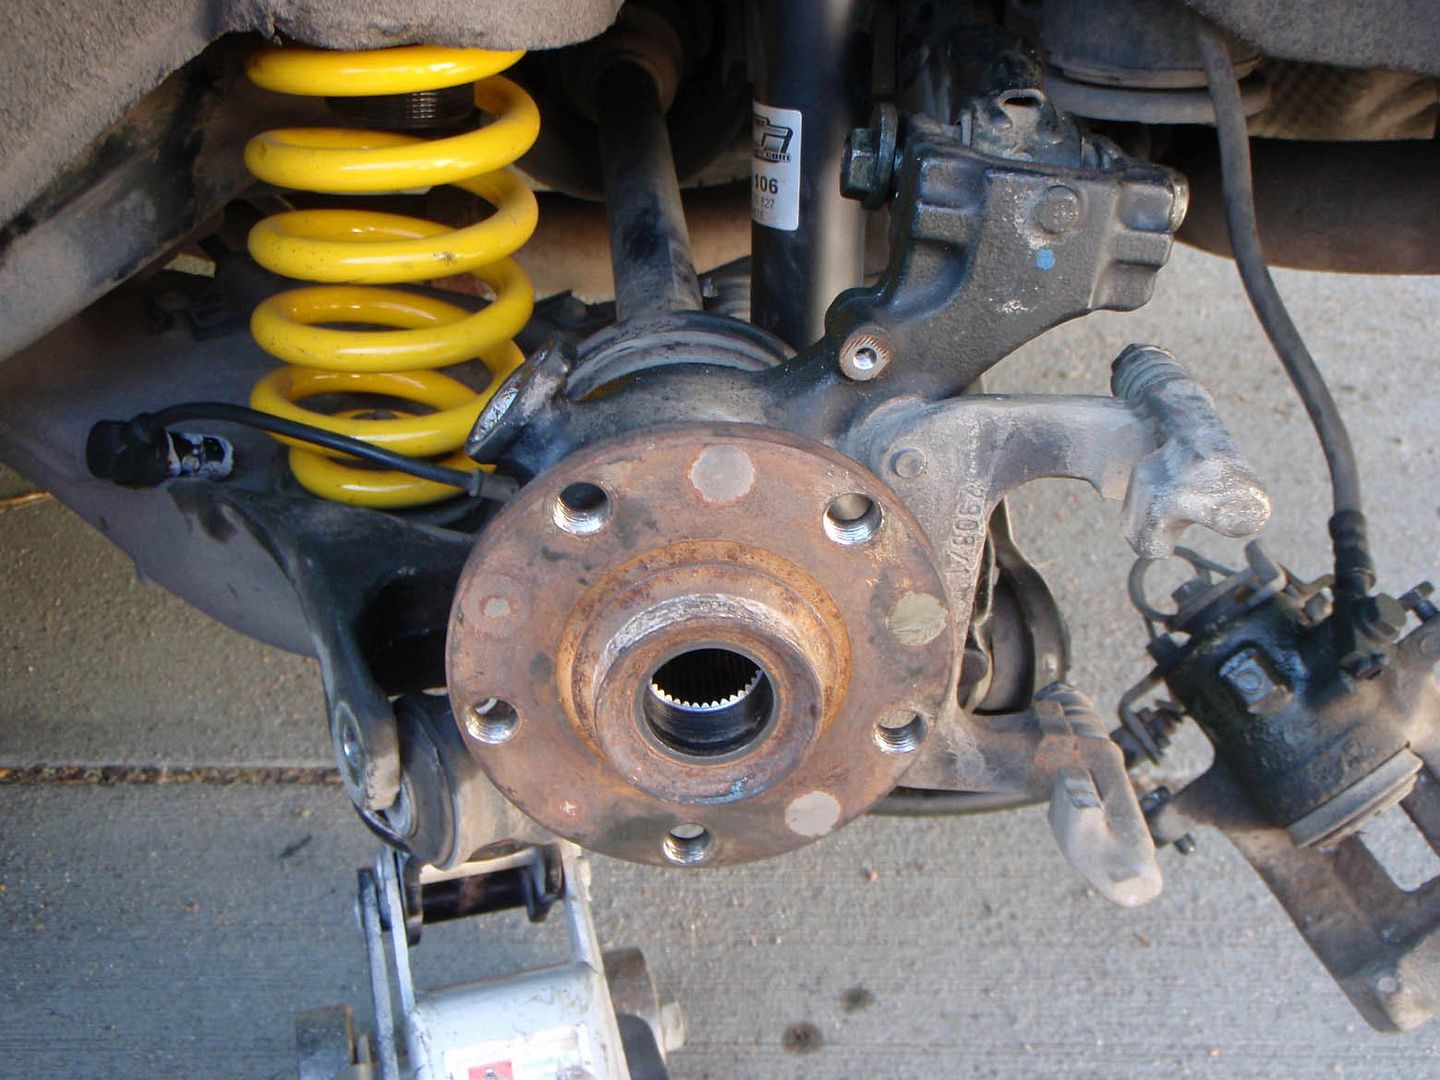
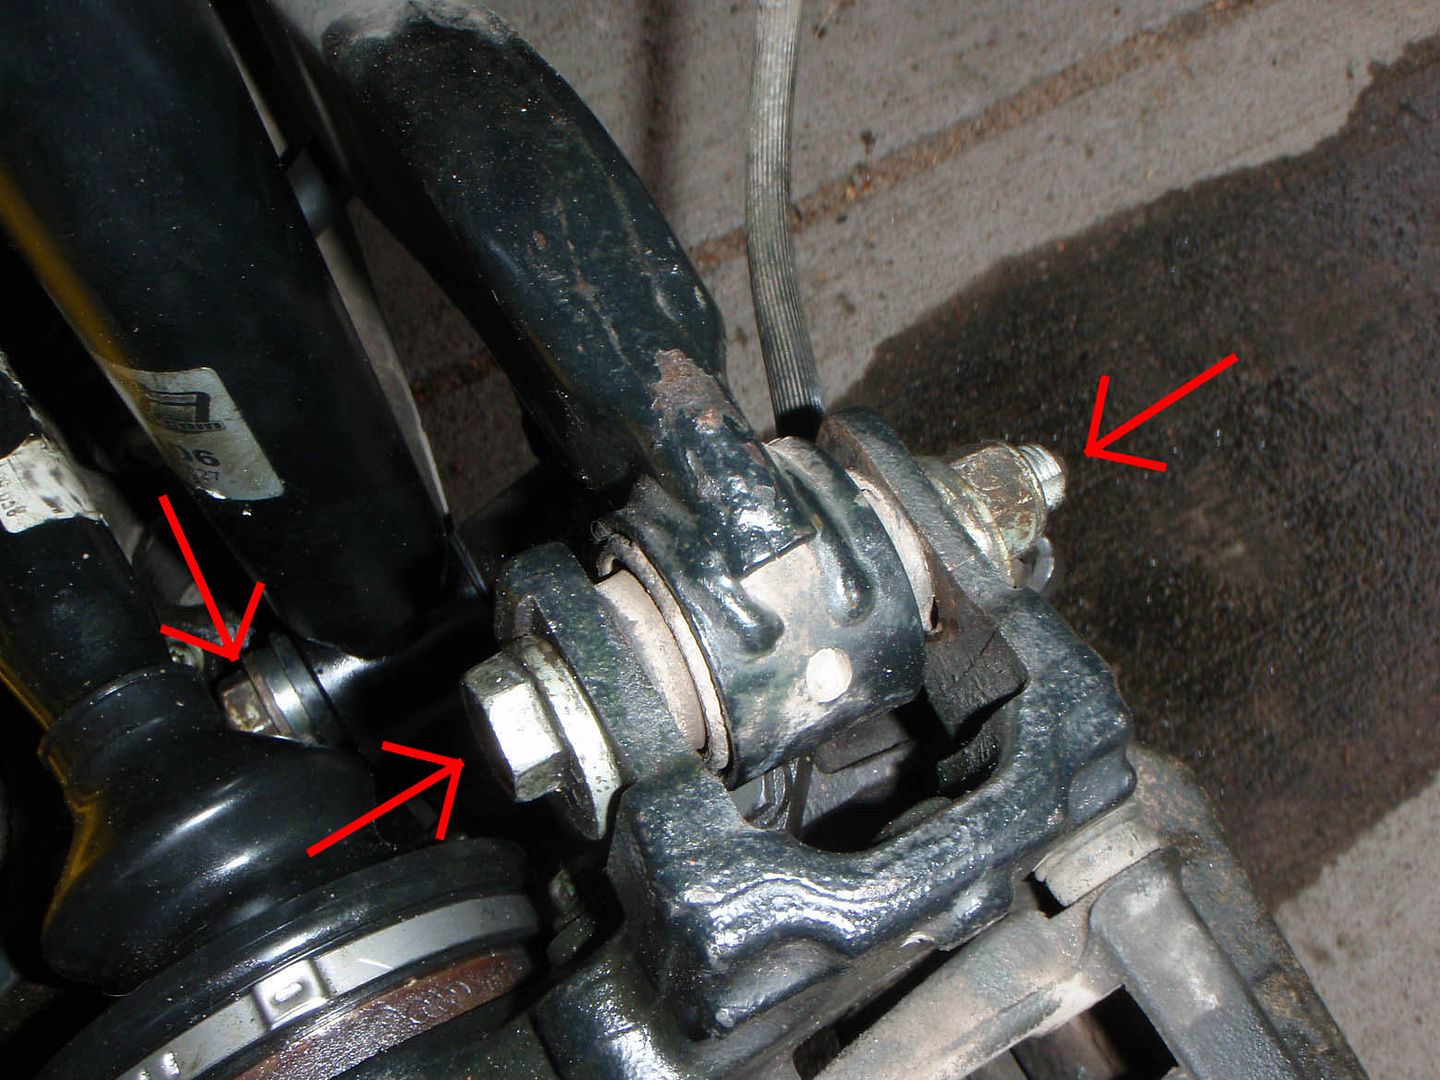
4) After you've removed the dust shield you can finally see what's going on. I then unbolted the shock mount. This uses a 21mm nut and bolt. It's a tight space between the shock and the axle so I put an open-end on the nut and used a socket on the bolt head.
5) After the shock is unbolted, you can remove either of the lower control arm bolts. These use an 18mm nut and bolt. It is a tight squeeze in the center of the hub assembly, so I advise using the open-end on the nut and the socket on the bolt head.
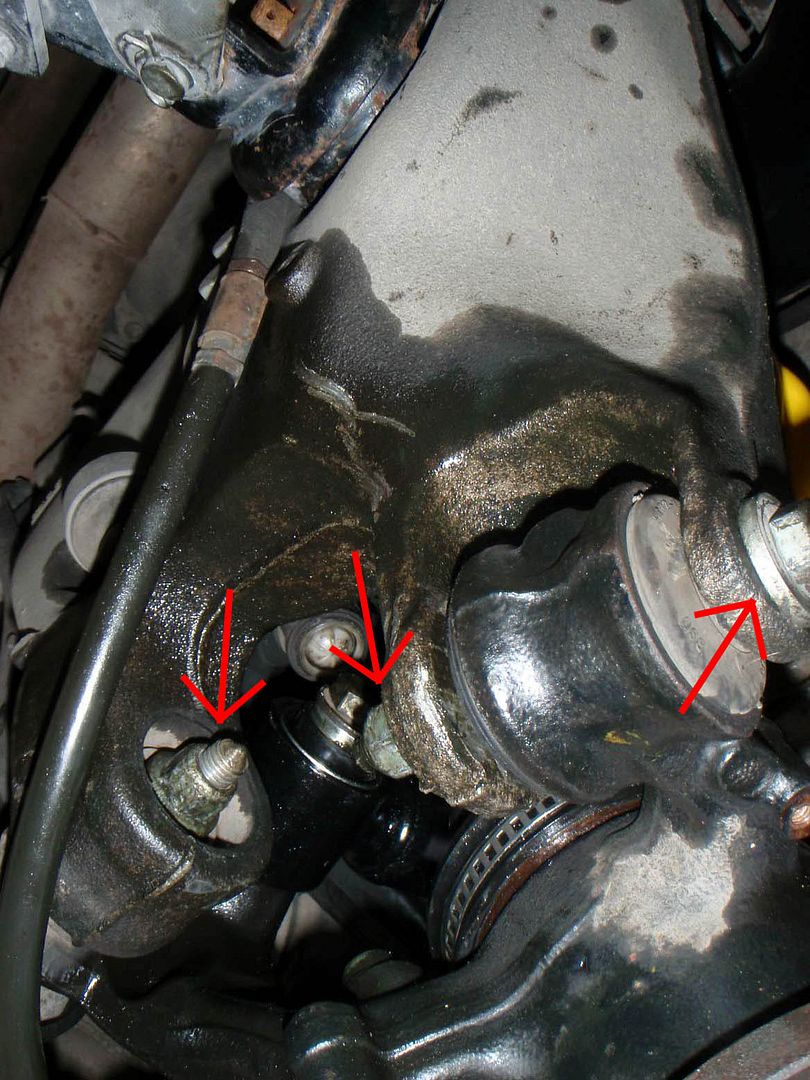
6) Once the lower control arms have been unbolted, you can work on the top of the assembly. Since everything will be broken free after the upper control arm is unbolted, I'd suggest removing the speed sensor first. This uses a 5mm hex key. Once that is removed, remove the bolt from the upper control arm. Like below, this is an 18mm nut and bolt. When you remove the bolt be sure to watch for the centric washer to fall off (you'll hear it fall).
7) Now that all of the bolts are lose, you'll want to pop the axle from the hub. Mine was in there tight, so we gently hit the back of the hub with a flathead hammer. After you free the axle, you can swing the hub assembly down and out of the way. If the lower control arm does not free itself from the rear mount, just loosen the rear mount with an 18mm socket.
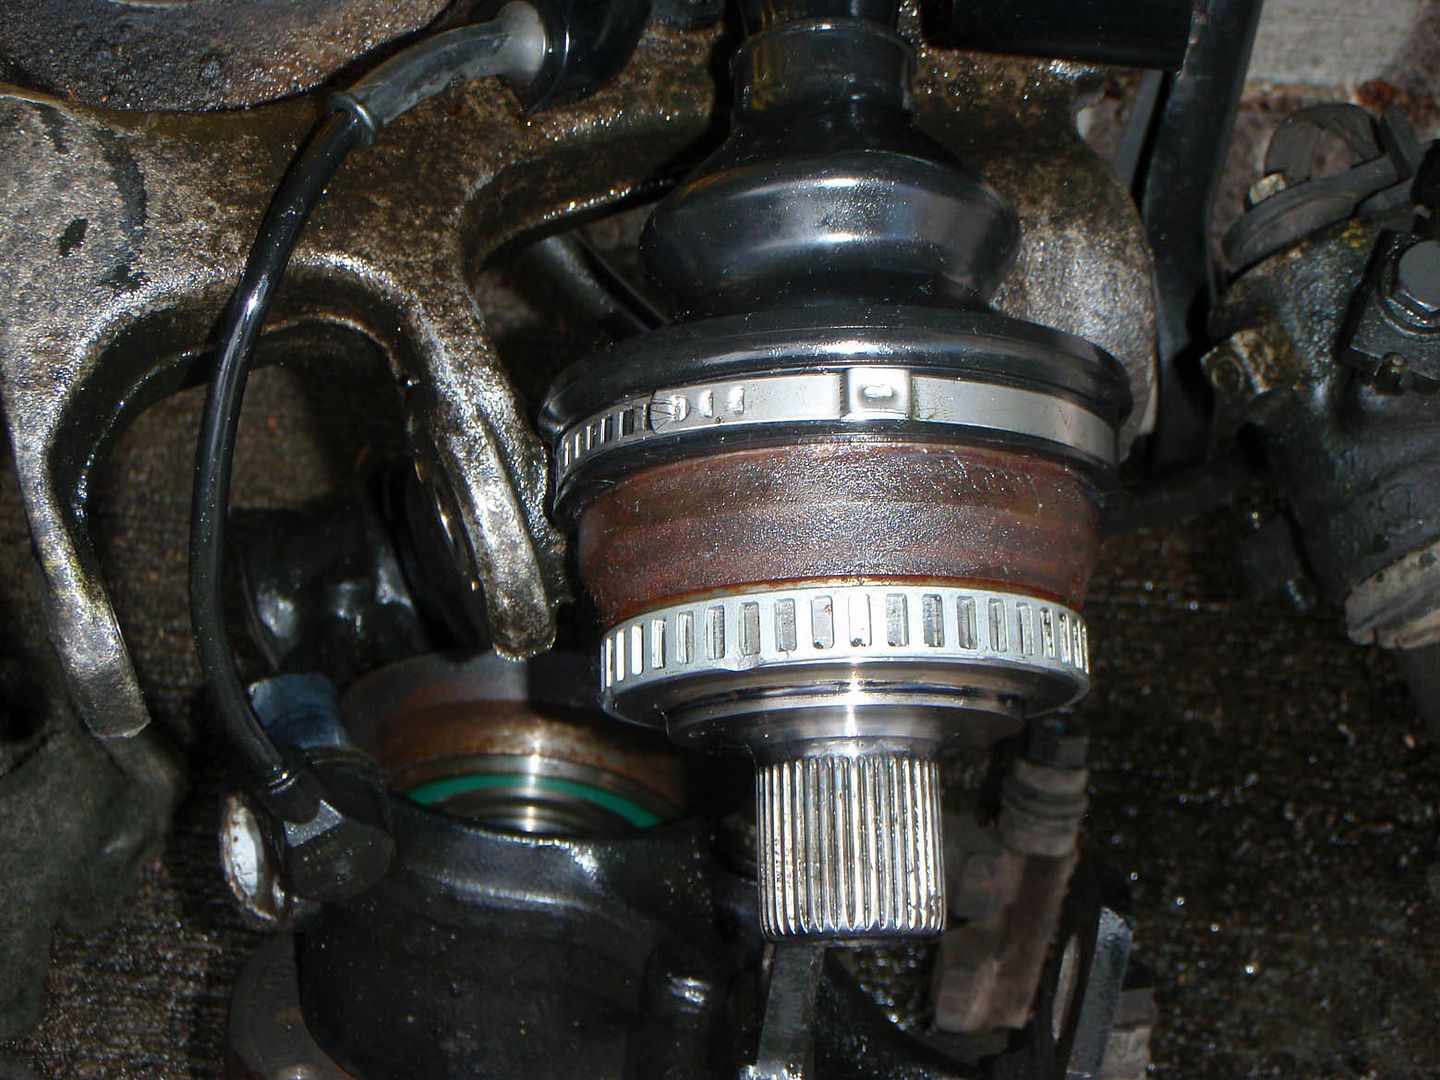
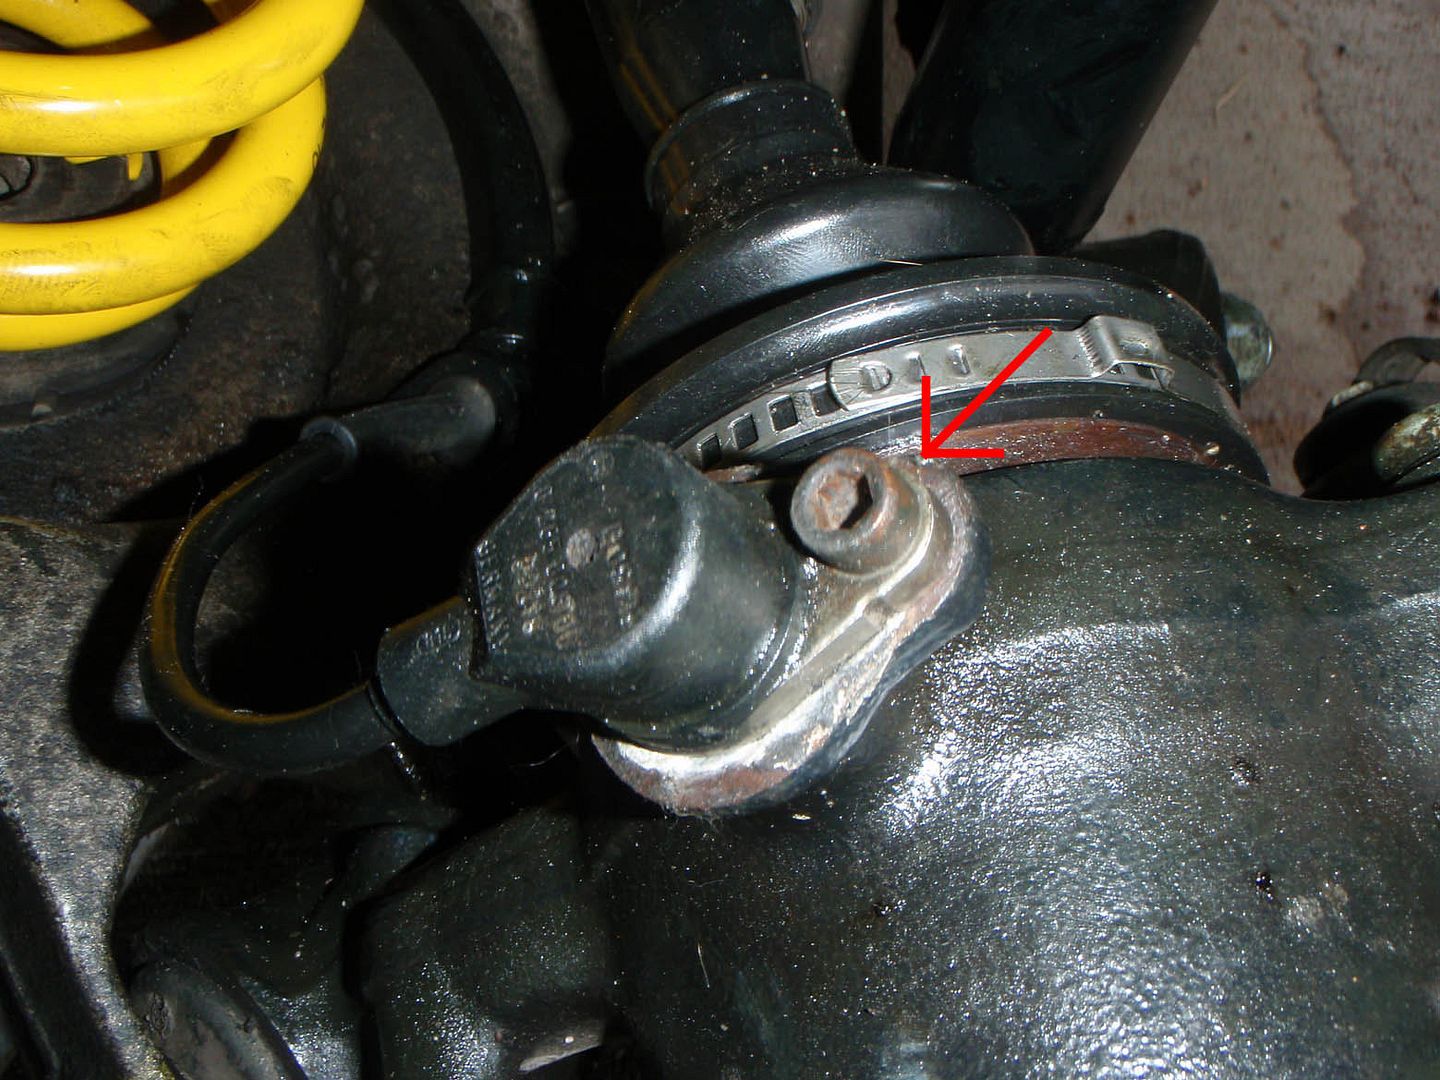
8) This is where the messy bit starts. You'll need to remove the old boot from the CV joint. First remove the CV boot clamp. A flathead screwdriver should fit under the boxy part of the clamp allowing you to pry it off. Don't worry about bending it because you will not be reusing this. After the clamp is removed, slide the boot back so you can see the back of the CV joint. I now suggest getting your can of degreaser out. To make things easier, and have less slippage, spray some degreaser on the back of the CV joint. NOTE: I put a rag over my wheel bearing to prevent the old grease and degreaser from getting all over it; I'm not sure if that really matters, but I didn't want that stuff all over things I don't want it on.

9) Now that you have the CV joint cleaned up a bit, get your 2-arm puller out. I suggest a 2-arm puller because it seems a bit easier to fit over the CV joint. After renting a 3-arm puller and having no luck, I found the 2-arm to work much easier. Once the puller is tight, continue twisting down on it until the CV joint pops. I will mention that you will think "It should have popped already", but keep going. It will sound like you busted something when the joint pops off, but rest assured that is how it is supposed to sound.
10) After the joint is off, check the end of the axle for a pin that locks that joint on. You'll want to remove this and use the new one that came with your boot kit.


11) Clean the old CV joint with degreaser and compressed air (if you don't have an air compressor, a can of duster will work). After you have cleaned the CV joint, clean the axle end up as well. Once the cleaning is done, you get to make a mess again. Take the new grease (that comes with your boot kit) and pack the CV joint. Once that is nice and packed, put some grease in the boot as well. This bit is very messy, so try and keep some degreaser in your can for cleaning up.
12) Reassembly begins. Slide the new boot over your axle. I had a bit of a struggle to get the new boot over the axle, so I sprayed a little degreaser on things to get some lubrication which allowed me to slip the boot over the axle. Once the boot is on, loosely put the boot clamp over the end of the boot. Then take your CV joint and pop it back on over the axle. You'll want to make sure you get it on far enough that you get over that pin to lock the joint back on. You can test this by giving the joint a tug to ensure you're on tight. Once the joint is locked back on the axle, slide the boot over the joint and tighten the clamp.
13) Once the axle assembly is back together, take your hub assembly and pop the axle back in place. After the axle is back through the hub, I put the bolt back in the upper control arm to keep things stable. You will more than likely need to jack the subframe at this point to get things lined up.
14) Now it's just a repeat of what you did before. Put the bolts back in the lower control arms and your shock mount. Put the speed sensor back in place. If you loosened the rear mount for the lower control arm, be sure to tighten that back up. Once all of the bolts are back in place and secure, you can start putting the brakes back together, just don't be dumb like me and do the brakes and then realize you left the dust shield off. Put the axle bolt back in place and tighten as much as you can with the car unweighted. Then put your wheel back on, lower the car and tighten the axle bolt. From what I found the proper torque is 90ft/lbs.
(before I put the brakes back on)

NOTE: After reading a few threads it does seem common that people just replace the axle. I didn't go this route because 1) a new boot kit is much cheaper and 2) I didn't know this until after I had already ordered the boot kit. Additionally, it does seem like the OEM axles (from what I've read) are higher quality than most aftermarket axles anyway, so for the time being I'd rather keep what came with the car.
Hopefully this helps some people and can save you a bit of time. What should have taken me an hour turned out to be an all day project due to lack of tools and a few odd pieces in the CV boot kit I ordered.

 Reply With Quote


Bookmarks