Audizine - An Automotive Enthusiast Community

Results 1 to 12 of 12
  1. #1
    Established Member Two Rings svo142010's Avatar
    Join Date
    Oct 24 2008
    AZ Member #
    34559
    My Garage
    2005 Audi A4 1.8
    Location
    OKC

    Thumbs up DIY Aerocatch Hood Pins Install (Boser Hood Install)

    Guest-only advertisement. Register or Log In now!
    Hey Audizine, I felt like contributing to the forum because it has helped me many times.

    *Install at your own risk* I am not responsible for any damages.

    Sorry for photo quality. I used my phone.

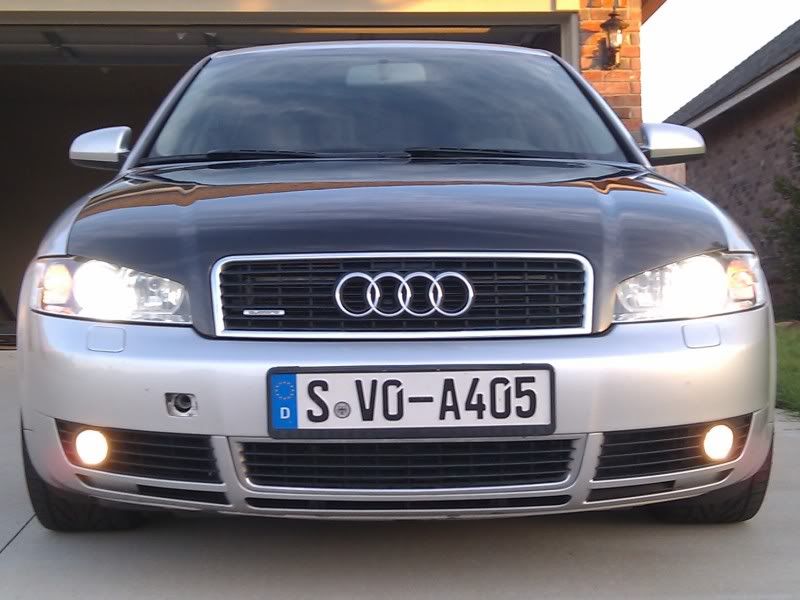
    Here is how I installed my Boserhood (Eurogear) and Aerocatch Hoodpins.


    Special Tools:
    Masking Tape
    Dremel
    Drill Bit
    Sand Bit
    Power Drill
    Gloves
    Paint

    You also need the tools you use to remove the headlights and air intake.
    Im not sure what size bolts but a nice tool set comes in handy. (Chime in if you know the bolt sizes)

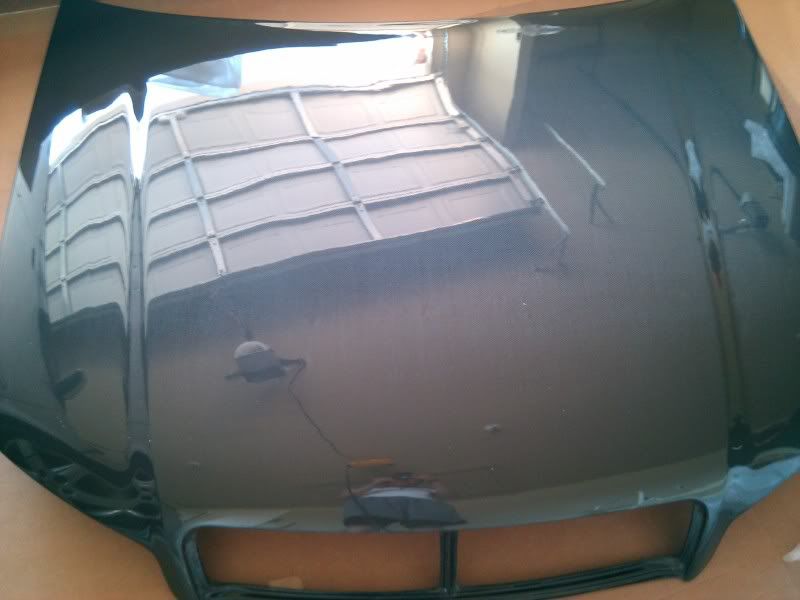
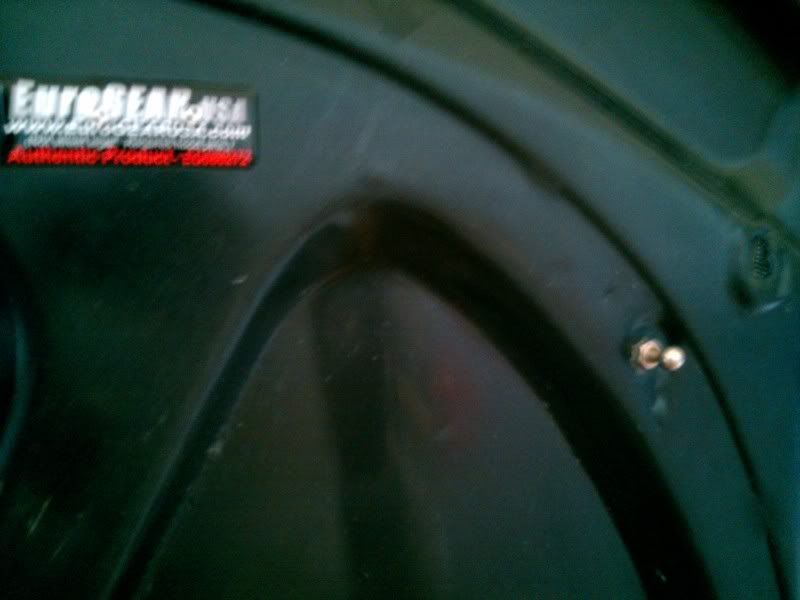
    Here are some pics of the Boserhood from Eurogear.
    I hope this helps if you are interested in buying a Eurogear Hood.

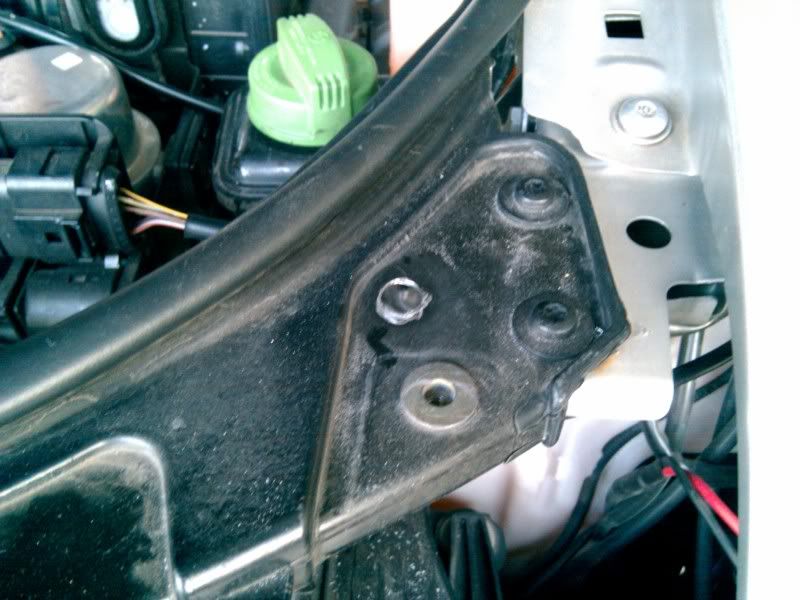
    These are the bolts for the OEM hood latch.


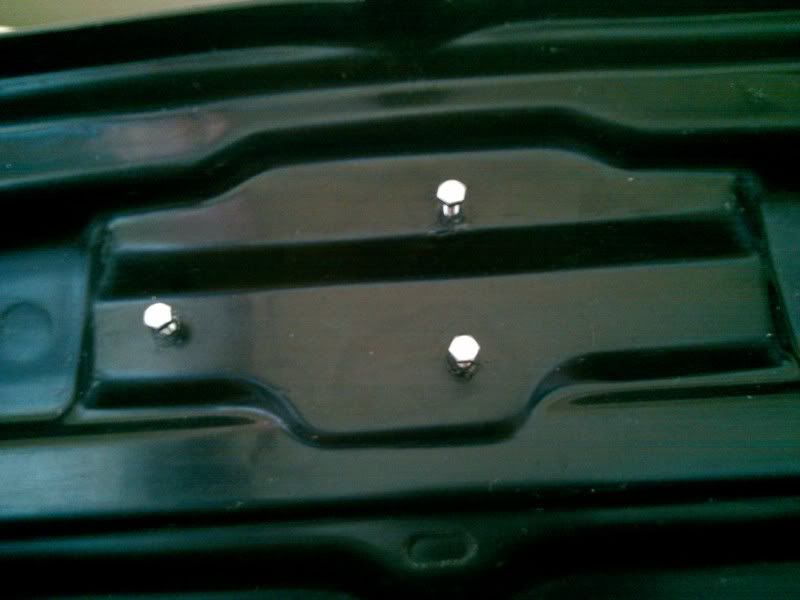
    Here are the two bolts for the hinge.


    This is where you attach on the hood strut. I recommend not to use the stock hood strut. Our OEM hoods are way to heavy.
    The stock strut might cause tension when you shut the hood. Go ahead and take out the strut.


    Go ahead and take out the spray nozzles and pull out the tubes.
    It is recommended to get some help removing the hood.
    I took out the strut and put some 2X4's to keep the hood open.
    Laid out some towels to protect the rest of the car and unbolted the hinges.
    Go ahead the install the new hood.
    Take out your stock grill and rubber seal under the grill and install on the new hood.

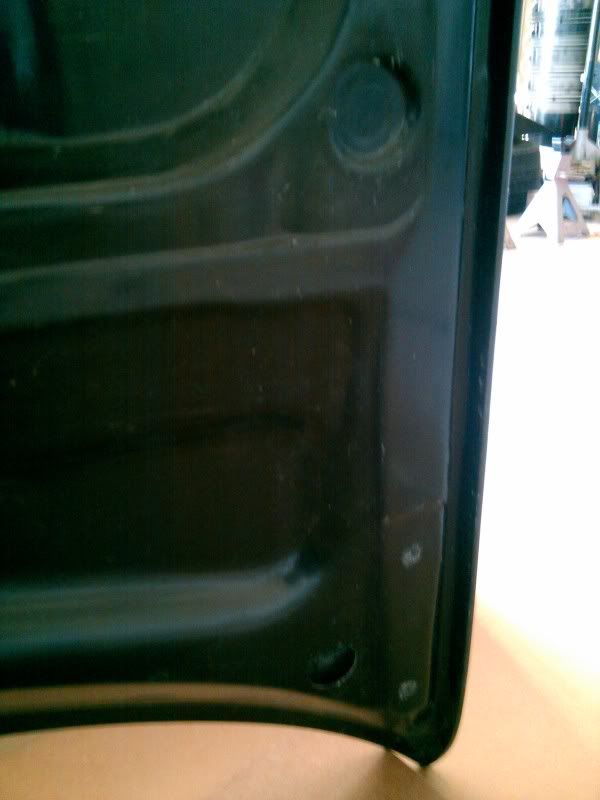
    Mine was not leveled right. I solved the problem by putting 4 washers (2 on each bolt) to raise the hood to match the fender.
    Then the hood didnt shut correctly, so i put 3 washers under the hood latch.

    I believe it looks good without hood pins, but better safe than sorry.


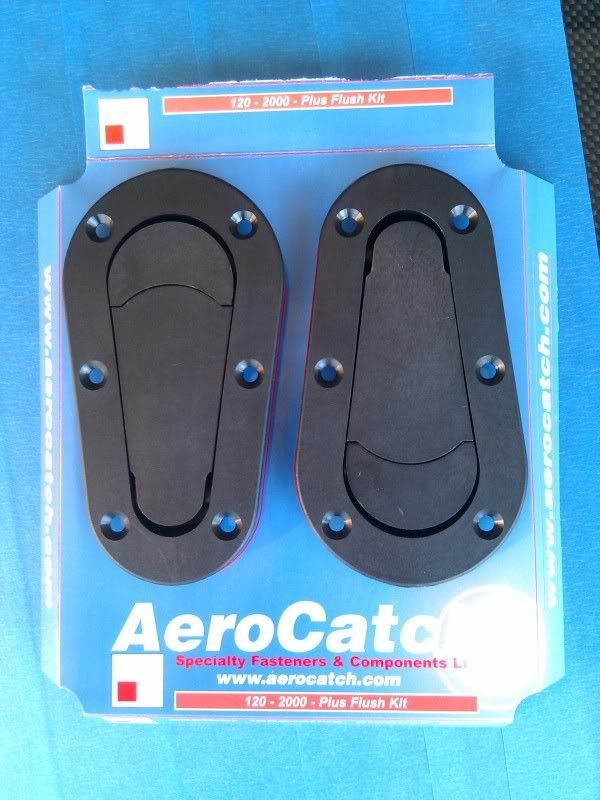
    DIY Aerocatch Install.

    Wear a mask and goggles!
    I wore my paintball goggles/mask with another mask so I dont breath in the dust.
    The hood is part Carbon fiber with a layer of fiberglass.
    Get some towels and cover the engine bay so dust and pieces of fiber dont fall in.

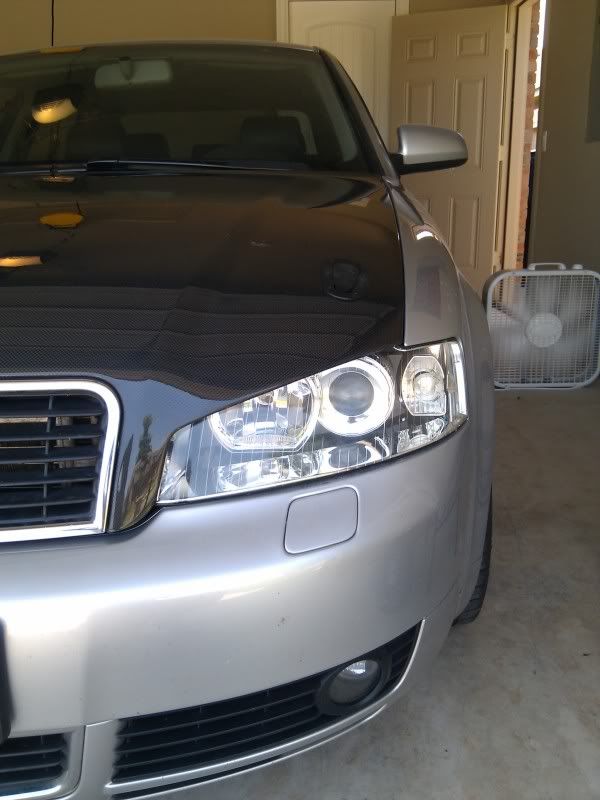
    Go ahead and remove the headlights and stock air intake.
    Wipe down the hood and mask off the sides.
    I did both sides at the same time.


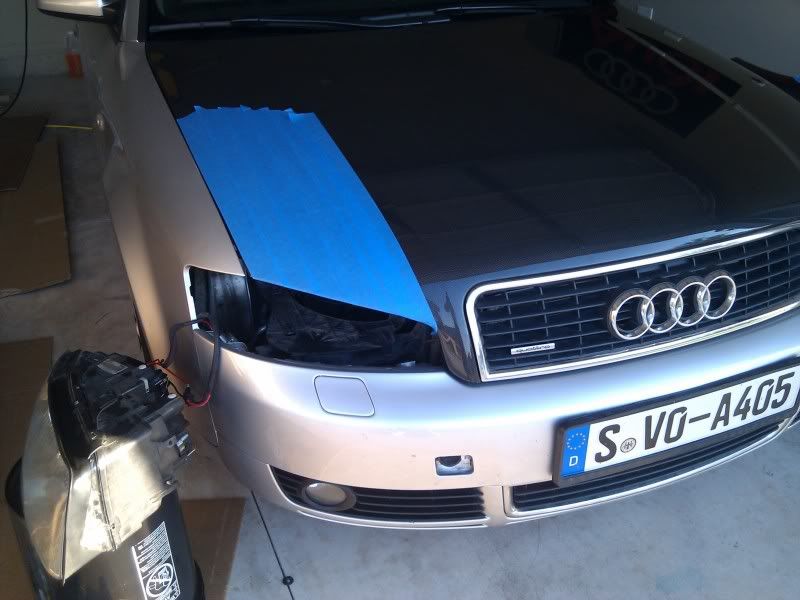
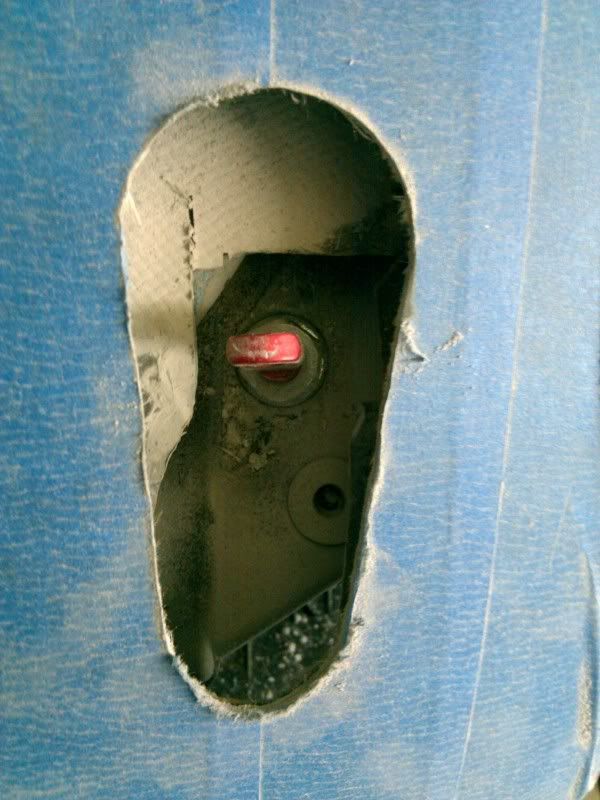
    Figure out how close to the edge you want your hoodpins to sit.
    Then drill a hole big enough for the hood pin.
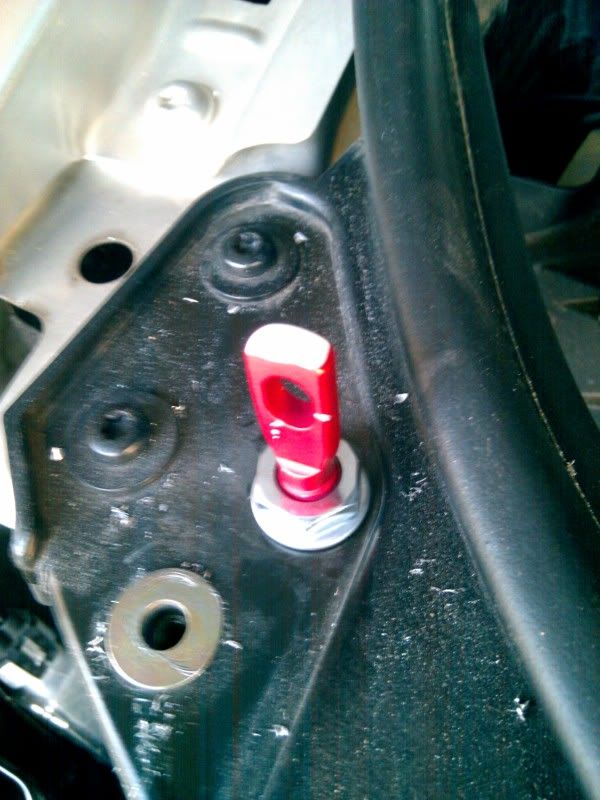
    I placed mine above the head light.


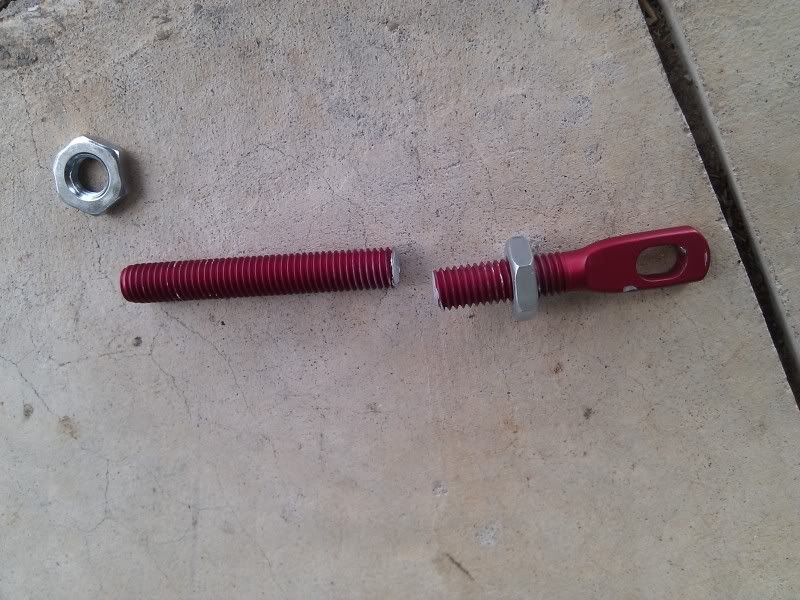
    Then install the pin and raise the pin up so it touches the hood when you shut it.


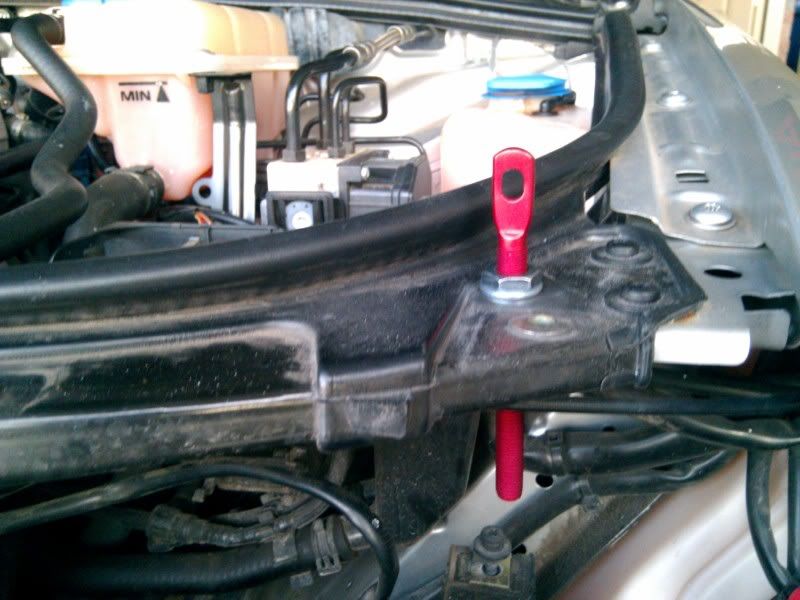
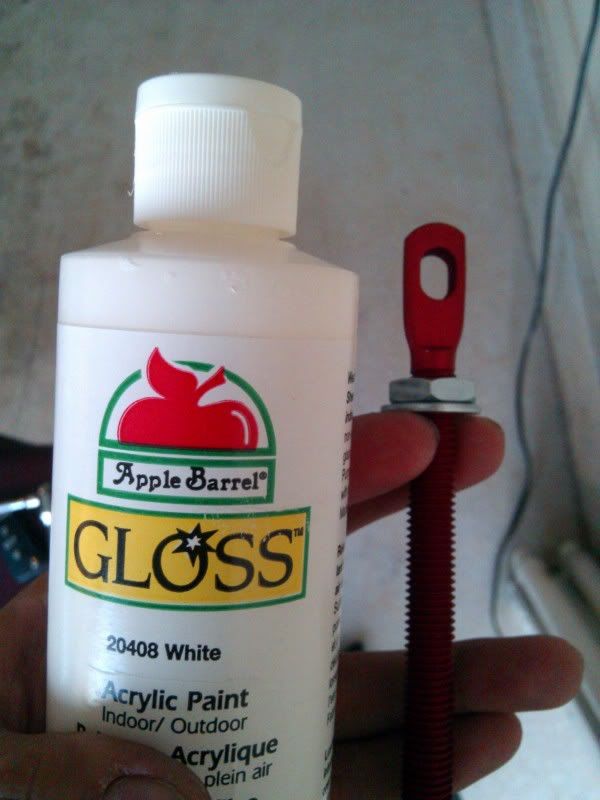
    Get some paint, put it on the top of the pin, and shut the hood gently so it makes a mark.


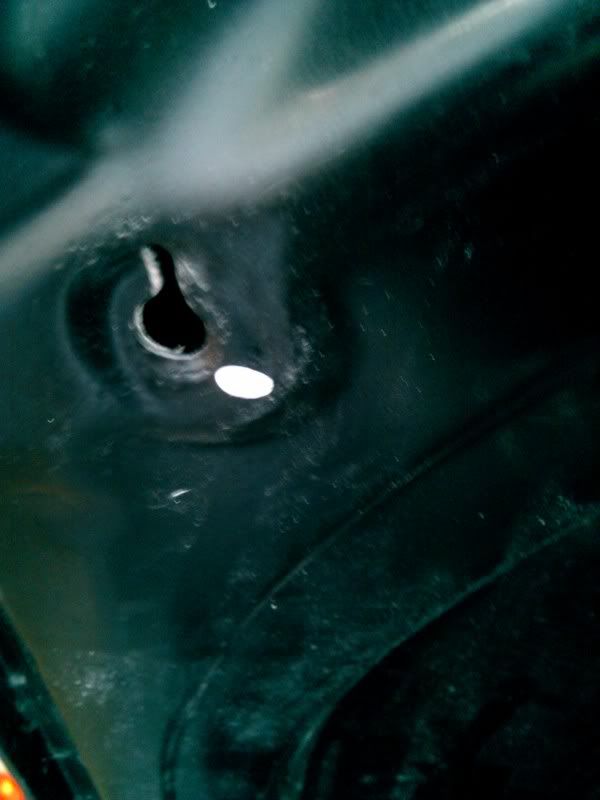
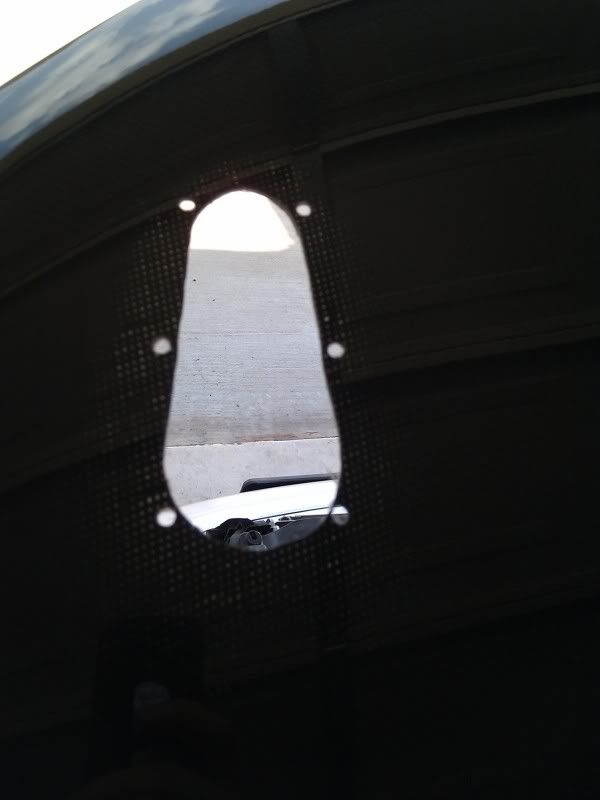
    Get the dremel and cut a hole out where the pin touched the hood.


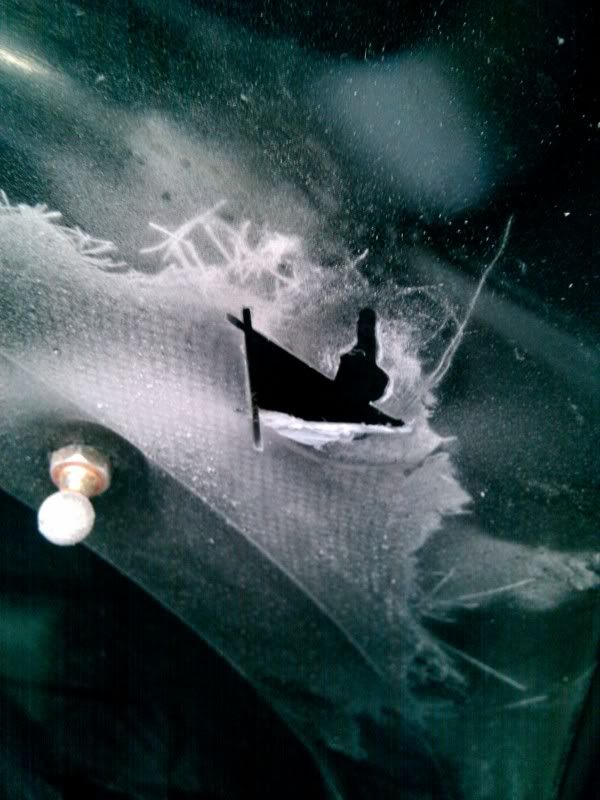
    Raise up the hood pin, paint the top of the pin, and shut the hood again so you get a more accurate mark on the second layer.
    Dremel at high RPM and go slow. Take your time and drill where that mark was.


    Shut the hood and see if the pin fits through.


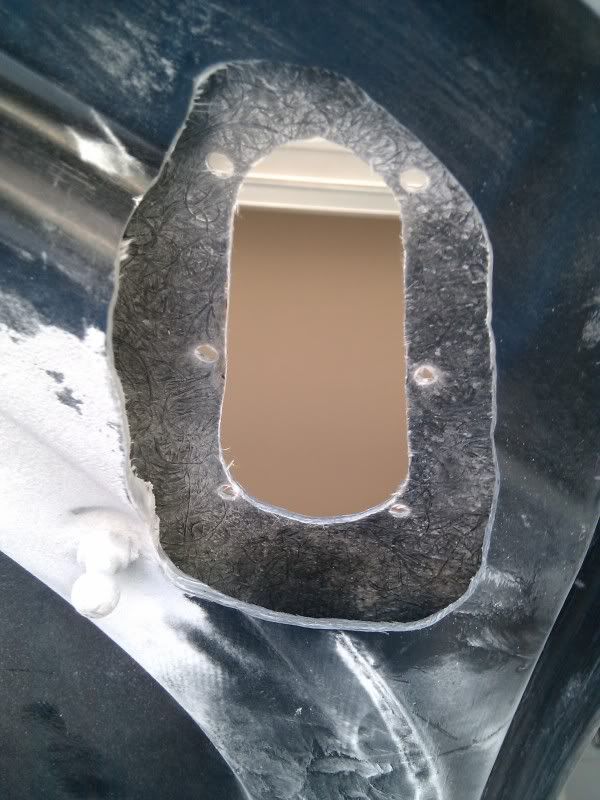
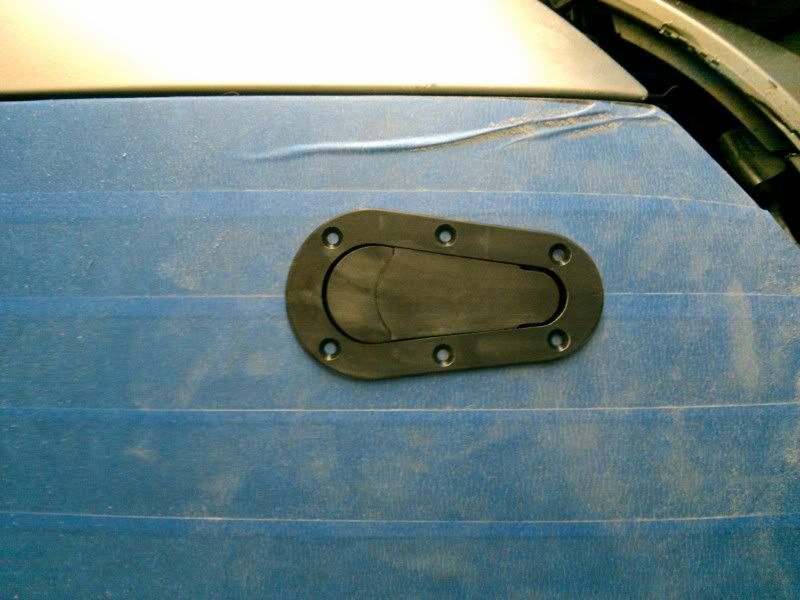
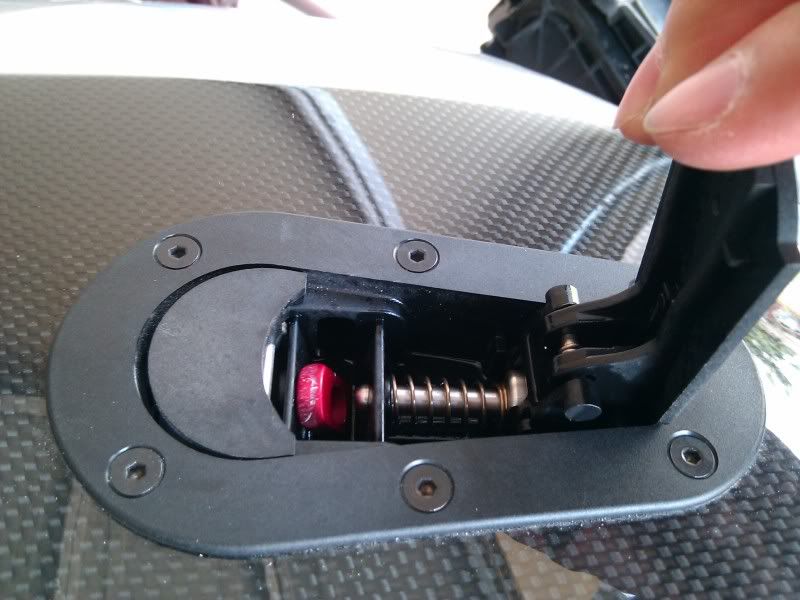
    Grab the Aerocatch and put it on top to get an idea where to cut.
    Getting the template and a ruler to measure it out helps too.


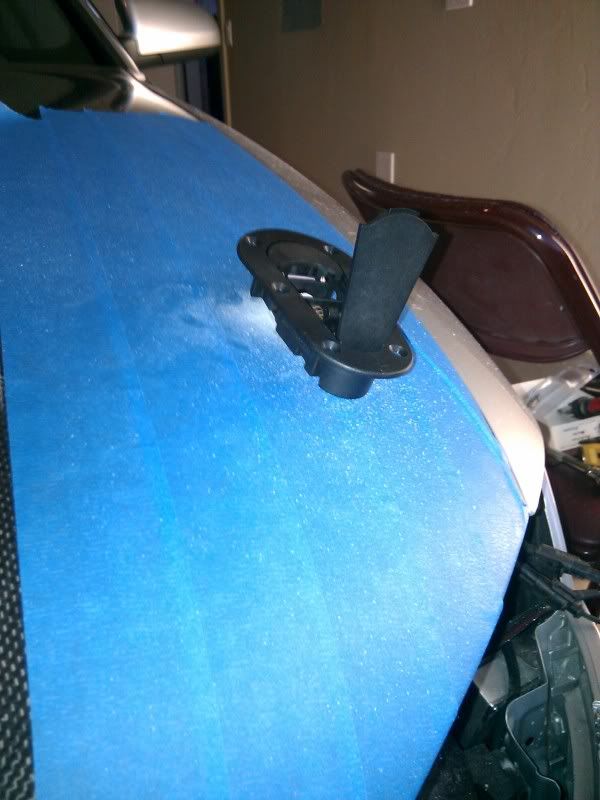
    Once you got it all measure out, go ahead and drill.
    Remember, "Measure Twice, Drill Once"
    I used a circular bit for the straights and a needle nose bit for the curve.
    Use the sanding bit to clean it up.


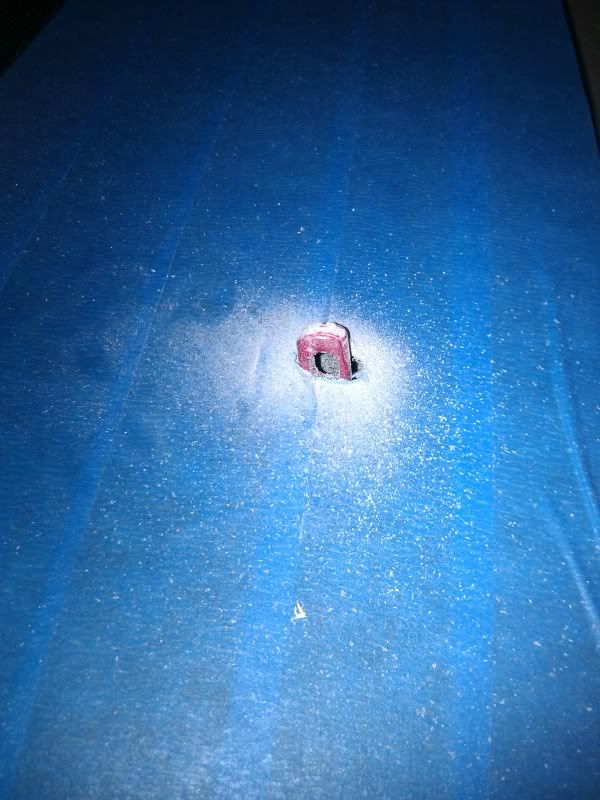
    If you are installing the pin on top of the head lights, cut the pin so the lights fit.
    Make sure the pin is perfectly lined up with the latch.
    Take a sharpie and mark where it clears the headlights.
    Cut. (Wear some gloves, it gets hot)


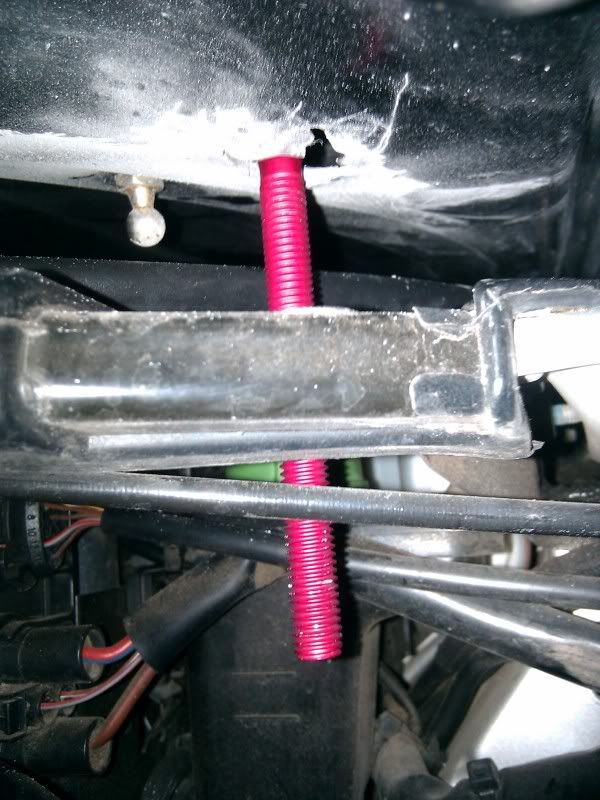
    Also drill out the bottom layer so you can screw in the latch.
    I used a sanding bit.


    Close the hood and see if the pins line up with the latch.
    I had to make some minor adjustments with the pin to get it perfect.


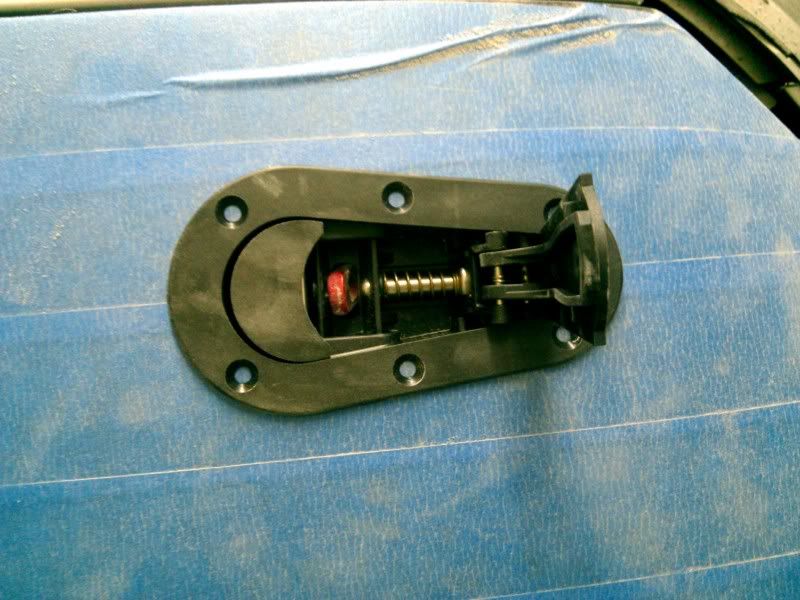
    Drill six holes for the screws once everything fits.


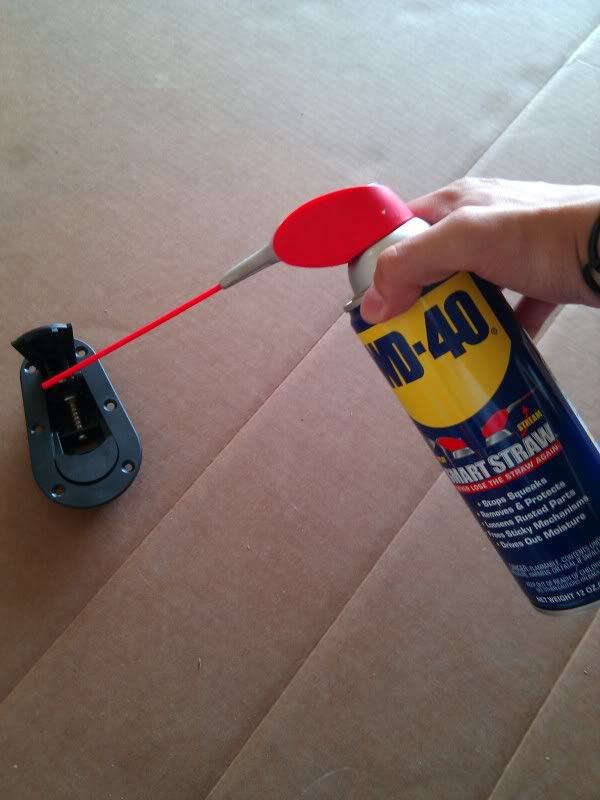
    Get some WD-40 and spray some in the hinge.
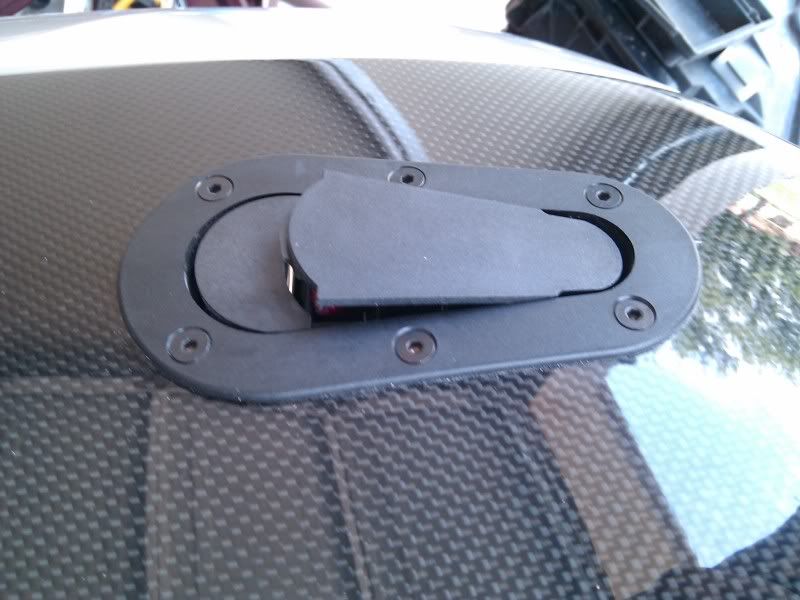

    Bolt it on!

    (Put a sealant around the bottom before you bolt it on to keep the rain out)


    I am not putting a sealant on yet because i am planning to take out the pins and paint the hood.


    Enjoy.


    I am planning to paint the hood to match the color of the car.
    Im going to keep the hood raw for awhile till i get sick of it and then paint it silver.

    Remember to take your time.
    If you guys having any questions PM me and ill try my best to answer.

    Post up some pics if you have hood pins!

    Hope this helps users who plan on installing pins or are too lazy to.
    Dont want your hood to pop up and cause damage or hurt yourself and others.
    Good Luck!

    -Scotty

  2. #2
    Veteran Member Four Rings kwimberly's Avatar
    Join Date
    May 03 2008
    AZ Member #
    28378
    Location
    Orlando

    Wow - excellent DIY. You are brave!
    Kevin W.
    2003 A4 1.8T quattro 5-spd. | USP lower | APR ECU w/ TT225's | APR TIP | test pipe | FMIC | Apikol snub | ecodes | Podi® | AWE sport pedals | JHM SSK/linkage | Forge 007 DV | '02 OEM sport suspension | OEM sport wheels | B6 S4 brakes w/ TyrolSport stiffeners | RS4 rear sway bar| Magnaflow 14829's| AVIC F700BT | hard-wired Passport 9500 | Side-mount trash bag hanging from shifter

  3. #3
    Stage 3 Forum Advertiser Four Rings VMRWheels's Avatar
    Join Date
    Jun 14 2005
    AZ Member #
    6871
    Location
    Anaheim, CA

    wow nice, I had mine installed at a body shop. How long did this take you?

    Brandon @ VMR Wheels
    [email protected] | 714.442.7916 Ext 108 | www.velocitymotoring.com| Instagram | | | Blog

  4. #4
    Established Member Two Rings svo142010's Avatar
    Join Date
    Oct 24 2008
    AZ Member #
    34559
    My Garage
    2005 Audi A4 1.8
    Location
    OKC

    thanks.
    It took me about roughly 4 hours.
    I took lots of breaks. The summer heat is killing me.

  5. #5
    Veteran Member Four Rings Raiketsu's Avatar
    Join Date
    Jan 21 2010
    AZ Member #
    53727
    My Garage
    '10 Marin Bobcat Trail
    Location
    University of Georgia

    Very, very nice DIY write up! I think the latches look pretty sick as well as being useful.
    Amulet Red 2003 Audi A4 1.8T

    Ecodes, Trunk Lip Spoiler, K&N Drop In Filter, LED Interior Lighting, DDM 55w 6000K Lows and H9 Retrofitted 2500K fogs, Depo LED Tails, painted brake calipers, and some VAG COM Mods

  6. #6
    Veteran Member Three Rings 80CID's Avatar
    Join Date
    Feb 11 2004
    AZ Member #
    189
    My Garage
    04 A4, 88 RX7 turbo, 12 MDX, 12 Grand Cherokee
    Location
    Houston

    Looks good!!! Nice work.
    "No matter what everyone else says..I still think you suck!"

    -Bill

  7. #7
    Veteran Member Four Rings n7plus1's Avatar
    Join Date
    Dec 19 2007
    AZ Member #
    23482
    My Garage
    2016 STI in WRBP / 2012 RDX SH-AWD w/Tech Package
    Location
    York, PA

    good shit. nice work.

  8. #8
    Veteran Member Four Rings Dan[FN]6262's Avatar
    Join Date
    Sep 12 2008
    AZ Member #
    32962
    My Garage
    stripped out stroker E30 and 98 C230 in middle of a LS/TH400 swap
    Location
    South Central PA

    very nice
    EFR | 7163
    268/260 cams

    I.E. Intake Manifold / 70mm
    Maestro [Dan Shank Super Tune™]

    BoostManager+
    Meth Head


  9. #9
    Established Member Two Rings
    Join Date
    May 24 2011
    AZ Member #
    75975
    Location
    Sin City, NV

    Nice work, I know this a little older thread but just to put it out there for anybody doing this now... dont use wd40 on the pins. Its a poor lubricant and attracts dust and dirt, also it is very bad for paint since paint is porous. Use white lithium grease, comes as a spray or in actual grease form(use the grease form if possible), it is available for low cost at any parts store. Its better for the life of the plastic as well.

  10. #10
    Established Member Two Rings
    Join Date
    May 24 2011
    AZ Member #
    75975
    Location
    Sin City, NV

    Also, you can use toothpaste in place of the paint to mark where the hood pin touches the hood and not have paint on the pins. Tends to be a more common item to have around the house, obviously the paint is fine to use as well

  11. #11
    Veteran Member Four Rings walky_talky20's Avatar
    Join Date
    Jun 30 2008
    AZ Member #
    30427
    Location
    Erie, Pennsylvania

    Some blood would work in a pinch, too. You ought to have a good amount available by the time you get to that step anyway. If you need more you can always dilute with tears.
    ^Don't listen to this guy, he's not even a mechanic.
    2001 Laser Red A4 1.8TQM, 5-Speed Swapped, 4.11 Final Drive, APR 93, 2.5" Exhaust, ST Coilovers, 034 RSB, A8 Brakes Front & Rear
    2006 Passion Red Volvo V50 T5 AWD 6MT
    2000 Satin Silver Passat 1.8T FWD Wagon, Slippy Tiptronic, 15" Hubcaps
    2001 Aluminum Silver Metallic A4 Avant 1.8TQM (winter sled)

  12. #12
    Registered User Four Rings UroTuning's Avatar
    Join Date
    Aug 23 2007
    AZ Member #
    20527
    Location
    Tampa Bay, FL

    Nice diy!

Tags for this Thread

Bookmarks

Posting Permissions

  • You may not post new threads
  • You may not post replies
  • You may not post attachments
  • You may not edit your posts
  •  


    © 2001-2025 Audizine, Audizine.com, and Driverzines.com
    Audizine is an independently owned and operated automotive enthusiast community and news website.
    Audi and the Audi logo(s) are copyright/trademark Audi AG. Audizine is not endorsed by or affiliated with Audi AG.