


In this DIY you will need:
6 coilpacks (or just the one your replacing
small torx bit
Flat head screw driver
My broken clip tool (if you have broken clips like I did)
Philips head screw driver
A safe spot for screws
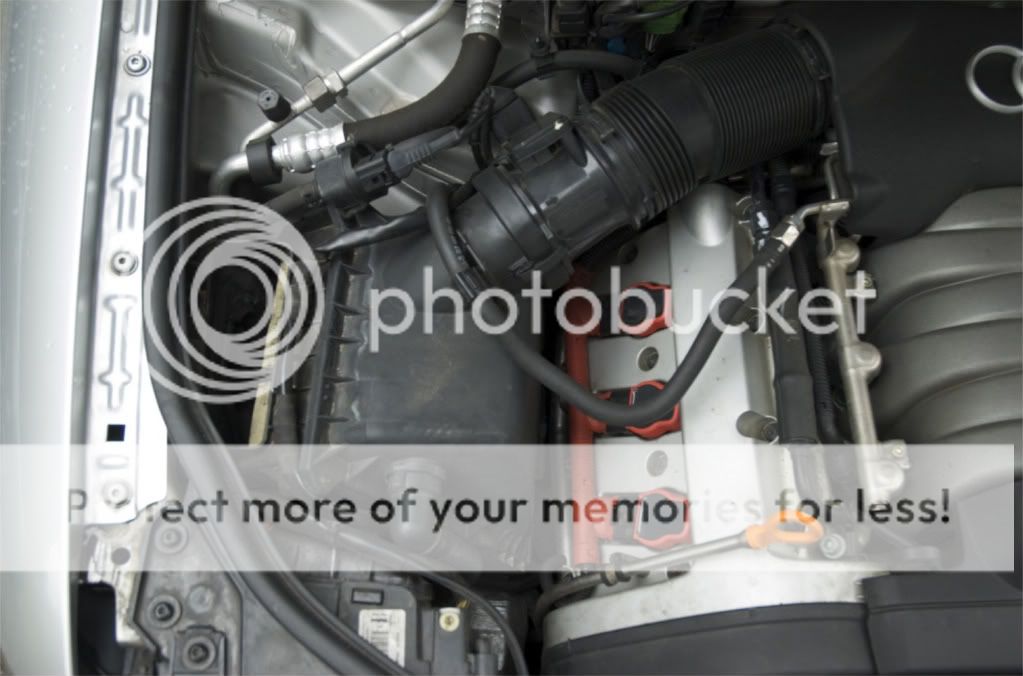
Okay so first things first. Here is your 3.0 motor.

See you have 3 ignition coils on each side in red along with the red wire covers. We will start on the driver side.
Red wire cover

First step is to unscrew the red wire cover. There are two torx screws holding the wire cover on the motor.
The first one is here

The second one is here

You can use a torx screw driver on the first one

But the second is is vert hard to get to. I had to use the bit and my fingers.


Now that we have this unscrewed we need to get the wire harnesses unclipped. It is the most easy, I found, to unclip all 3 coilpacks then remove all 3 wire harnesses together.
Pop off the clips x3

Now that they are all unclipped you can push the red wire cover down out of the way and off the coilpacks

it will take a bit of pushing.
Now that they are all unclipped and unplugged you can start pulling them up.

Pull straight up!

The last one is a bit tricky but there is a cave in the coolant tank that will allow you to wiggle it out.
Bring it up

And tilt it out

Now you have all 3 out!

Tada! Now put some back in and re attach the harnesses along with screwing it back down to the motor and you are set with the driver side!
Make sure you get the coilpacks to sit firmly on the valve cover. they need to be pushed down as far as you can get them. They should be slightly sinked into the valve cover.

Now onto the Passanger side!
This takes a bit more work. Here you need to remove the air intake snorkel.
That black thing.

To do this there are 2 screws on the rad support that need to be undone.

So get at it

Now that that is done, pull the first section of the snorkel out.

Feel free to manhandle it a bit. Its not to fragile, but remember plastic does break.

thats how its wedged in there.
Now remove the second part. It just clips into the top of the airbox.


Now this is what it will look like. Soo much more room.
Now lets get to those pesky wire cover screws. These are a PITA because the airbox is right there.
#1 screw is here

#2 is here

Like I said, PITA. I used my fingers and the bit. They werent screwed down to tight. But once you get them undone you can pull off the harnesses 3 at a time. Just like the other side.

I found it was eaisest to pull out the CPs like this

With two fingers under the male side. Just pop em up.
Now replace them with new ones and re attach all the harnesses and screws and it will look like this!

Dope.
Now just reinstall the snorkel and your all set.
Go out and enjoy those fresh coilpacks! Also go pick up a six pack to relieve any of the pain that this install may have inflicted.
Oh and I am not responsible for your; body, car, my info, or your reading skills. And I dont condone underage drinking. Fo sho


 Reply With Quote


Bookmarks