


Sent from my Nexus 6P using Tapatalk


2014 A4 2.0TQ Technik Manual
2006 A4 2.0TQ Manual
1978 Porsche 911SC Targa
1976 Yamaha XS 360
Note: PMs disabled, please keep requests for technical help on the forums to benefit everyone:
Brilliant Red B6 A4 1.8T quattro Ultrasport
Frankenturbo F21L | Motoza Tuning | FMIC | Test Pipe | Bosch 550cc | 710n DV | Podi Boost Gauge | 21 PSI
Dolphin Grey B6 A4 1.8T quattro
Brilliant Red B7 A4 2.0T quattro
 [/IMG]
2014 A4 2.0TQ Technik Manual
2006 A4 2.0TQ Manual
1978 Porsche 911SC Targa
1976 Yamaha XS 360
Note: PMs disabled, please keep requests for technical help on the forums to benefit everyone:


Brilliant Red B6 A4 1.8T quattro Ultrasport
Frankenturbo F21L | Motoza Tuning | FMIC | Test Pipe | Bosch 550cc | 710n DV | Podi Boost Gauge | 21 PSI
Dolphin Grey B6 A4 1.8T quattro
Brilliant Red B7 A4 2.0T quattro
Garage: 2008 Quartz Gray Audi A4Q 6MT
Tuning: JHM Tuned Stage 2 93 Octane w/ IE HPFP
2014 A4 2.0TQ Technik Manual
2006 A4 2.0TQ Manual
1978 Porsche 911SC Targa
1976 Yamaha XS 360
Note: PMs disabled, please keep requests for technical help on the forums to benefit everyone:
08 a4 2.0t quattro avant | eng bwt 200hp | tip 6-spd zf 6hp19a | akebono ceramic | andros 18x8 et35 cb72.2 72-57 centric rings | pirelli p0as+ 235/40r18 | hu xtrons px5 mtce_gs_3.40 android 8 | rev d dv
'04 Corvette Z06 track car
'15 F350 Platinum 6.7
'06 APR S2+ A4 2.0T 6 Speed DD - current
'12 Q5 2.0T P+ Built engine/CTS K04/IE tune - current
'05 Ford F250 XLT 4x4 BP'd 6.0 - current
'01.5 APR S3 S4 Avant 6 Speed - sold '04 Goodwood S4 6 Speed - sold '91 Jetta GL 1.8 8v manual swap - sold '99 SVT Cobra 08whp/308wtq - sold '01 Mustang GT - sold '88 Mustang LX 5.0 - sold '95 Jeep Cherokee Country - sold

08 a4 2.0t quattro avant | eng bwt 200hp | tip 6-spd zf 6hp19a | akebono ceramic | andros 18x8 et35 cb72.2 72-57 centric rings | pirelli p0as+ 235/40r18 | hu xtrons px5 mtce_gs_3.40 android 8 | rev d dv
 No problem and god speed, its a pretty straight forward DIY and it will blow your mind how quickly you can do it after you have gotten through it once.
'04 Corvette Z06 track car
'15 F350 Platinum 6.7
'06 APR S2+ A4 2.0T 6 Speed DD - current
'12 Q5 2.0T P+ Built engine/CTS K04/IE tune - current
'05 Ford F250 XLT 4x4 BP'd 6.0 - current
'01.5 APR S3 S4 Avant 6 Speed - sold '04 Goodwood S4 6 Speed - sold '91 Jetta GL 1.8 8v manual swap - sold '99 SVT Cobra 08whp/308wtq - sold '01 Mustang GT - sold '88 Mustang LX 5.0 - sold '95 Jeep Cherokee Country - sold
2014 A4 2.0TQ Technik Manual
2006 A4 2.0TQ Manual
1978 Porsche 911SC Targa
1976 Yamaha XS 360
Note: PMs disabled, please keep requests for technical help on the forums to benefit everyone:

Brilliant Red B6 A4 1.8T quattro Ultrasport
Frankenturbo F21L | Motoza Tuning | FMIC | Test Pipe | Bosch 550cc | 710n DV | Podi Boost Gauge | 21 PSI
Dolphin Grey B6 A4 1.8T quattro
Brilliant Red B7 A4 2.0T quattro
2006 A4 Avant
replaced wrecked 04 A6 Avant
replaced tired 98 A4 1.8tqm
2012 Audi A6 3.0t
2019 GTi 2.0t 6 speed
2013 Touareg VR6
A4 B7 2.0T | HPFP upgrade + FMIC | BSR Stage II + exhaust + HFC | 3.0TFSI Throt. Body | RS4 fuel contr., PRV + S3 inj., G247 + DW300c | GFB DV+| 034 RSB + all arms and mounts | S4 brakes | B12 Bilstein suspension + H&R springs | RNS-E + Polk Audio PA D5000.5 - 4 x DB6502 + DB840DVC sub + Pioneer 10" sub | LEDs throughout | 19" Audi 2015 RS4 rims
My respray thread
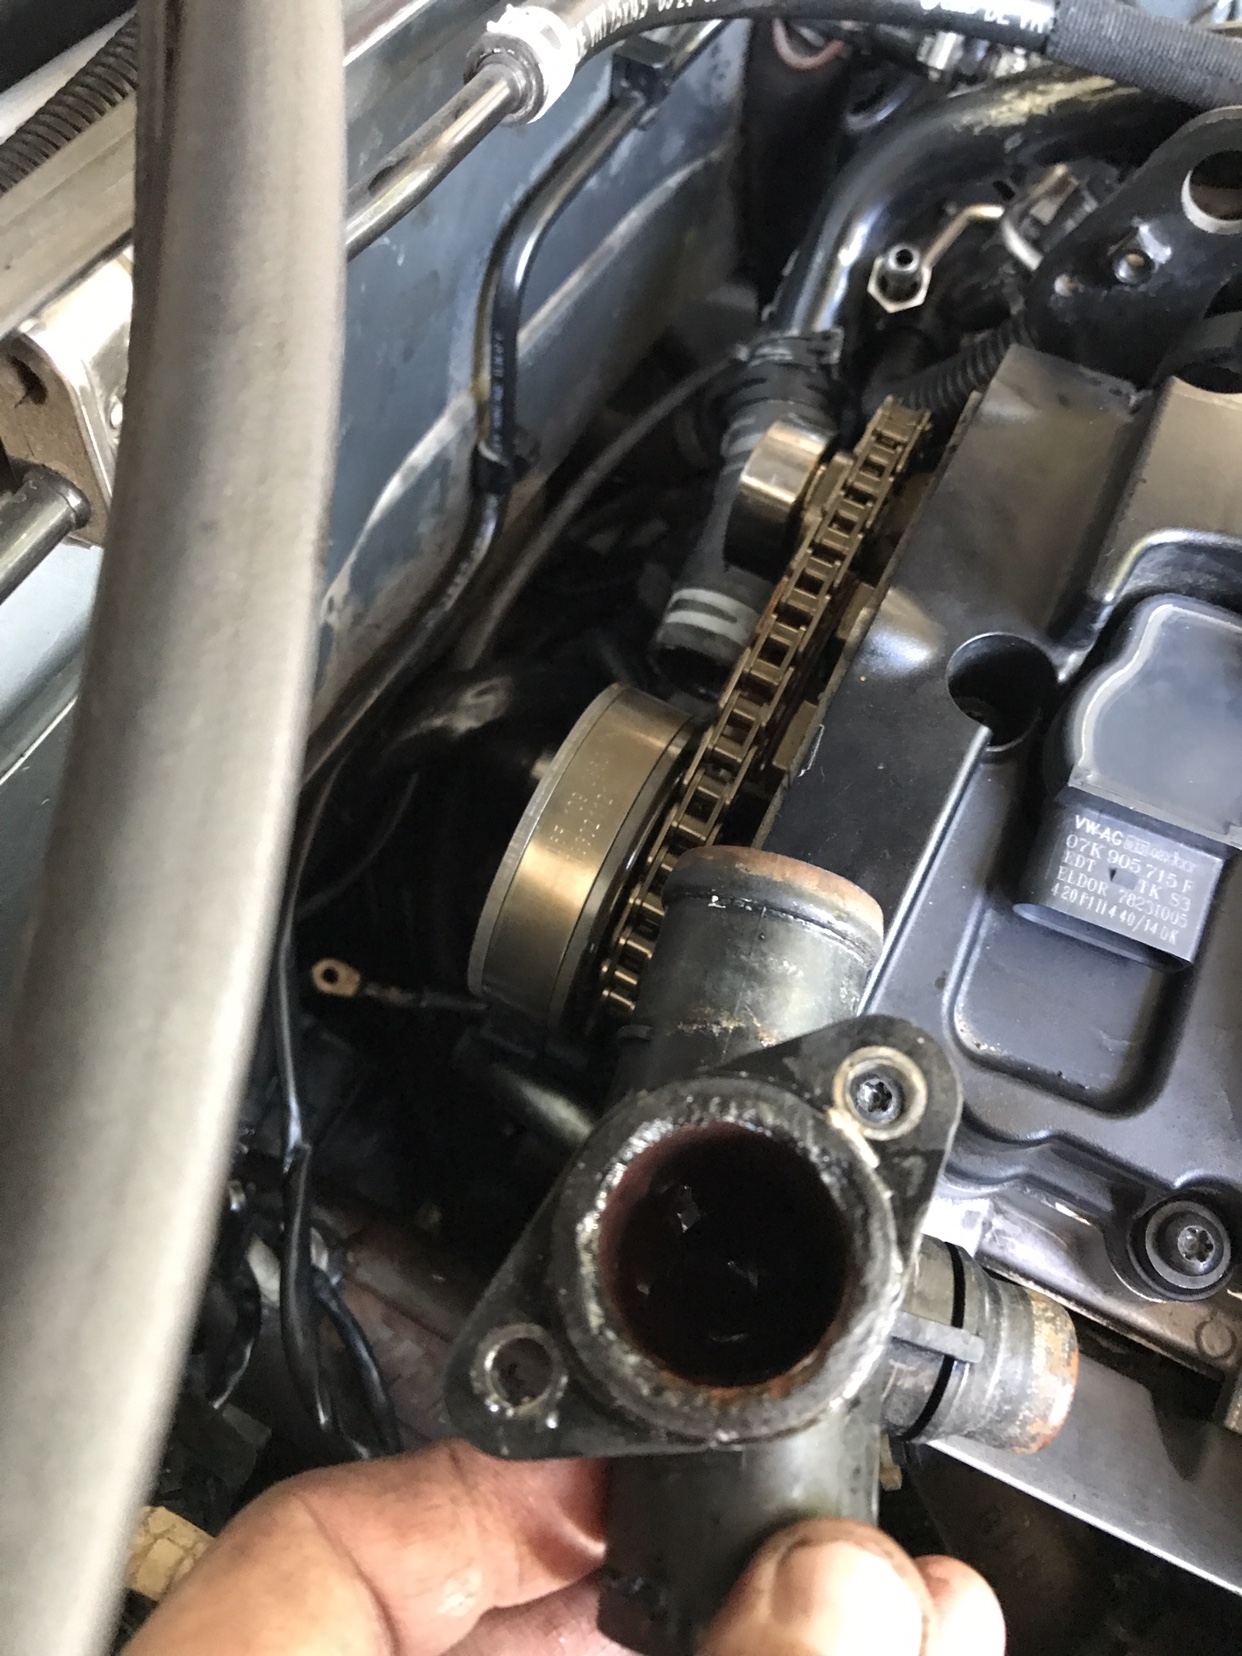 Rear coolant flange was a pita
2012 Audi A6 3.0t
2019 GTi 2.0t 6 speed
2013 Touareg VR6
------
The Garage:
2005.5 Brilliant Black A4 Quattro 6spd manual / JHM Stage 1 / 034 snub / NewSouth Vent Boost Gauge / GFB DV+ / JHM Lightweight Flywheel Clutch Kit / Koni FSD / Eibach springs
2008 Dolphin Grey S-Line Avant
2014 A4 2.0TQ Technik Manual
2006 A4 2.0TQ Manual
1978 Porsche 911SC Targa
1976 Yamaha XS 360
Note: PMs disabled, please keep requests for technical help on the forums to benefit everyone:
2014 A4 2.0TQ Technik Manual
2006 A4 2.0TQ Manual
1978 Porsche 911SC Targa
1976 Yamaha XS 360
Note: PMs disabled, please keep requests for technical help on the forums to benefit everyone:


------
The Garage:
2005.5 Brilliant Black A4 Quattro 6spd manual / JHM Stage 1 / 034 snub / NewSouth Vent Boost Gauge / GFB DV+ / JHM Lightweight Flywheel Clutch Kit / Koni FSD / Eibach springs
2008 Dolphin Grey S-Line Avant
------
The Garage:
2005.5 Brilliant Black A4 Quattro 6spd manual / JHM Stage 1 / 034 snub / NewSouth Vent Boost Gauge / GFB DV+ / JHM Lightweight Flywheel Clutch Kit / Koni FSD / Eibach springs
2008 Dolphin Grey S-Line Avant


Brilliant Red B6 A4 1.8T quattro Ultrasport
Frankenturbo F21L | Motoza Tuning | FMIC | Test Pipe | Bosch 550cc | 710n DV | Podi Boost Gauge | 21 PSI
Dolphin Grey B6 A4 1.8T quattro
Brilliant Red B7 A4 2.0T quattro

08 a4 2.0t quattro avant | eng bwt 200hp | tip 6-spd zf 6hp19a | akebono ceramic | andros 18x8 et35 cb72.2 72-57 centric rings | pirelli p0as+ 235/40r18 | hu xtrons px5 mtce_gs_3.40 android 8 | rev d dv
2007 2.0T Q 6MT, S-Line, Ti Package, BB
Revo Stage 2 | JHM Stage 1 Clutch | K&N Drop in | APR HPFP | 034 HFC | AWE Catback | 034 SD Tranny & Motor Mounts | Neuspeed Snub | H&R Sport Springs | Bilsteins | Moog ACA | B5 Perches (removed) | RS4 RSB | ABT Drilled n Slotted Rotors | Redstuff Front & Akebono Rear | Podi Stepper Boost Gauge | Recaro's | H&R Spacers 15f/20r | Clear Corners w/Blackout | Smoked Frt Markers | Cupra R Lip | 20% Tint
------
The Garage:
2005.5 Brilliant Black A4 Quattro 6spd manual / JHM Stage 1 / 034 snub / NewSouth Vent Boost Gauge / GFB DV+ / JHM Lightweight Flywheel Clutch Kit / Koni FSD / Eibach springs
2008 Dolphin Grey S-Line Avant
Ivan
 Posting Permissions
|
© 2001-2025 Audizine, Audizine.com, and Driverzines.com
Audizine is an independently owned and operated automotive enthusiast community and news website. Audi and the Audi logo(s) are copyright/trademark Audi AG. Audizine is not endorsed by or affiliated with Audi AG. |

 |

 Reply With Quote
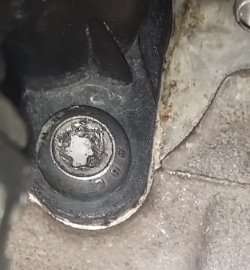 Not good.
Bookmarks