


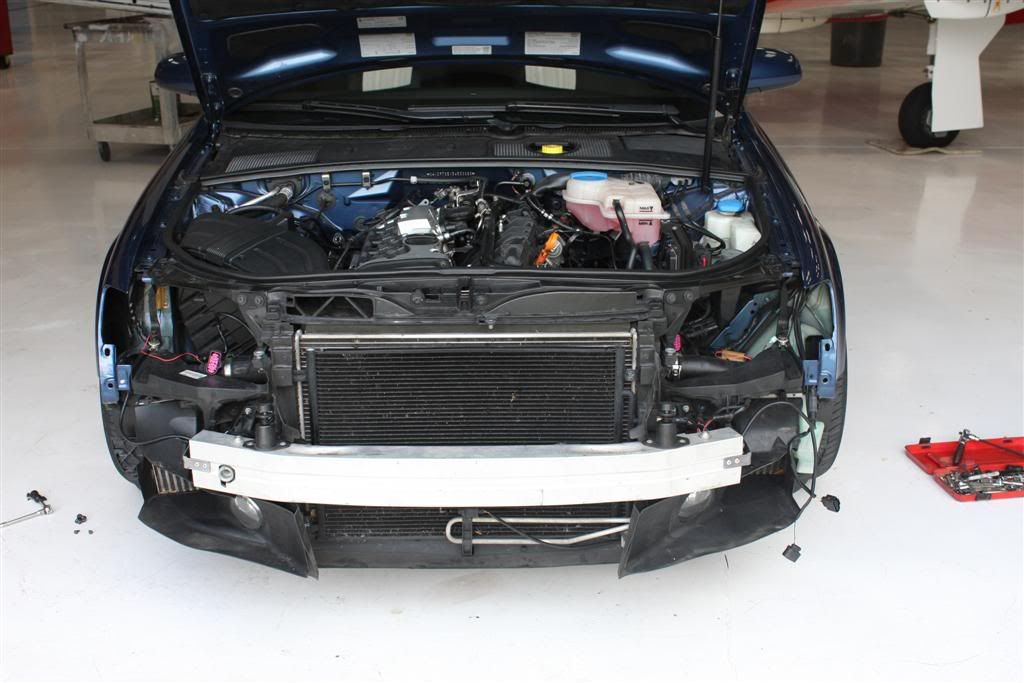
I was not too stuffed after the Thanksgiving meal so I decided to start the project.
For the Bumper removal, the DIY is here:
http://www.audizine.com/forum/showth...ghlight=bumper
Remove the following components:
Headlights
Intercooler scoops
Disconnect hood latch cable
Air filter intake conduit
Spark plugs (you need to do that for later)
Then, you should end up like this
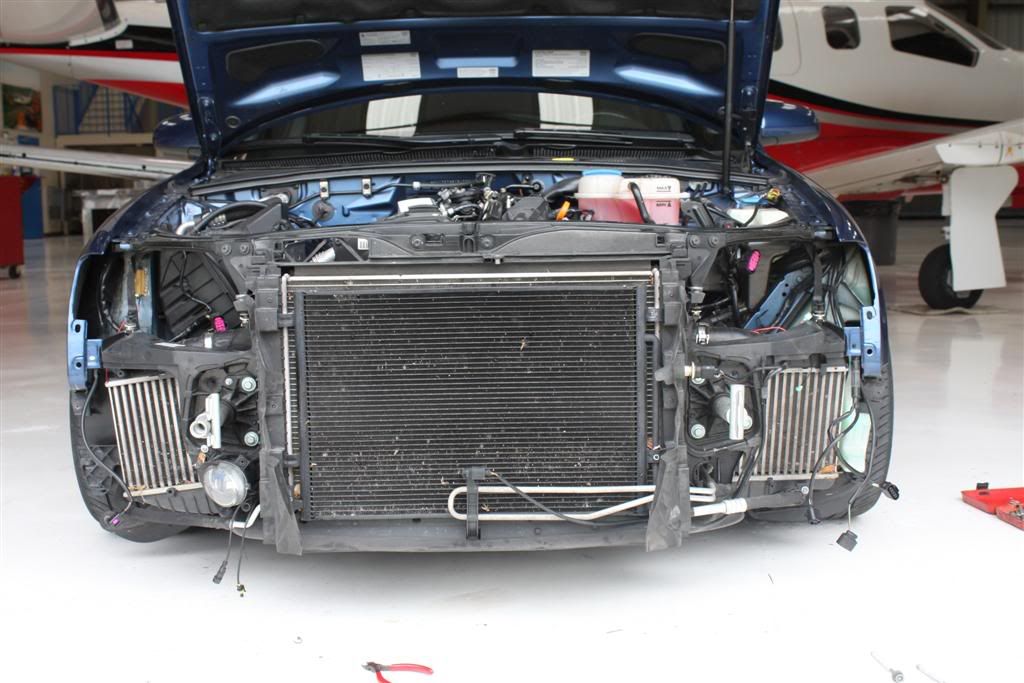
Then remove the 2 front impact sensors located on each side of the radiator
Remove the front support
And under supervision of my weekly rides (my primary job
 )
)
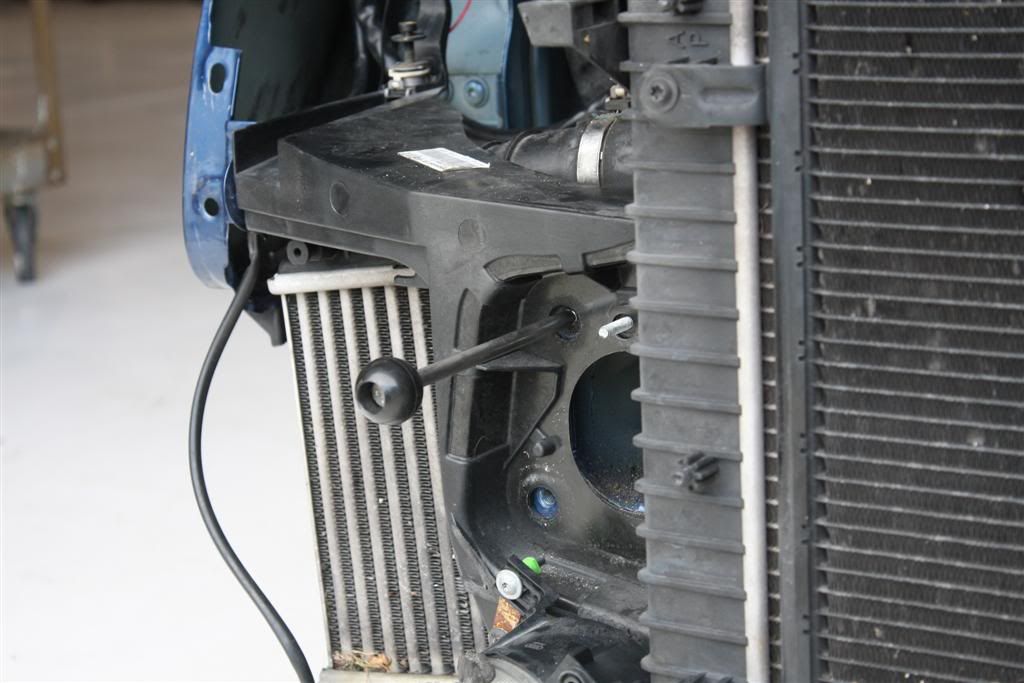
Driver intercooler, disconnect the bottom hose
Passenger intercooler, disconnect the upper hose

Now, time to dump the coolant. Located on the bottom left corner, the valve: turn counter clockwise

When the circuit is empty, disconnect the bottom hose by lifting the clip and pulling AFT. Be gentle, everything is plastic
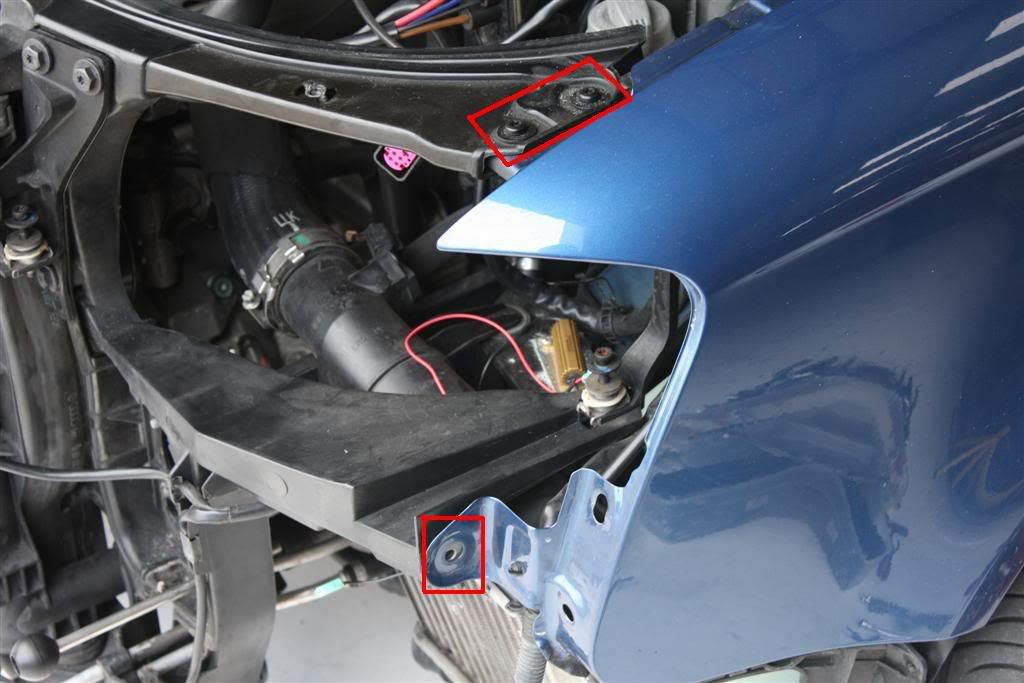
Insert 2 bolts on each side of the frame to be able to slide and support the front
Now, remove the screws circled in red, on both side of the car
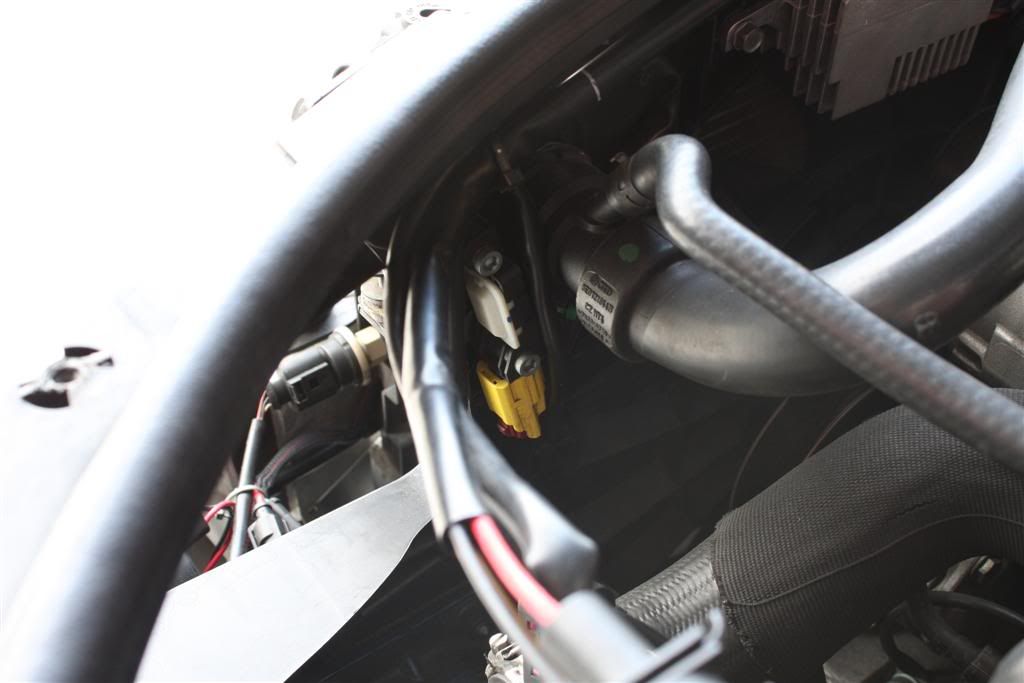
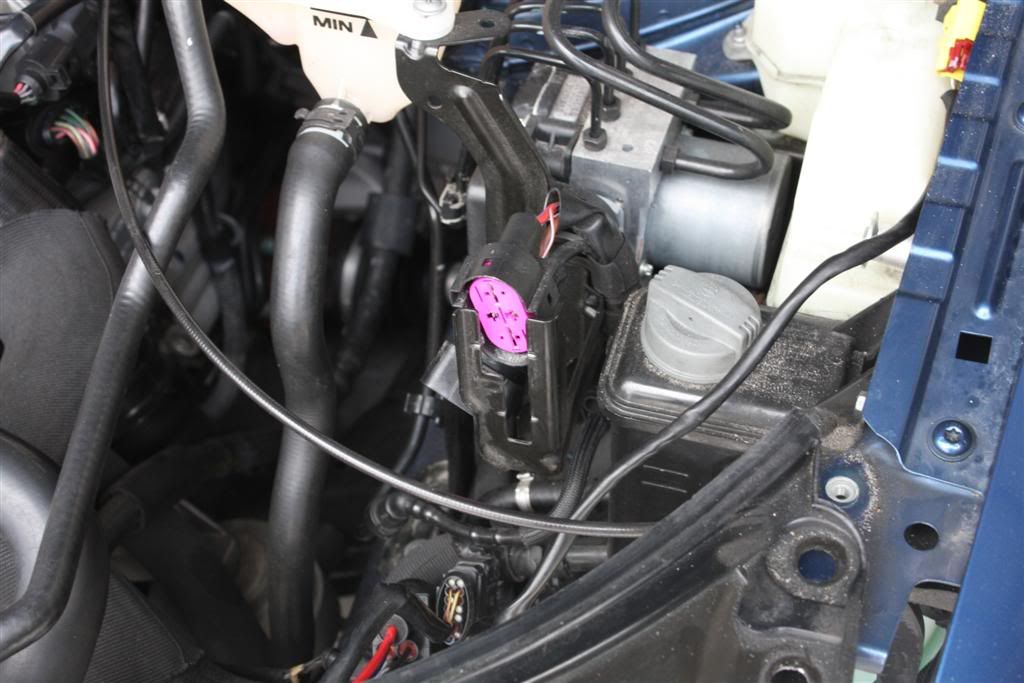
Unplug the fans controller harness
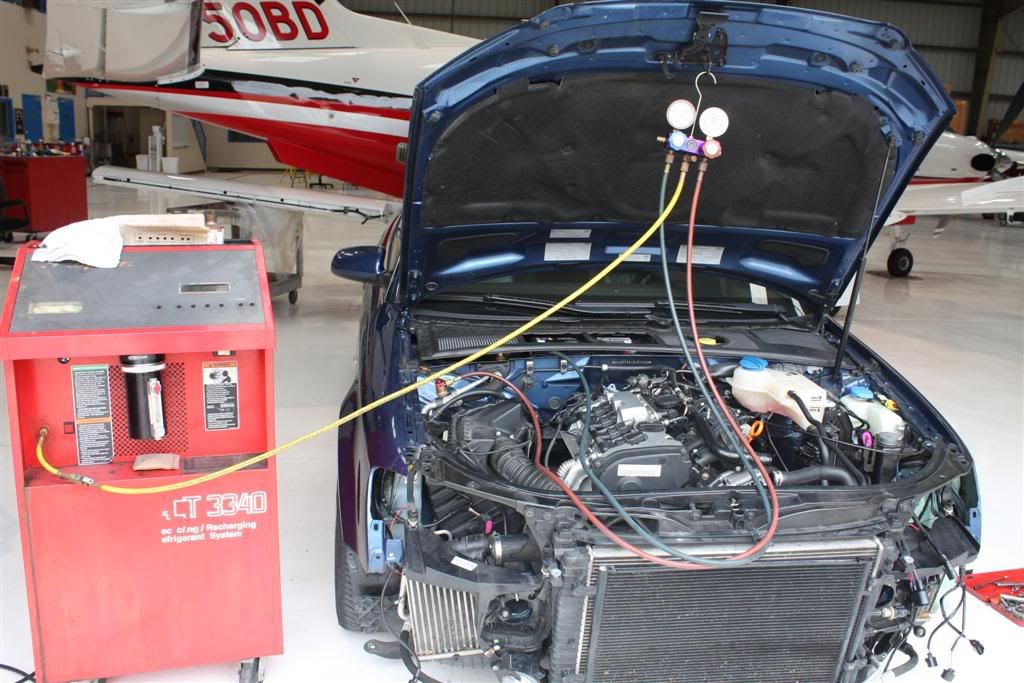
Because I really want to have access to the front and the bench was close by, I decided to vacuum the AC. Doing so (good thing, my Freon was low); I will be able to slide the entire front end on the side.
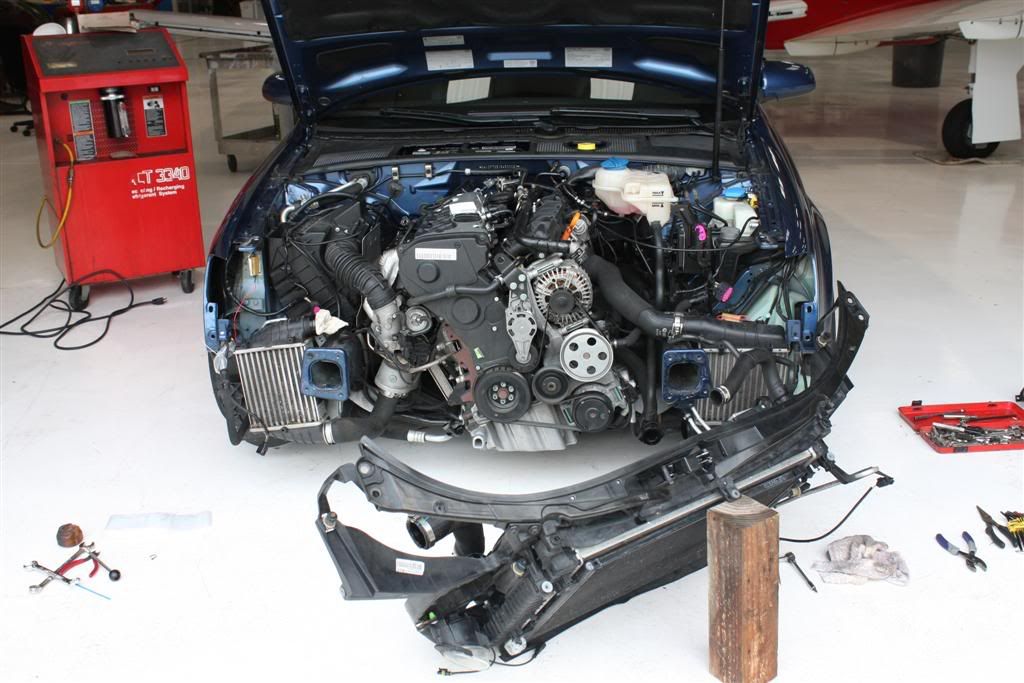
And voila, plenty of room to access the timing belt
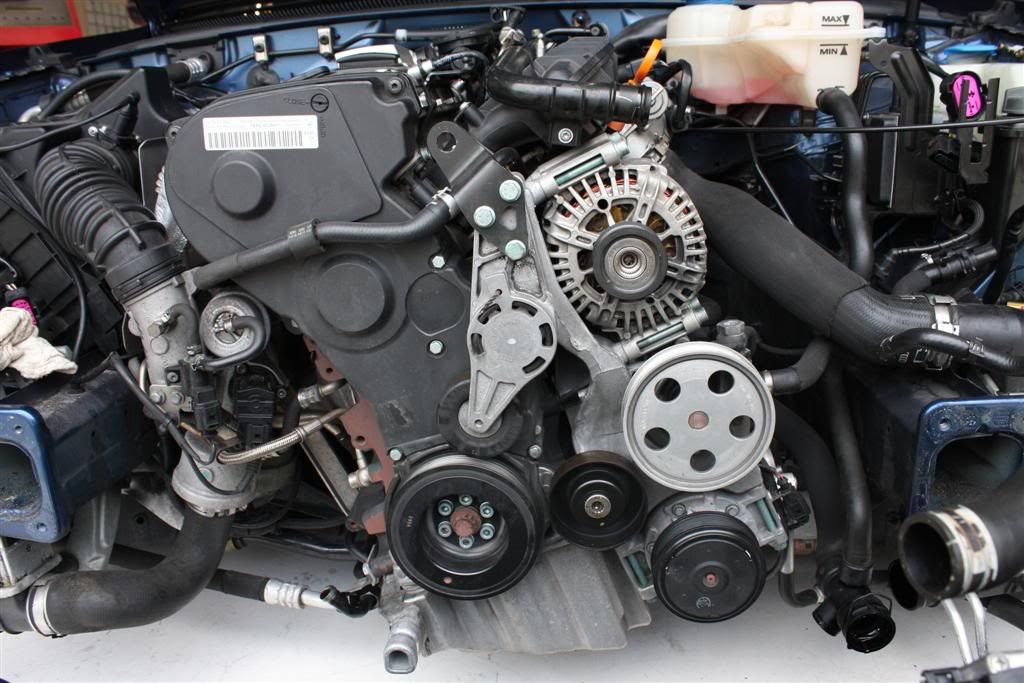
How easy the DV access is now

Part 2
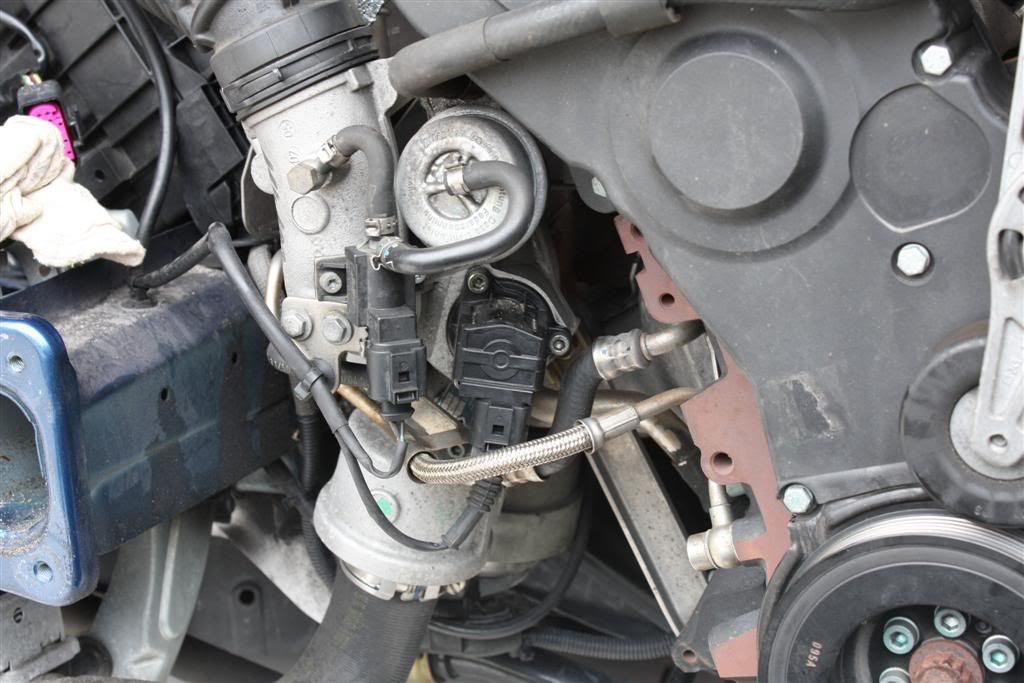
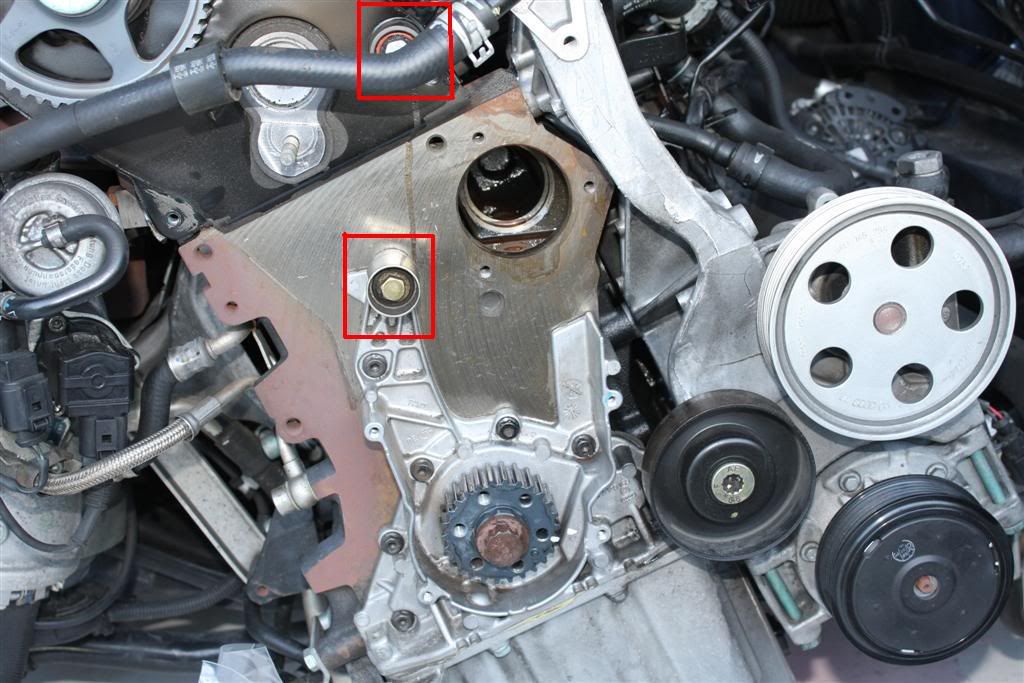
Started this morning by removing the Alternator to access the Thermostat Assembly. Pretty straightforward: remove the 4 Allen screws and secure it on the side. No need to remove the connectors on the back.
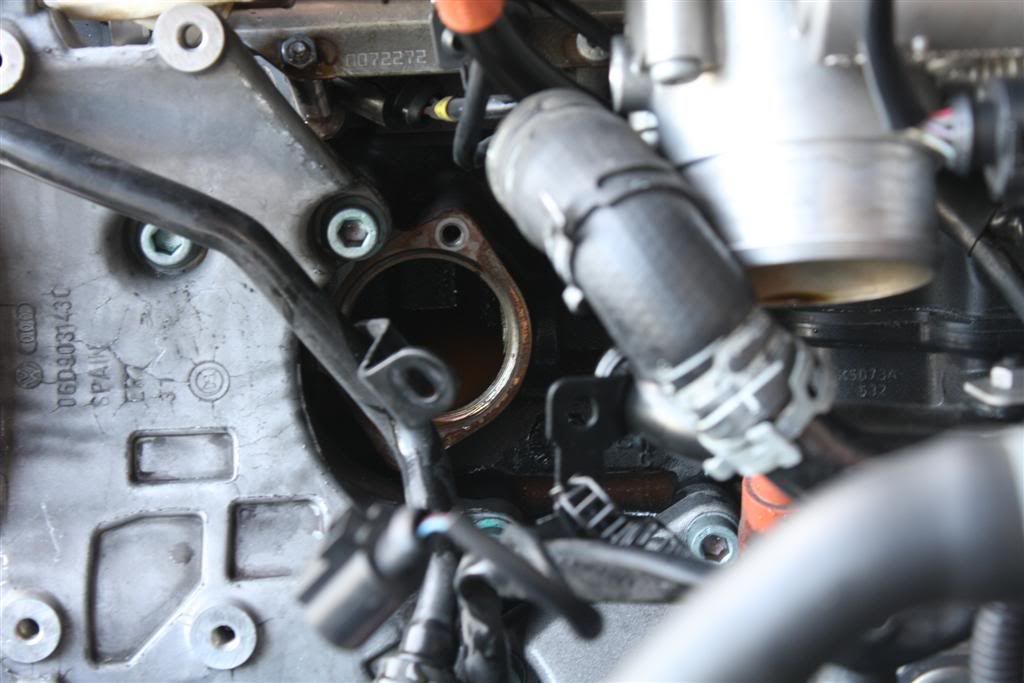
Now, here is the beast. Pretty easy here as well: Not shown on the picture due to access, you need to remove the 2 top Allen screws of the Oil Cooler to give some slack to a metallic line connected to the valve

Valve removed
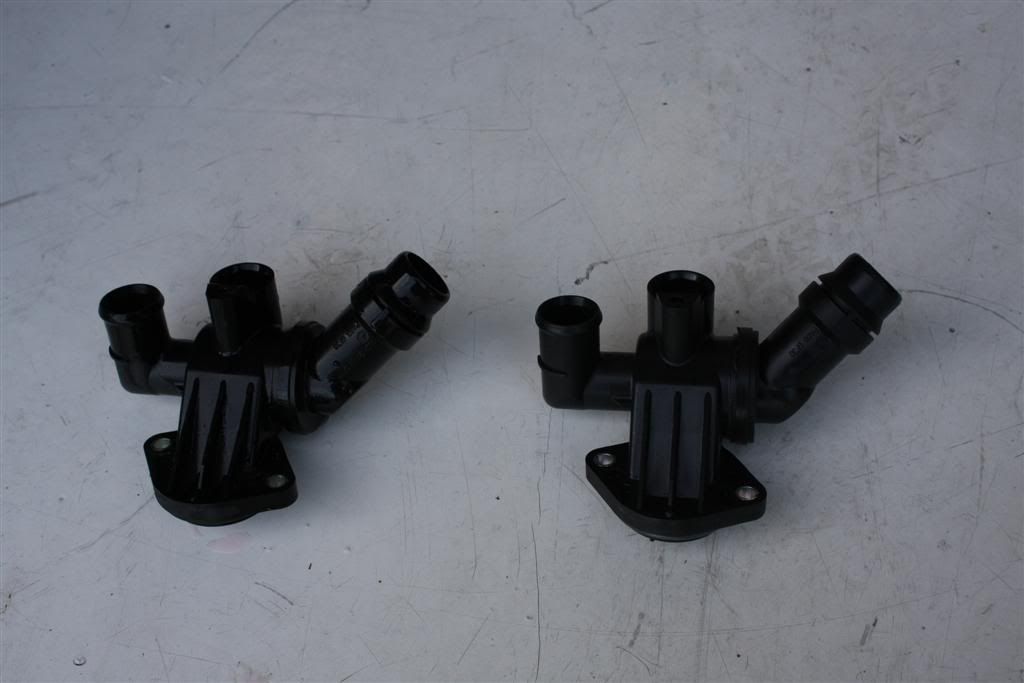
New one & old one side by side
Warning: This DIY is for information only. If you decide to use it, it’s at your own risk.
Now the timing belt:
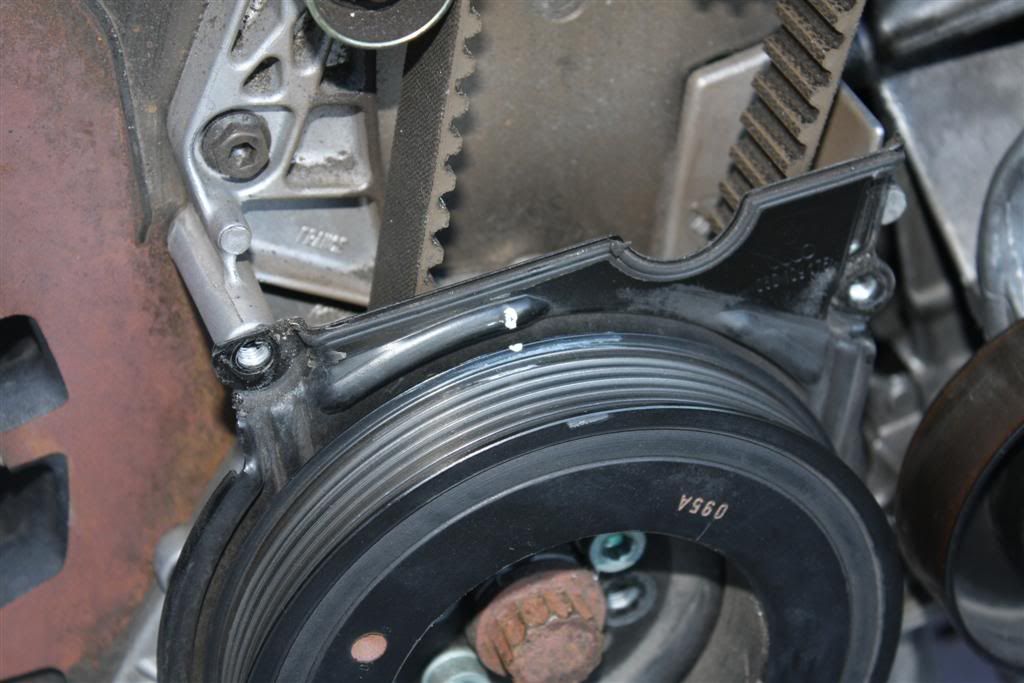
Loosen the 6 screws of the puller Dampner (don’t remove the pulley yet)
Remove the 5 screws of the upper plastic cover
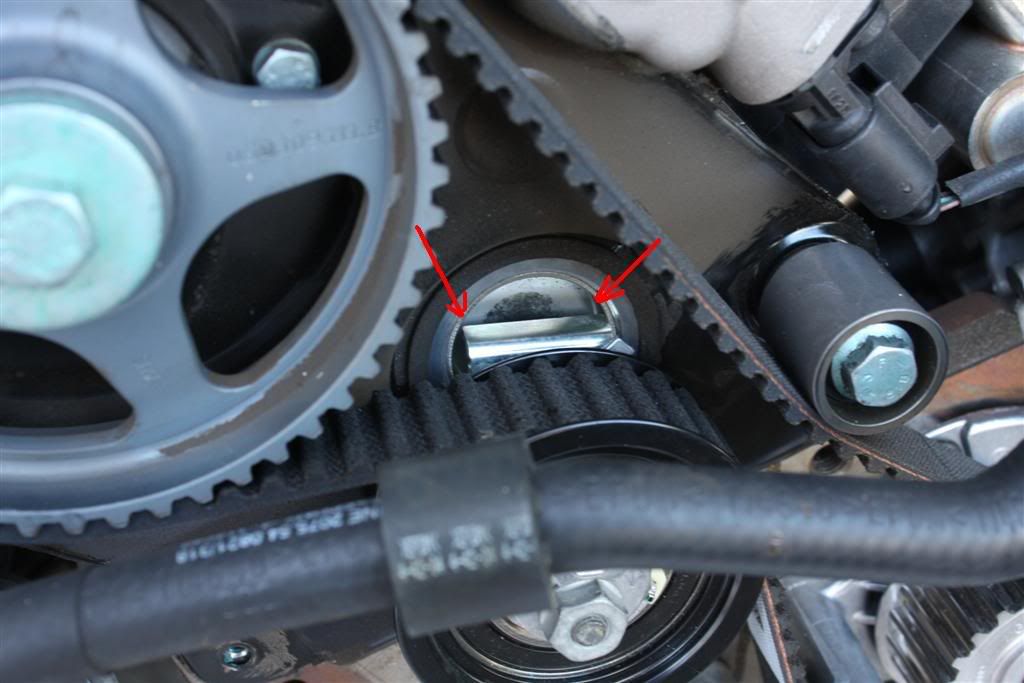
Using the Crankshaft bolt, turn clockwise until the mark on the Camshaft and Crankshaft are aligned. Because both marks could be difficult to see (especially the one on the Dampner pulley) I use a white marker to materialize them a bit better (got old eyes too).
Camshaft

Crankshaft
Now remove the 6 screws of the pulley Dampner. Remove the bottom protector. As you will see, your bottom mark is now gone so as a safety, I made another mark on the block and the bottom pulley
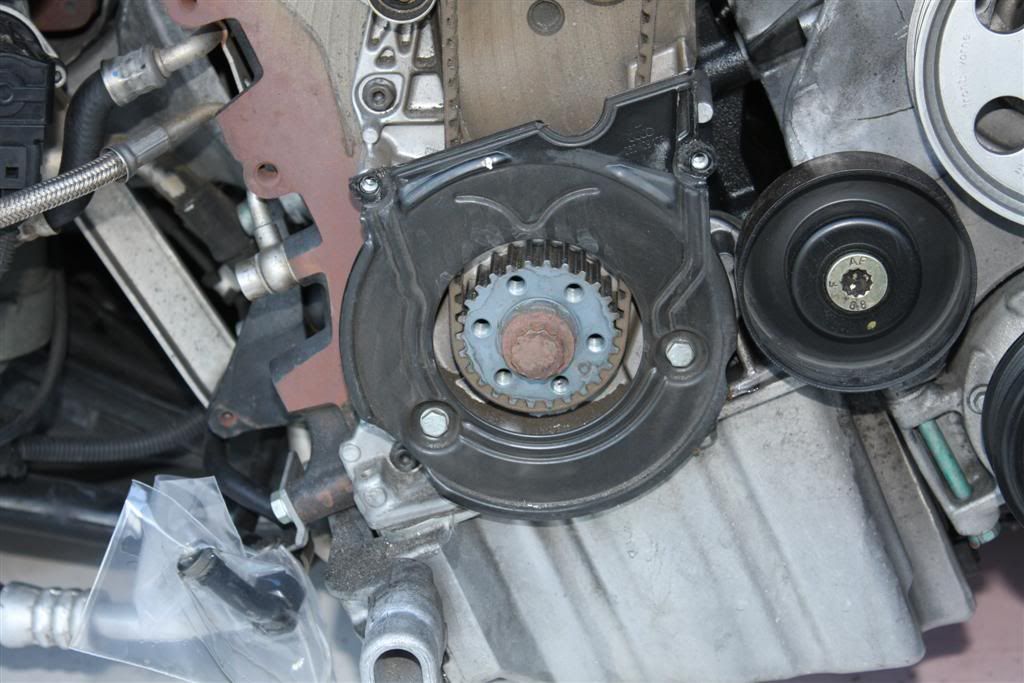
New reference
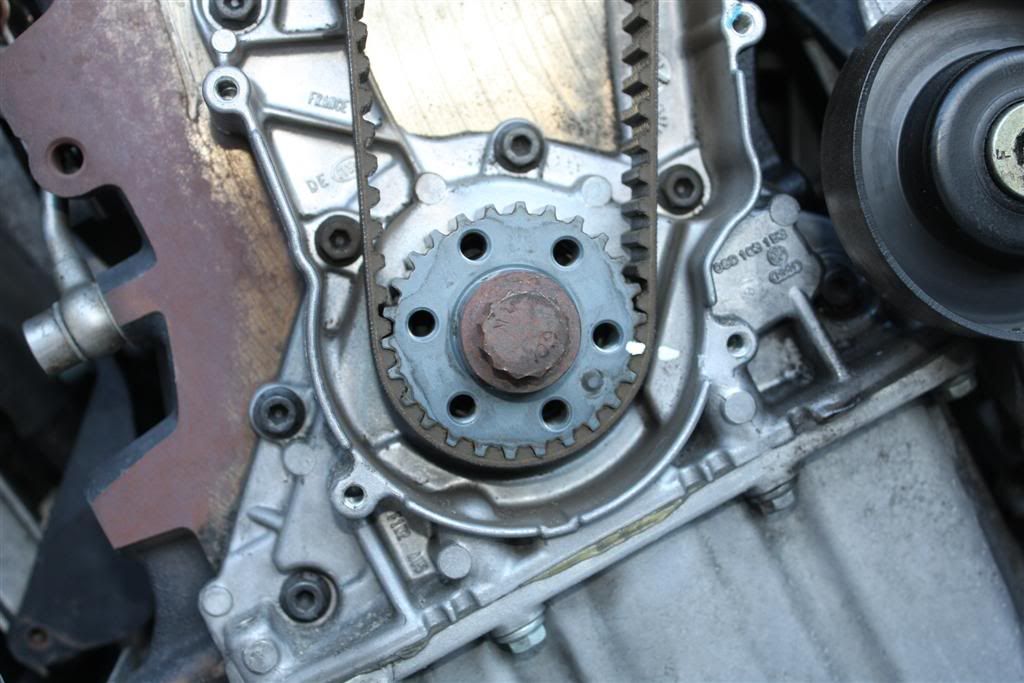
Now removed the nut of the Tensioner and slide out the Tensioner.

Now remove and replace the water pump as well as both idler (in red)
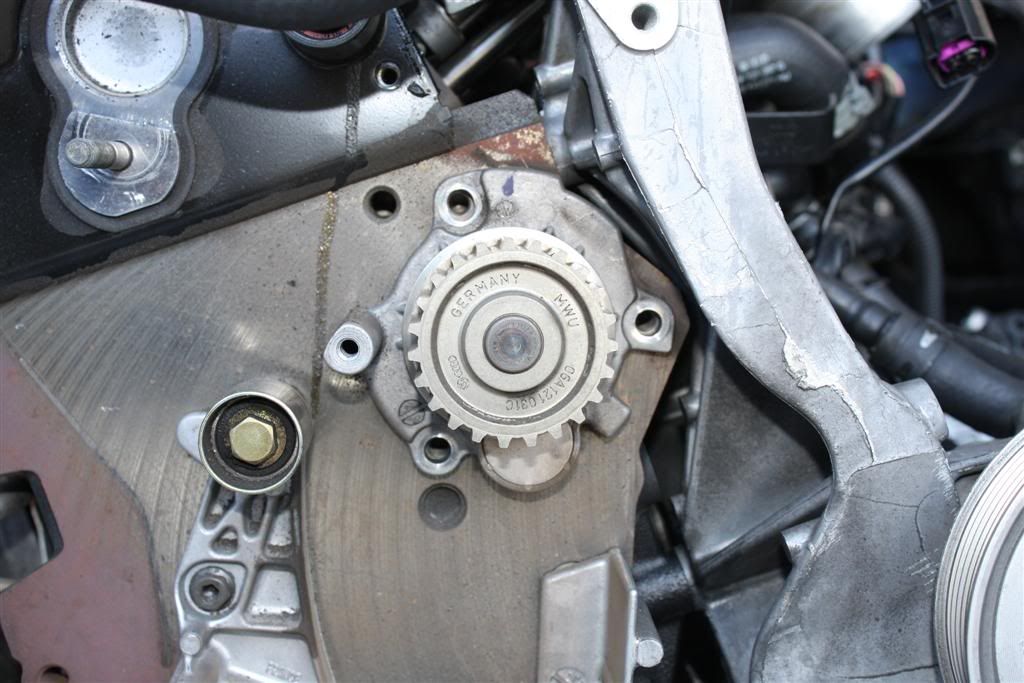
Slide the new belt in place.
When installing the new Tensioner, make sure that the rear tab fits completely inside the block.
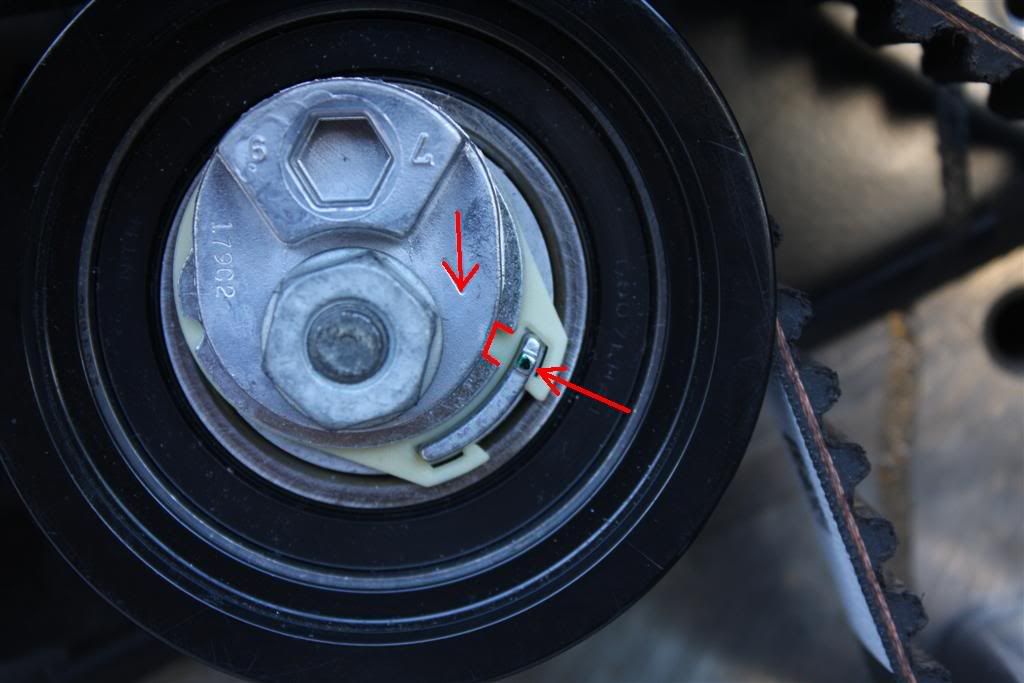
Now, set the tension:
Tight barely the Tensioner nut. Using an Allen wrench, turn clockwise the center of the Tensioner until the notch is aligned with the highlighted dot. Then torque the nut with final value
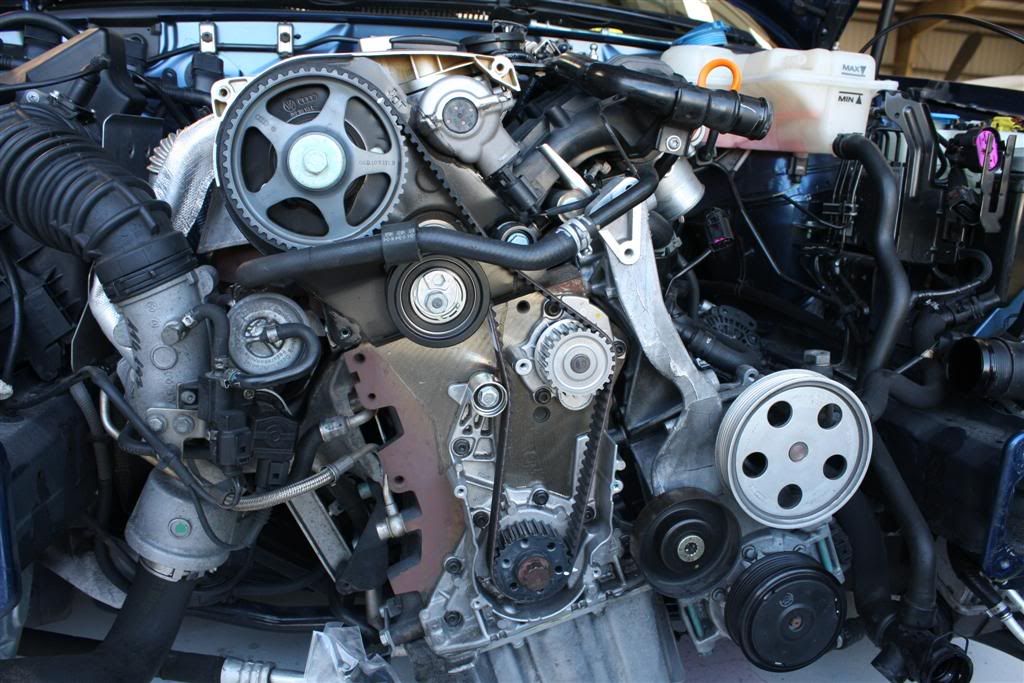
All should look like this
Torque Values:


Using the crankshaft bolt, turn the shaft a complete revolution: This will center the belt on all the pulleys and use this step to control that at the end, all your marks are still aligned.
Time now to put everything back together because you are done and you save yourself a big chunk of cash.
Phil
CUSTOMER ADDITIONAL COMMENTS WHO HAVE FOLLOWED THIS DIY
a. IMPORTANT! before you do anything - read up on it and picture it in your mind doing it. do this a few times. so, your mindset is fresh and have a courage in doing it. of course, the right tools, double check everything, take lots of picture, bring a lot of patience, and take your time.
b. TB access - use Phil's DIY reference - you don't have to disconnect A/C lines - slide out and down to ground put support on radiator - you'll have plenty of room to access TB.
c. T-stat removal - disconnect top hose, remove torx screw on middle metal hose on T-stat body. pry it out with flat screw driver gently and pull middle metal hose out slightly once popped out the T-stat house and STOP. remove the two hex bolt on T-stat and slide out towards you. then pull out bottom hose (pop the clip). you'll have plenty of space and leverage to pull bottom hose. put things back in reverse order.
d: filling coolant - 2 gallons of G12 50/50 mix - squeeze/pump top and bottom coolant hose to let air out and suck in new coolant in engine. do this a few times until you hear coolant flowing on top coolant hose. if you have air, you'll see your coolant in reservoir bubble up. before starting car, leave reservoir open, put heat on HI on low fan setting, start the car and start squeezing/pumping top and bottom coolant lines. you'll feel and hear coolant flowing. run car for a few minutes to get coolant going. do this process a couple of times. put reservoir cap back on and test drive. when done test driving. let car cool down and check coolant level again. add if neccesary. Note: In adding coolant. Don't fill over MAX level. If you do, I'll make a mess.

 Reply With Quote


 . My tensionner once removed, had a pretty consequent side play


Bookmarks