


Rating:
Easy, but potentially frustrating
Time:
1-2 Hours (depending on proficiency
 )
)Tools:
-Screwdriver
-Masking or electrical tape
Cost:
$40 to $60 Depending on type and quantity ordered.
Parts:
I ordered my LEDs off www.superbrightleds.com, but you can use whatever you want. As for what lights you need, I found this diagram to be most useful:
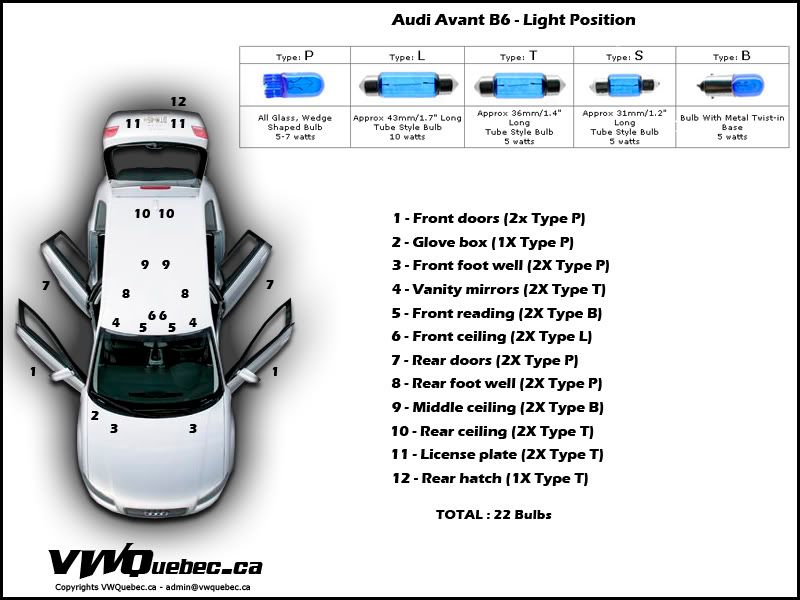
The diagram is a picture of a B7 Avant, but the bulbs are the same for a B6. Below are the lights, quantity needed, type in the diagram and the type at superbrightleds.com with the link for the Avant (Wagon) and Saloon (Sedan).
Saloon (Sedan):
Front Door Puddle Lights - Quantity: 2 - Type P in Diagram - Wedge Base Bulb
Glovebox Light - Quantity 1 - Type P in Diagram - Wedge Base Bulb
Front Footwell Lights - Quantity: 2 - Type P in Diagram - Wedge Base Bulb
Vanity Lights - Quantity: 2 - Type T in Diagram - 36mm Festoon Type Bulb
Front Reading (Map) Lights - Quantity: 2 - Type B in Diagram - Bayonet Base Bulbs
Front Ceiling (Dome) Lights - Quantity: 2 - Type L in Diagram - 42mm Festoon Type Bulbs
Rear Door Puddle Lights - Quantity: 2 - Type P in Diagram - Wedge Base Bulb
Rear Footwell Lights - Quantity: 2 - Type P in Diagram - Wedge Base Bulb
Rear Reading (Map) Lights - Quantity: 2 - Type B in Diagram - Bayonet Base Bulbs
Trunk Lights - Quantity: 2 - Type P in Diagram - Wedge Base Bulb
Avant (Wagon):
Front Door Puddle Lights - Quantity: 2 - Type P in Diagram - Wedge Base Bulb
Glovebox Light - Quantity 1 - Type P in Diagram - Wedge Base Bulb
Front Footwell Lights - Quantity: 2 - Type P in Diagram - Wedge Base Bulb
Vanity Lights - Quantity: 2 - Type T in Diagram - 36mm Festoon Type Bulb
Front Reading (Map) Lights - Quantity: 2 - Type B in Diagram - Bayonet Base Bulbs
Front Ceiling (Dome) Lights - Quantity: 2 - Type L in Diagram - 42mm Festoon Type Bulbs
Rear Door Puddle Lights - Quantity: 2 - Type P in Diagram - Wedge Base Bulb
Rear Footwell Lights - Quantity: 2 - Type P in Diagram - Wedge Base Bulb
Middle Ceiling (Map) Lights - Quantity: 2 - Type B in Diagram - Bayonet Base Bulbs
Rear Celiling Lights - Quantity: 2 - Type T in Diagram - 36mm Festoon Type Bulb
Rear Hatch Light - Quantity: 1 - Type L in Diagram - 42mm Festoon Type Bulbs
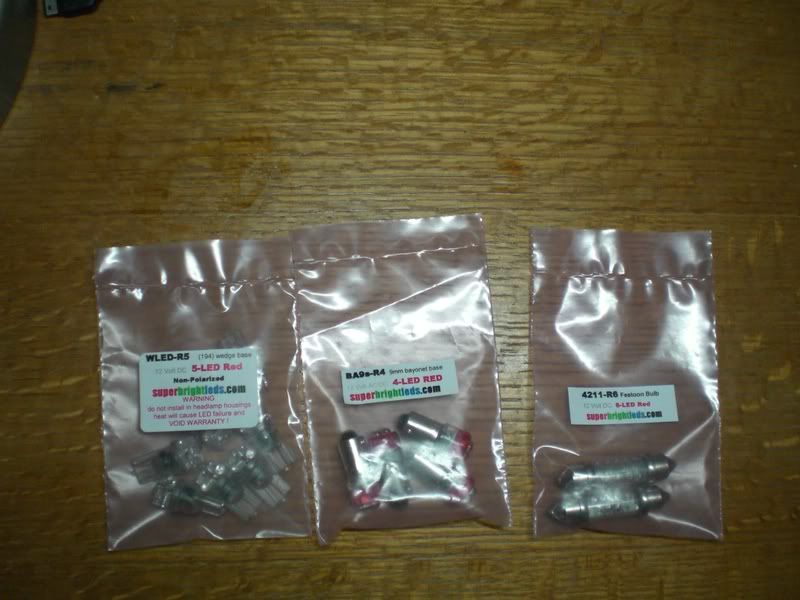
As you will see on the website, you have choices of different types of LEDs, and different arrangements. My suggestion is to go with the wide-angle beam ones, and you will see why in the installation section. If you get narrow-angle beam, the light will shine into the side of the housing and not much light will go down through the lens. I got the narrow-angle beam ones with the bayonet base type as I didn't want as much light coming out of the map lights (front and back). So if you want more light, get wider angle bulbs.
Picture of bulbs I ordered (two dome, eight wedge, and four bayonet)
Installation:
The installation of the bulbs is really pretty easy, with the exception of the rear footwell lights. They suck only because of the tight space. More on that later. The bulbs are plug and play, so you are simply replacing your old lights with the LEDs.
Wrap the screwdriver in tape. This will mimimize the risk of scratching the interior pieces.
First thing I suggest is to either disconnect your battery or unplug fuses associated with the lights. You do not have to do this, but I highly recommend it. I wanted to do everything I could to avoid inviting the electrical gremlins into my car!
 I personally went with the fuse option, as it was much easier to plug/unplug fuses to test that the lights worked than to do the battery thing.
Fuses:
#2 - Footwell illumination - Front and Rear Footwell Lights
#22 - Front Doors - Front Door Puddle Lights
#23 - Rear Doors - Rear Door Puddle Lights
#24 - Central Convenience Electrical System - Map, Glovebox, Vanity, Trunk and Overhead Lights
First I replaced all four door puddle lights. They are located at the bottom of the door. Simply take your screwdriver wrapped in tape and pop the clear covers off. You will have to wedge it under the forward-most side (closest to the door hinge). After it pops out, you will be able to pull it out, it is connected by a wire, so simply un-clip the little harness.
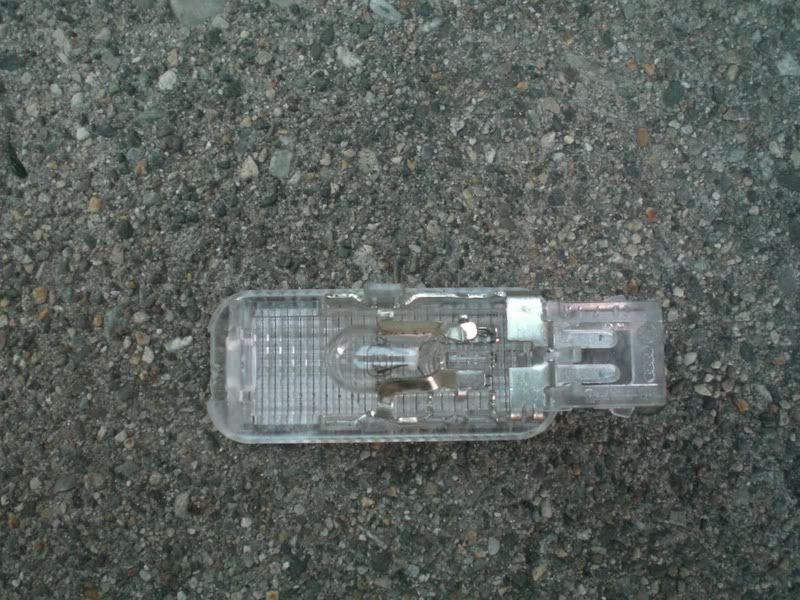
This is what it should look like when you pulled it out. This is obviously with the old bulb in, so go ahead and take it out. Now you might have to bend the metal tabs on the housing a little bit to match the metal leads on the new wedge-type LED light. This might take some time in order to get a clean connection. Make sure it is snug, especially since you will be opening and closing the doors a lot, and don't want the light knocking itself loose. Test that you made a good connection by plugging in the wire to the housing, and replacing the fuse. If it doesn't light, check the back edge of the door (farthest from the hinge) to see if the red-covered light back there is working. If it isn't on, replace the housing, close the door, wait a few seconds and open it. Essentially you had timed out the lights and they turned off after a set time, and so you need to reset them by closing and opening the door. Do this for all four doors.
Next I replaced the front footwell lights. They are the same exact housing as the puddle lights, and come out the same way. Remove the clear plastic housing, unplug the harness, remove the old bulb, bend the metal tabs, replace with wedge-type LED bulb, replace fuse/battery cable, test, replace housing.
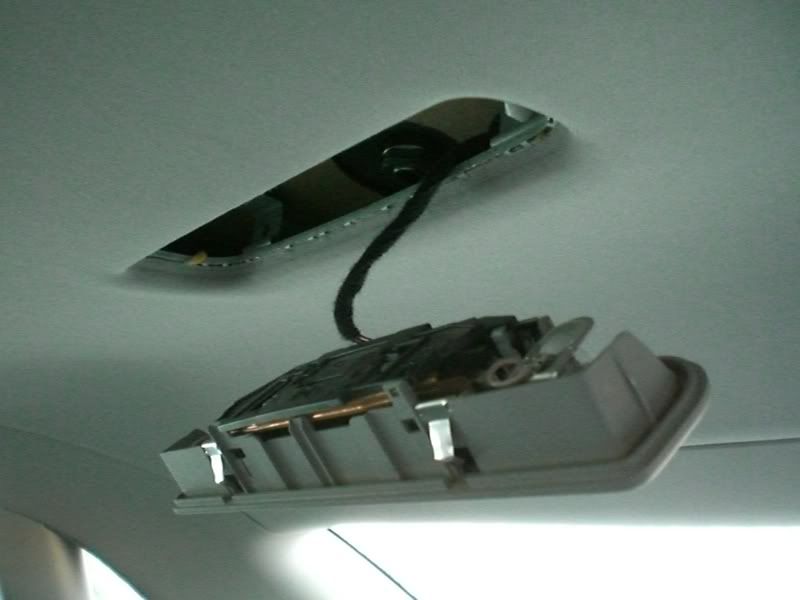
I next did the overhead lights. The cover it easily removed, but be gentle and careful not to scratch the plastic. Start at the back of the lens at one corner, and carefully work the piece off. It hinges forward. After removing the clear lens, remove the panel just forward of it where the map lights are. This is accomplished just like with the lens, start at the back corner and carefully work the screwdriver under the panel and across. This is what the overhead looks like with the two pieces removed (I already replaced the festoon bulbs with the LEDs in this picture):
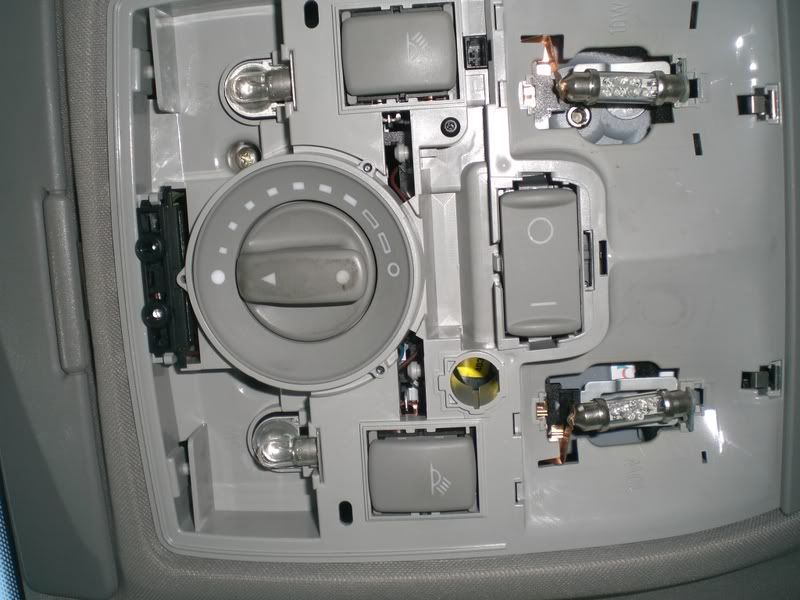
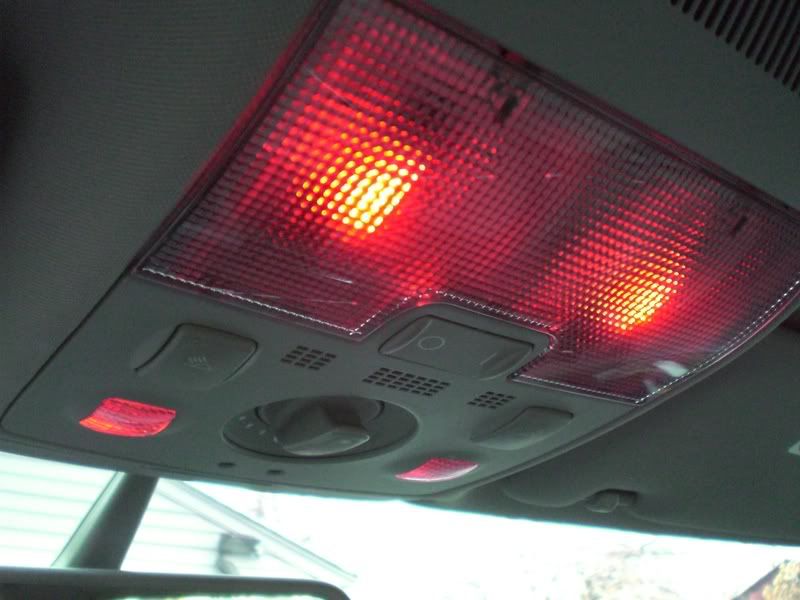
Replace the two long bulbs (festoon types) for the overheads with the two festoon-type LEDs. Make sure the LEDs are pointed downward, as shown in the picture above. Next, replace the two map lights with the bayonet-type bulbs. You simply push in, twist about a quarter of a turn, and pull the bulbs out. Reverse to put the new LEDs in. Test the lights with the covers off. Replace the panels, map lights first then lens, the reverse of how you removed them. This is what it should look like with the new bulbs in!
Moving to the backseat, the only overhead lights back there are the map lights. They are exactly the same as the map lights in the front. Use the tape-wrapped screwdriver to carefully pry the panel off. It is attached by a wire, and will look like this when removed:
You don't have to unplug the harness, you can simply change the bulbs with the housing hanging there. It is the same bayonet-type bulb as the map lights in the front. Twist and pull, replace and twist. Test. Replace housing.
The last part is the part that took the longest and is the most frustrating part of the entire process: the rear footwell lights. They are located under the back edge of the front seats. They are exactly the same as the puddle and front footwell lights. Use the screwdriver to pop them out just like the others. The problem, and most frustrating part, is that the wire leading to the harness is insanely short. You cannot pull the housing out with the wire attached. So once you pop it out, you will have to carefully pull sideways (towards the door) in order to unhook the harness. You might have to reach your finger under the seat and into the insanely small space to the side of the housing (there is a small opening where the wire leaves the metal part and goes under the seat).
When you get it out, replace the bulb just like the others. I highly recommend that you make damn sure that the bulb is in securely and the contacts are making good contact. Good news is you would have already done this 6 times with the 4 puddle and 2 front footwell lights, so you know what it takes for a good connection. I highly recommend testing it with one of the rear puddle lights to make sure it is in correctly. Take out the puddle light housing that you already worked on, plug in the footwell light and test to make sure it works.
This next part is a bitch. As I said before, the wire is short as hell. I tried pulling it out as far as I could, being careful not to do any damage. I looked under the seat and you can see where the wire goes forward and joins up with the heated seat wires (if you have them). It doesn't look like you can pull any slack towards the rear. So you are stuck with having to try and reconnect the harness through the hole. You can stick one finger in with the wire, and stick the housing in. The hard part is getting the plug to get into the port. It is hard to explain, but you will understand what I am talking about. It is so damn frustrating. I kid you not, you will probably have to stop a few times, yell some explicitives, maybe drink a beer (or two) and have another go at it. The two rear footwell lights took me about an hour to do. It is really frustrating, but so worth it when you are done. Don't let me discourage you, you will eventually get it, but it will take some time and a shit-load of patience.
You can change the trunk (Saloon) and glovebox lights the same way as the puddle and footwell lights. They use the wedge base bulb. Also, the vanity and rear ceiling (Avant) and rear hatch lights (Avant) are changed similarly, except with festoon type 36mm bulbs. I did not change any of these lights when I did it myself, since I only wanted that lights that turn on when you open the doors to be red.
That is it!
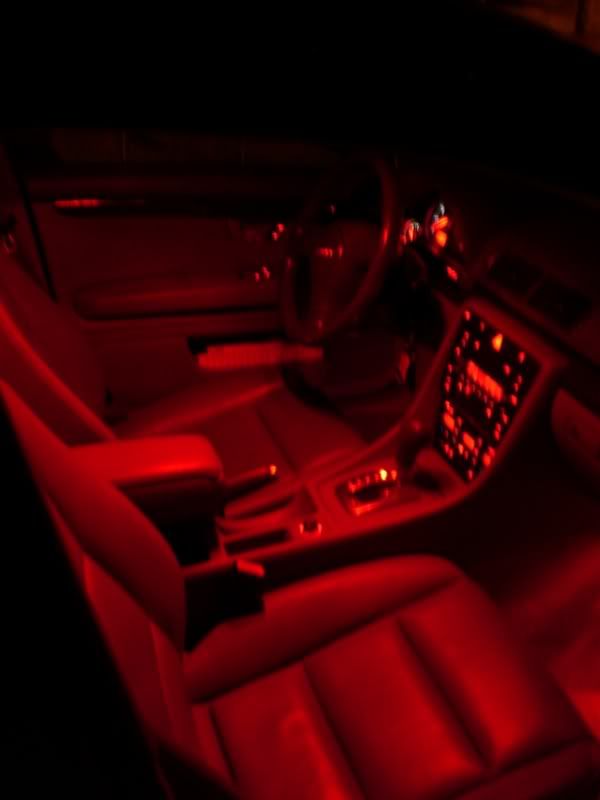
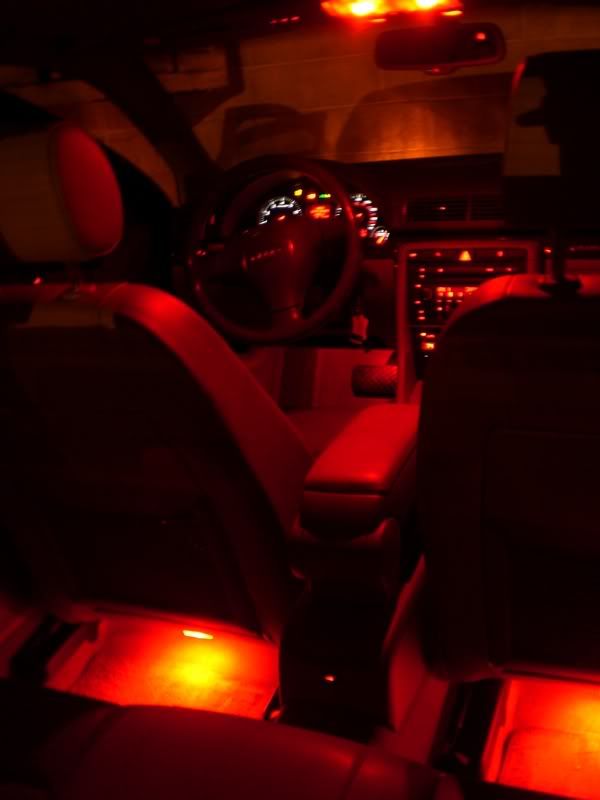
 Again, I did not change my vanity lights as I wanted to leave them white in case I needed to read a map at night, as the red lights are not bright enough (and I don't want them to be, it looks way cooler with them giving out a cool red glow). Here is the finished product. The pictures suck, and make it much brighter than it actually is but you get the idea. I don't have any picures of the puddle lights, but it is way cool rolling up somewhere, opening up the doors and having red light spill out onto the ground! It looks really good, and everyone who has seen it loves it I hope this helped, and enjoy you newly-lighted interior!

 Reply With Quote


 I install the bulb during... two or three weeks and work very fine and perfect fitment. yesterday I start the car and I have a bulb alert for my license plate. I check and the bulb desn't work. I install and desinstall the bulb and one bulb flickering and the other one stop to work..


Bookmarks